
USING THE MILITARY LENSATIC COMPASS - PowerPoint PPT Presentation
1 / 22
Title:
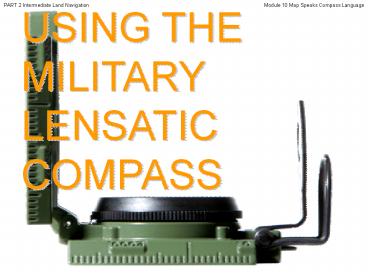
USING THE MILITARY LENSATIC COMPASS
Description:
USING THE MILITARY LENSATIC COMPASS PART 2 Intermediate Land Navigation Module 10 Map Speaks Compass Language This presentation is intended as a quick summary, and ... – PowerPoint PPT presentation
Number of Views:280
Avg rating:3.0/5.0
Title: USING THE MILITARY LENSATIC COMPASS
1
USING THE MILITARY LENSATIC COMPASS
PART 2 Intermediate Land Navigation
Module 10 Map Speaks Compass Language
2
PART 2 Intermediate Land Navigation
Module 10 Map Speaks Compass Language
WARNING
This presentation is intended as a quick summary,
and not a comprehensive resource. If you want to
learn Land Navigation in detail, either buy a
book or get someone, who has the knowledge and
skills, to teach you in person.
3
PART 2 Intermediate Land Navigation
Module 10 Map Speaks Compass Language
NOTE
To get the ideas across presented on these
slides, many figures, pictures, and calculations
may not be to scale and may be exaggerated for
clarity.
4
PART 2 Intermediate Land Navigation
Module 10 Map Speaks Compass Language
Note Prior to being issued any training
equipment, you will be required to sign a
statement of liability agreeing to pay for
anything you damage or lose. All items will be
inspected and inventoried prior to your signature
and at the end of the training day too. If you
do not intend to sign this statement, then you
may be denied training. You may use your own
equipment.
5
LAND NAVIGATIONPRESENTATIONPART 2Module
10Map Speaks Compass Language
PART 2 Intermediate Land Navigation
Module 10 Map Speaks Compass Language
6
PART 2 Intermediate Land Navigation
Module 10 Map Speaks Compass Language
LAND NAVIGATION WITH MAP
AND LENSATIC COMPASS
7
PART 2 Intermediate Land Navigation
Module 10 Map Speaks Compass Language
LAND NAVIGATION
- Why Learn Land Navigation?
- Tracking present location
- Determining Distance
- Sense of direction
- How to read a topographic map
- Terrain and map association
- Spatial skills
- Planning safe, practical routes
- And more Navigational skills
Training and practicing land navigation on foot
provides the following everyday navigation (how
not to get lost) benefits
(Where am I ?)
(How far is it and am I there yet ?)
(Where do I want to go and where am I actually
going ?)
(Do I understand the map ?)
(What hill or river am I looking at ?)
(Can I mentally visualize the landscape in 3D ?)
(Take a long safe route or a short risky route ?)
8
PART 2 Intermediate Land Navigation
Module 10 Map Speaks Compass Language
- THIS PRESENTATION IS DIVIDED INTO FOUR PARTS
- __________________________________________________
__________________________________________________
__________________________________________________
__ - PART 1 Basic Land Navigation
- The Lensatic Compass module 1
- The Topographic Map modules 2, 3, 4,
- The Land and Map Association modules 5, 6
- PART 2 Intermediate Land Navigation
- Making Sense of Direction module 7
- Tracking Present Location modules 8, 9, 10, 11
- Determining Travel Distance modules 12, 13, 14
- PART 3 Advance Land Navigation
- Navigation Methods to Stay On Course module 15
- Additional Skills of Land Navigation module 16
- Planning to Navigate module 17
- PART 4 Expert Land Navigation
- Navigation in different types of Terrain module
18 - Night Navigation module 19
- Sustainment module 20
9
PART 2 Intermediate Land Navigation
Module 10 Map Speaks Compass Language
THESE ARE THE TRAINING MODULES Module 1 Lensatic
Compass parts and features, and how to sight
the compass by two different methods. Module
2 Topo Map Margin what map margin data
represents, map care, and how to properly fold a
map. Module 3 Topo Map Scale map sizes and how
it affects amount of detail that will be
shown. Module 4 Topo Map Symbols you must
understand them to read and speak map language
to others. Module 5 Terrain Relief shows
elevation, indicates terrain features and heights
of natural features. Module 6 Map Information
what a protractor is for and how a map provides
four kinds of information. Module 7 Sense of
Direction lateral drift, current bearing,
obstacles, back azimuth, deliberate
offset. Module 8 Resection locate position with
map only. Modified resection is with a map or
compass. Module 9 Intersection Triangulation
two methods to locate position by compass. Module
10 Map Speaks Compass Language - there is no need
to orient the map to find your position. Module
11 Plotting Position Coordinates exact
positioning, used to communicate to others with a
map. Module 12 Route Measure mapping
straight-line distance, curvature distance, and
slope distance. Module 13 Pace Count using
ranger pacing beads and estimating hiking
speed. Module 14 Travel Distance Estimation
estimating by 100 meter rule, rule-of-thumb, and
by time. Module 15 Plan to Navigate in a group
or alone, equipment, safety, responsibilities,
route selection. Module 16 Stay on Course
advance reference points and advance
baselines. Module 17 Additional Land Navigation
Skills estimate daylight, conserve energy,
blisters, weather insight. Module 18 Navigating
Different Terrain special environments,
featureless terrain, visibility, dense
foilage. Module 19 Night Navigation night
adaptation, protecting night vision, navigate
with lensatic compass. Module 20 Sustainment
maintaining skills, training others, setting up a
land navigation course.
10
Any Questions?
PART 2 Intermediate Land Navigation
Module 10 Map Speaks Compass Language
11
PART 2INTERMEDIATE LAND NAVIGATION
PART 2 Intermediate Land Navigation
Module 10 Map Speaks Compass Language
- MODULE 10
- Tracking Present Location
- Map Speaks Compass Language
12
TRACKING PRESENT LOCATIONDESCRIPTION
PART 2 Intermediate Land Navigation
Module 10 Map Speaks Compass Language
Navigation is not about finding yourself after
you are lost (although thats what happens
sometimes) navigation is about keeping track of
your POSITION as you move away from a known
point. As you move you have to remain cognizant
of the terrain you are leaving, of the terrain
you are passing, and of the terrain that is ahead
of you.
- Make it a habit of keeping your map and compass
handy and refer to them every hour or so to
locate your position (more often in low
visibility). Keep track of your starting time,
rest breaks and general hiking pace. This will
also give you an idea of how far you have
traveled. - To find out where you are on a map, you must
relate your position to the features you can see
and can identify on the map. - There are several techniques to find your
position on a map. - RESECTION - With map only (no compass).
- MODIFIED RESECTION With map or One compass
bearing. - INTERSECTION - Two compass bearings.
- TRIANGULATION - Three compass bearings.
- COMPASS LANGUAGE Make map speak compass
language.
13
PART 2 Intermediate Land Navigation
Module 10 Map Speaks Compass Language
TRACKING PRESENT LOCATIONFINDING YOUR LOCATION -
ALTERNATE TECHNIQUEfor Modified Resection,
Intersection, Triangulation
MAKING YOUR MAP SPEAK COMPASS LANGUAGE Instead
of going to the trouble of converting map GN to
compass MN or vice versa each time you take an
azimuth direction from the map or compass, with
the possibility of making errors, there is a much
simpler way of compensating for G-M Angle
conversions. MN Lines drawn on the map allow
you to orient a map so that the map landmarks are
aligned with the actual ground landmarks they
represent. You also can use the MN Lines to
identify landmarks, find your own location, and
follow compass bearings without orienting the
map, and that can save you lots of time and
trouble.
14
PART 2 Intermediate Land Navigation
Module 10 Map Speaks Compass Language
TRACKING PRESENT LOCATIONFINDING YOUR LOCATION -
ALTERNATE TECHNIQUEfor Modified Resection,
Intersection, Triangulation
- STEP ONE. With compass map
- With the MN lines drawn on the map, there is no
need to orient the map to find your position. - This will be explained in the following slides.
- With a ruler or flat edged object, draw MN lines
on the map. - Do this before going into the wilderness.
- Make the lines as light or heavy as you want.
- Draw as many lines as you want.
- Space out the lines as wide or close as you want.
TOP OF MAP
Ensure the lines drawn are accurately parallel
with the map MN line to eliminate errors when
used with the compass
15
PART 2 Intermediate Land Navigation
Module 10 Map Speaks Compass Language
TRACKING PRESENT LOCATIONFINDING YOUR LOCATION -
ALTERNATE TECHNIQUEfor Modified Resection,
Intersection, Triangulation
- STEP TWO. With compass map
- Identify a landmark on the map.
- Take an azimuth to the landmark.
- Example you want to know where you are on the
dirt road, in relation to the distant HILL.
HILL AZIMUTH 25º
16
PART 2 Intermediate Land Navigation
Module 10 Map Speaks Compass Language
TRACKING PRESENT LOCATIONFINDING YOUR LOCATION -
ALTERNATE TECHNIQUEfor Modified Resection,
Intersection, Triangulation
- STEP THREE. With compass map
- Lower the compass till you can see the whole
compass dial. Example, to your waist. - Keeping the compass dial and index line set to
the landmark azimuth (HILL AZIMUTH 25º). - Rotate bezel until Luminous Bezel Line is
aligned with compass needle. Once bezel is set
leave it there. (The Luminous Bezel Line now
represents the North Needle Arrow).
STEP 2
STEP 3
17
PART 2 Intermediate Land Navigation
Module 10 Map Speaks Compass Language
TRACKING PRESENT LOCATIONFINDING YOUR LOCATION -
ALTERNATE TECHNIQUEfor Modified Resection,
Intersection, Triangulation
- STEP FOUR. With compass map
- It does not matter which direction the map is
oriented. Why? Because you will be using the MN
Lines and Luminous Bezel Line as references. - Open flat the compass and put the compass front
left corner on the HILL landmark. - Then Rotate the whole compass until the Luminous
Bezel Line (which represents the Magnetic North
Needle in STEP THREE) is aligned / parallel with
the MN Lines. - Ignore the compass dial needle.
- NOTE
- a transparent square has been drawn to show
- that the Luminous Bezel Line and MN Lines
- are aligned / parallel.
- 4. Draw a line from the HILL to the dirt road.
That is where you are.
HILL
TOP OF MAP
Dirt road
18
PART 2 Intermediate Land Navigation
Module 10 Map Speaks Compass Language
TRACKING PRESENT LOCATIONFINDING YOUR LOCATION -
ALTERNATE TECHNIQUEfor Modified Resection,
Intersection, Triangulation
Here is a closer look at STEP FOUR. You can see
that the Luminous Bezel Line and the MN Lines are
aligned / parallel. NOTE - Ignore the compass
dial needle.
19
Any Questions?
PART 2 Intermediate Land Navigation
Module 10 Map Speaks Compass Language
20
PART 2 Intermediate Land Navigation
Module 10 Map Speaks Compass Language
Note Prior to being issued any training
equipment, you will be required to sign a
statement of liability agreeing to pay for
anything you damage or lose. All items will be
inspected and inventoried prior to your signature
and at the end of the training day too. If you
do not intend to sign this statement, then you
may be denied training. You may use your own
equipment.
21
TESTING
PART 2 Intermediate Land Navigation
Module 10 Map Speaks Compass Language
- Now it is time for the following . . .
- Written exam
- Hands-on / Outdoors exam
22
THE END OFLAND NAVIGATIONPRESENTATIONPART
2Module 10Map Speaks Compass Language
PART 2 Intermediate Land Navigation
Module 10 Map Speaks Compass Language
Recommended
CrystalGraphics Presentations


