
Earth Science 24.2 : Tools for Studying Space - PowerPoint PPT Presentation
1 / 23
Title: Earth Science 24.2 : Tools for Studying Space
1
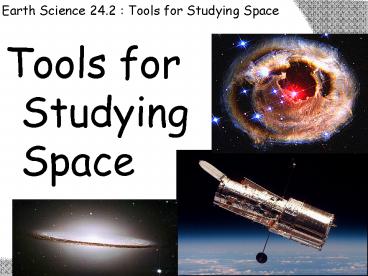
Earth Science 24.2 Tools for Studying Space
Tools for Studying Space
2
Earth Science 24.2 Tools for Studying Space
- Looking at the tools of astronomy used to study
the energy emitted by distant stars and objects. - Earliest telescopes used in astronomy were
optical so thats where well begin. - To create an image of something very far away,
such as a distant galaxy, a telescope must be
able to collect and focus a large amount of light
onto a detector like the eyeball or a camera. - Optical telescopes contain mirrors, lenses, or
both to accomplish this task.
3
Earth Science 24.2 Tools for Studying Space
- Ideal locations of todays optical telescopes
- 1. High-altitude (mountains)
- 2. Far away from cities (no light pollution)
- 3. Desert climate (less humidity means a clearer
view) - Up high, there is less air to scatter, dim and
distort the incoming light. - Less water vapor in the air means less distortion
of infrared radiation.
4
Earth Science 24.2 Tools for Studying Space
- Refracting Telescopes
- Galileo is considered the first person to use a
telescope for astronomical observations. - Having learned about the newly invented
instrument, Galileo built his own that was
capable of magnifying objects up to 30 times. - Because this early instrument, like its modern
day models, used lenses to bend or refract light,
it is known as a refracting telescope.
5
Earth Science 24.2 Tools for Studying Space
- Focus
- The most important lens in a refracting
telescope, the objective lens, produces an image
by bending light from a distant object so that
the light converges at an area called the focus. - A star appears as a point of light.
- For nearby objects, the image appears inverted,
flipped upside down.
6
Earth Science 24.2 Tools for Studying Space
- Focus
- You can easily demonstrate the latter case by
holding a lens in one hand and, with the other
hand, placing a white card behind the lens. - Now vary the distance between them until an image
from a window appears on the card. - The distance between the focus (where the image
appears) and the lens is called the focal length
of the lens.
7
Earth Science 24.2 Tools for Studying Space
- Astronomers usually study an image from a
telescope by first photographing the image. - However, if a telescope is used to examine an
image directly, a second lens called an eyepiece
is required. - The eyepiece magnifies the image produced by the
objective lens. In this respect, it is similar to
a magnifying glass. - The objective lens produces a small bright image
of an object, and the eyepiece enlarges the image
so the details can be seen.
8
Earth Science 24.2 Tools for Studying Space
- Chromatic Aberration
- Although used extensively in the 19th century,
refracting telescopes suffer a major optical
defect. - A lens, like a prism, bends the shorter
wavelengths of light more than the longer ones. - Consequently, when a refracting telescope is in
focus for red light, blue and violet light are
out of focus. - This troublesome defect, known as chromatic
aberration, weakens the image and produces a halo
of color around it.
9
Earth Science 24.2 Tools for Studying Space
- With a chromatic aberration, when red light is in
focus, a bluish halo appears. - When red light is in focus, a bluish halo
appears. - Although this effect can not be eliminated
completely, it is reduced by using a second lens
made of a different type of glass.
10
Earth Science 24.2 Tools for Studying Space
- Refracting Telescopes
- Newton was bothered by chromatic aberration so he
built telescopes that reflected light from a
shiny surface, a mirror. - Because reflected light is not dispersed into
its component colors, the chromatic aberration
is avoided. - Reflecting telescopes use a concave mirror that
focuses the light in front of a mirror, rather
than behind it, like a lens. - The mirror, called the objective, is generally
made of glass that is finely ground and coated
with a reflective material, usually an aluminum
compound.
11
Earth Science 24.2 Tools for Studying Space
- Refracting Telescopes
- Because the focus of a reflecting telescope is in
front of the mirror, an observer must be able to
view the image without blocking too much incoming
light. - In a Newtonian method of viewing, a secondary
mirror allows viewing from a side view. - In a Cessagrain method of viewing, a break in the
main reflector allows viewing from outside
through a portal in the reflector. - In the Gregorian method, also known as Prime
method, viewing is actuall done from a cage
inside the telescope. This method obviously only
works on very large telescopes.
12
Earth Science 24.2 Tools for Studying Space
- Advantages of Refracting Telescopes
- As you might guess, its a huge task to produce a
large high quality bubble free glass for
refracting telescopes. - Because of this, most large optical telescopes
are reflectors. Light does not pass through a
mirror on these so the glass does not have to be
of optical quality. - In addition, a lens can be supported only around
the edge so it sags. Mirrors however can be
supported from behind. - One disadvantage of most reflecting telescopes is
that the secondary mirror blocks some light from
entering the telescope. Thus a reflecting
telescope with a 10 inch lens will not collect as
much light as a 10 inch refracting telescope
does.
13
Earth Science 24.2 Tools for Studying Space
- Properties of Optical Telescopes
- Both refracting and reflecting telescopes have
three properties that aid astronomers in their
work. - Light gathering power
- Resolving power
- Magnifying power
14
Earth Science 24.2 Tools for Studying Space
- Light gathering power refers to the telescopes
ability to gather light from distant objects
thereby creating brighter images. - Telescopes with larger lenses can gather more
light and see farther into space than smaller
telescopes. - Greater resolving power allows for sharper images
and more detail in the light collected. - Large telescopes lastly have magnifying power
which is the ability to make an image larger. - Magnification is calculated by dividing the focal
length of the objective by the focal length of
the eyepiece. Thus, the magnification of a
telescope can be changed just by changing the
eyepiece.
15
Earth Science 24.2 Tools for Studying Space
- Detecting Invisible Radiation
- As you learned earlier, sunlight is made up of
more than just the radiation that is visible to
our eyes. - Gamma rays, X-rays, ultraviolet radiation,
infrared radiation, and radio waves are also
produced by stars. - Photographic film that is sensitive to
ultraviolet and infrared radiation has been
developed. This extends the limits of our vision.
16
Earth Science 24.2 Tools for Studying Space
- Detecting Invisible Radiation
- However, most of the radiation can not penetrate
our atmosphere so balloons, rockets, and
satellites must transport cameras above the
atmosphere to record it. - A narrow band of radio waves is able to penetrate
the atmosphere. - Measurement of this radiation is important
because we can map the galactic distribution of
hydrogen. - Hydrogen is the main material from which stars
are made.
17
Earth Science 24.2 Tools for Studying Space
- Radio telescopes
- The detection of radio waves is accomplished by
big dishes called radio telescopes. - In principal, the dish of one of these telescopes
operates in the same manner as the mirror of an
optical telescope. - A radio telescope focuses the incoming radio
waves on an antenna, which absorbs and transmits
these waves to an amplifier, just like a radio
antenna.
18
Earth Science 24.2 Tools for Studying Space
- Radio telescopes
- Because radio waves are about 100,000 times
longer than visible radiation, the surface of the
dish doesnt need to e smooth as a mirror. - Except for the shortest radio waves, a wire mesh
is a good reflector. However, because radio waves
from distant sources are very weak, large dishes
are necessary to intercept an adequate signal. - Radio telescopes have poor resolution, making it
difficult to pinpoint a radio source. Pairs or
groups of telescopes are wired together creating
a network called a radio interferometer.
19
Earth Science 24.2 Tools for Studying Space
- Advantages of Radio telescopes
- Radio telescopes have some advantages over
optical telescopes. - They are much less effected by turbulence in the
atmosphere, clouds and weather. - No protective dome is necessary which keeps the
cost down and viewing is possible 24 hours a day.
- More important, radio telescopes can see through
interstellar dust clouds that obscure visible
wavelengths. - Radio telescopes can also detect clouds of gases
too cool to emit visible light. These cold gas
clouds are important because they are the sites
of future star formation.
20
Earth Science 24.2 Tools for Studying Space
- Advantages of Radio telescopes
- Radio telescopes are however hindered by
human-made radio interference. - While optical telescopes are placed on remote
mountain tops, radio telescopes are often hidden
in valleys to block human made radio
interference. - Radio telescopes have revealed such spectacular
events as the collision of two galaxies. - They have also discovered intense and distant
radio sources called quasars.
21
Earth Science 24.2 Tools for Studying Space
- Space based telescopes
- Have you ever seen the blurring effect caused by
hot air rising on a summer day? This blurring
effect also distorts the images produced by
telescopes on Earth. - On a night when the stars twinkle, viewing a star
clearly through a telescope is difficult because
the air is in motion, moving rapidly. - One way to get around this problem is to send
telescopes into space. - Space telescopes orbit above Earths atmosphere
and therefore produce clearer pictures than Earth
based telescopes.
22
Earth Science 24.2 Tools for Studying Space
- Hubble Space telescope
- The first space telescope, built by NASA, was the
Hubble Space Telescope. - Hubble was put into orbit around Earth in April
1990. - This 2.4 meter space telescope has 10 billion
times more light gathering power than the human
eye. - Hubble has given us many spectacular images and
provided us with data about black holes, births
of stars, planets orbiting other stars and the
age of the universe.
23
Earth Science 24.2 Tools for Studying Space
- Hubble Space telescope
- Hubble and many Earth-based telescopes have
detected more than 140 extrasolar planets. - An extrasolar planet is a planet in orbit around
a star other than our own. - How do astronomers detect an extrasolar planet?
- A planets gravity causes a Doppler shift in
light emitted by a planets star. By measuring
the Doppler shift in the stars emission
spectrum, astronomers can infer that a planet is
present. - Most known extrasolar planets are thought to be
gas giants larger than Jupiter.
Recommended
CrystalGraphics Presentations


