
Arrival Mini Schedule - PowerPoint PPT Presentation
1 / 8
Title:
Arrival Mini Schedule
Description:
... allows the teacher to turn a picture over to communicate to the child when an activity is completed and still have it stick to the board. Printing directions ... – PowerPoint PPT presentation
Number of Views:75
Avg rating:3.0/5.0
Title: Arrival Mini Schedule
1
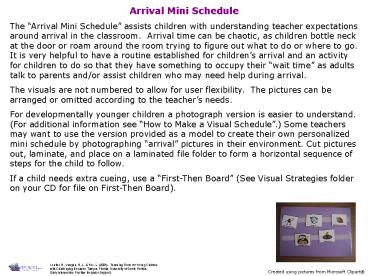
Arrival Mini Schedule The Arrival Mini Schedule
assists children with understanding teacher
expectations around arrival in the classroom.
Arrival time can be chaotic, as children bottle
neck at the door or roam around the room trying
to figure out what to do or where to go. It is
very helpful to have a routine established for
childrens arrival and an activity for children
to do so that they have something to occupy their
wait time as adults talk to parents and/or
assist children who may need help during
arrival. The visuals are not numbered to allow
for user flexibility. The pictures can be
arranged or omitted according to the teachers
needs. For developmentally younger children a
photograph version is easier to understand.
(For additional information see How to Make a
Visual Schedule.) Some teachers may want to use
the version provided as a model to create their
own personalized mini schedule by photographing
arrival pictures in their environment. Cut
pictures out, laminate, and place on a laminated
file folder to form a horizontal sequence of
steps for the child to follow. If a child needs
extra cueing, use a First-Then Board (See
Visual Strategies folder on your CD for file on
First-Then Board).
Created using pictures from Microsoft Clipart
2
Assembly Directions
- If your class calls an activity something other
than what is currently available feel free to
make adaptations. You can double click on the
word, located above the picture, to change the
text label. Also, a blank template for pictures
or photographs has been provided on the last
slide. If you would like to personalize pictures
or make additional picture prompts, you can paste
the pictures into the template and add text using
the text box on the bottom tool bar. - Print the pictures on cardstock (or printer paper
glued to a file folder to increase durability),
cut them, laminate them, and place a piece of
Velcro (rough side) on the back of each picture
and a small sliver of a piece on the front side
above the text. Velcro on both sides allows the
teacher to turn a picture over to communicate to
the child when an activity is completed and still
have it stick to the board. Printing directions
are on slide 3. - The pictures attached to a laminated file folder
(or board) using strips of Velcro (the soft side)
across the front (see photograph of sample).
Some teachers find it useful to store the extra
pictures on the back of the file folder. Others
may want to create a storage binder (see photo
sample of storage binder in Class Visual
Schedule file) with tabbed file folders for
picture storage.
FRONT VIEW
BACK VIEW
To view photographs at a larger size, go to
view on tool bar and then to zoom.
Created using pictures from Microsoft Clipart
3
Created using pictures from Microsoft Clipart
4
Say Good Morning.
Take items out of bag.
Put item in cubby.
Put folder in bin.
5
Check-in.
Go potty.
Go to morning activity.
Go to centers.
6
Go to table.
Go to story.
Go to circle.
Get a book go to circle.
7
Go to breakfast.
Wash hands.
8
(No Transcript)
Recommended
CrystalGraphics Presentations


