
FAX FORWARDING PowerPoint PPT Presentation
1 / 16
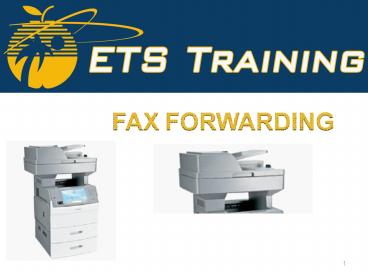
Title: FAX FORWARDING
1
FAX FORWARDING
2
What is Fax Forwarding?
Fax Forwarding is a feature on the Lexmark MFP to
forward inbound faxes to a pre-defined e-mail
address as a PDF attachment.
- Why use it?
- It will save paper and toner.
- It can be distributed electronically.
- How do I set it up?
- Use the MFPs embedded web server to set the
following fields - Fax Forwarding Forward
- Forward to E-mail
- Forward to Shortcut (e-mail shortcut of
designated inbound fax administrator) - First, you must have e-mail shortcut setup prior
to Fax Forwarding configuration. - In the next few slides you will learn how to
configure an e- mail shortcut. - Then you will learn the steps to configure Fax
Forwarding.
3
Fax Forwarding Configuration
- Pre-requisites
- Analog Fax line connected to Lexmark MFP
- E-mail shortcut must be created for intended fax
administrator - Fax Conference created in sites CAB Conference
4
Fax Forwarding Configuration
- 1. Open embedded web server by typing TCP/IP
address into a web browser.
5
Managing Email Shortcuts
Click the Settings from the list of menu
options.
- Click Manage Shortcuts.
- Click E-mail Shortcut Setup.
6
Managing Email Shortcuts
4. Change settings below as indicated
Enter a descriptive name.
Enter the CAB e-mail address.
Enter the default E-mail file attachment
parameters.
Enter the desired shortcut for this entry. TIP
Find a unique ID consistent for each person.
5. Click Add.
7
Scan To E-mail Configuration
- Click the Settings from the list of menu
options.
- Click Network/Port.
7. Click SMTP Setup.
8
Scan To E-mail Configuration
8. Change settings below as indicated
Enter the SMTP Gateway. REQUIRED!!
Enter the MFP Reply Address in this format.
9. Click Submit.
9
Scan To E-mail Configuration
Click the Settings from the list of menu
options.
10. Click Fax Settings.
10. Click Analog Fax Setup.
10
Scan To E-mail Configuration
Configure the Settings as indicated below
Enter A Station Name Something descriptive like
location number-FISH (3471-101) or Department
with Unit (ETS NI), etc.
Enter A Station Number e.g., fax number
11
Scan To E-mail Configuration
Scroll and change Fax Receive Settings as
indicated below
Change Fax Forwarding to Forward.
Change Forward to Email.
Forward Email.
12
Scan To E-mail Configuration
Scroll and change Fax Log Settings as indicated
below
Change Transmission Log to Print only for error.
Change Receive Error Log to Print Never.
Change Logs Display to Remote Station Name.
And, enable Job and Call Logs.
12. Click Submit.
13
Fax Forwarding Configuration
- Click the Settings from the list of menu
options.
13. Click E-mail Settings.
14
Fax Forwarding Configuration
Change the Settings as indicated below
Enter the Subject as Lexmark Scan.
Enter the Message as indicated in the screen
capture.
Enter the Limit destinations as indicated.
This setting restricts e-mails being sent outside
of school district from MFP.
15
Monitoring the Fax CAB Conference
- Open the CAB email application and logon.
- Click on the Desktop menu item and scroll to
find the CAB fax conference, e.g. ETS_Faxes.
16
Distributing Faxes
- Double-click the conference to view the faxes.
- Review the faxes to determine the intended
recipient. - Forward to the appropriate recipient.
Recommended
