
Meaning PowerPoint PPT Presentation
Title: Meaning
1
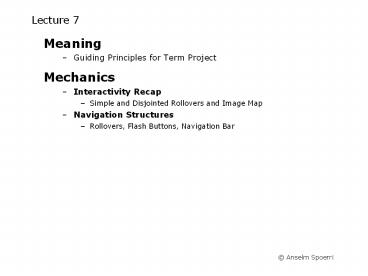
Lecture 7
- Meaning
- Guiding Principles for Term Project
- Mechanics
- Interactivity Recap
- Simple and Disjointed Rollovers and Image Map
- Navigation Structures
- Rollovers, Flash Buttons, Navigation Bar
2
Meaning Guiding Principles for Term Project
- Simple
- Don't make me think!
- Less is More
- Cut text is half
- Easy Navigation
- Where am I?
- How do I get to ?
- Tell a Story
- Be Creative
3
Interaction Design
- Interactivity Choices
- Rollovers
- Jointed interact with page element and it
changes its appearance - ? example
- Disjointed interact with page element and
OTHER elements change - ? example
- Image Maps
- Interact with Hotspots Circle, Rectangle,
Polygon - ? example
- Navigation Structures (today)
- Rollovers You are here special case
- ? example
- Flash Buttons You are here special case
- ? example
- Navigation Bar semiautomatic support of You
are here
4
Recap Disjointed Rollover
1. Select Graphic 2. Select in Behavior
Window 3. Select Swap Image 4. Select Image(s)
to swap and browse to replacement image (
indicator now next to image) 5. Select Preload
Images Importance of NAMING your graphic
elements
5
Recap Behavior Management
- Changing Which Event Triggers Action
- Select Event in Behaviors Window
- Press on black triangleand pull down menu
appears - Select which event triggers behavior(mouse click
or mouse over etc.)
- Multiple Behaviors
- Can attach multiple actions to same object
- Action for MouseOver (Default)
- Action for MouseClick
- Etc.
- Press icon and select
6
Recap Image Map
- Create Hotspot(s)
- Select Image
- Select hotspot tool in Properties Inspector
- Make sure all Property Inspector options visible
(if not, click bottom right triangle) - Rectangle / Circle draw shape over hotspot
region - Polygon trace contour of hotspot region by
clicking mouse - Select Hopsot using hotspot selection arrow
- Attach Behavior
7
Navigation - Overview
- Want to indicate You are here
- Want interactive navigation elements
- Move over navigation and its elements indicate
responsiveness - FOUR Possible States example
- Up Not selected (button up not pressed)
- Over Mouse over button that is not selected
- Down Selected (button pressed down)
- Over while down Mouse over selected button
8
Navigation Display Options
- Color
- White ? Red
- Grey ? White
- Black ? White
- Type Style
- Regular ? Bold
- Regular ? italics
- Type Size
- Background Color
9
Navigation Structure Step by Step
- Steps So Far
- Interactions Behaviors
- Created Disjointed Rollovers
- Used of "blank images" that can be swapped
- Assigned "image swaps" using Behaviors
- Created Image Map mouse over
- This Week
- Navigation Structure in Dreamwaver
- Create Primary Navigation "you are here now
- Use Dreamweavers Navigation Bar structure,
- (but can only have one Navigation Bar structure
on a page) - Create Primary Secondary Navigation Structures
- Use Rollovers or Flash Buttons
- Why?
- More flexibility
- Can have many rollovers / flash buttons on same
page - Navigation Graphics in Fireworks
- How to create text navigation buttons
10
Navigation Bar
- Navigation Bar Set of images
- Visual appearance changes based on user actions
- Navigation Bar Element Button
- Has different states
- When clicked takes user to another page
- Before creating Navigation Bar, need to create
set of images for different display states of
each navigation element. - Navigation Bar Element can have FOUR states
- Up image that appears when user hasnt yet
clicked or interacted with element. - Over image that appears when the pointer is
moved over the Up image.Elements appearance
changes to let users know they can interact with
it. - Down image that appears after element has been
clicked. - Over While Down image that appears when pointer
is rolled over the Down image after the element
has been clicked. - Dont have to specify all four states.
11
Step 0 Download files and Initialize
- Create folder mplec7 in My Documents folder
- Download Files and Images (select zip file and
download) - http//www.scils.rutgers.edu/aspoerri/Teaching/M
POnline/Lectures/Lecture7/stepbystep/ - Launch Dreamweaver
- Initialize
- File gt New
- View gt select Design
- View gt Rulers gt select Show and Pixels
- Windows gt select Properties and Behaviors
12
Step 1a Create Navigation Bar
- Open file home0
- Select Layout Cell in Layout Table intended for
navigation - Insert gt Image Objects gt Navigation Bar
- Insert Navigation Bar dialog box appears
- In Element Name field, type home for navigation
bar element - Specify Up, Over, Down and Over While
Down images - Specify hyperlink browse to home page
- Select Show Down Image Initially because
were on home page
13
Step 1b Create Navigation Bar
- Still in Navigation Bar dialog box
- Press button, to add new navigation bar
element - In Element Name field, type interests for this
navigation bar element - Specify Up, Over, Down and Over While
Down images - Specify hyperlink browse to interests page
- Do NOT Select Show Down Image Initially
because on home page - Make sure Preload Images is selected
l
14
Step 1c Create Navigation Bar
- Open file home
- Select Layout Cell that contains Navigation Bar
- Edit gt Copy
- Open file interests0
- Select Layout Cell in Layout Table intended for
navigation - Edit gt PasteYou might get an error message,
click OK and click inside page and repeat
clicking OK until error message disappears. - Modify gt Navigation Bar
- In Nav Bar Elements list, select the element you
want to edit - Select homeDeselect Show Down Image
Initially because on interests page - Select interestsSelect Show Down Image
Initially because on interests page - Final file interests
15
Recap How to Create Navigation Bar
- Select Layout Cell into which to insert
Navigation Bar - Insert gt Images Objects gt Navigation Bar
- Navigation Bar dialog
- Add Nav Bar Element by selecting
- Name category
- Select images for Up, Over, Down and Over
while down - Set When clicked browse to file for
category - Options
- Select Preload Images ALWAYS
- Select Show Down Image initially only if
current category current page - Repeat steps 1-5 for another category
- Save file and press F12 to test page
- Copy Navigation Bar and paste into other page
- Make sure Show Down Image initially is properly
configured
16
Step 2a Create Navigation Using Rollovers
- Why use Rollovers?
- There can be only one Navigation Bar per page
- Want Primary and Secondary Navigation on same
page - Easier to copy paste
- Open file imago0
( Final file
imago) - Place Cursor before first image in 2nd
navigationSelect bar image and press left
arrow key - Insert gt Images Objects gt Rollover Image
- Image Name Imago
- Original Image images/secondarynavi/IMAGOS.gif
Want Down / Selected image because on imago
page - Rollover Image images/secondarynavi/IMAGOSMO.gi
f - Specify hyperlink browse to imago page
l
17
Step 2b Create Navigation Using Rollovers
- Open file poem0
- Need to Change Up into Down for Poem
category to indicate that we are on the poems
page. - Select Poem image
- In Property Window change Scr PoemsS
- In Behavior Window select onMouseOver and
doubleclick - In Swap Image dialog select Poems image (has
next to it)and Set Source to PoemsSMO - Final file poem
18
Flash Buttons for Navigation
- Flash Button
- (Be aware Flash Buttons not supported by all
Browsers) - Insert gt Media gt Flash Button
- Flash Button Dialog
- Select Style
- Specify Text
- Specify Link
- Specify Save As
l
Specify name of flash file that stores button
specifics
19
Step 3a Use Flash Buttons for Navigation
- Open file see_empty
- 1 Create Flash Button See
- Place cursor inside Layout Cell
- Insert gt Media gt Flash Button
- Flash Button Dialog
- Select Style Translucent Tab
- Specify Text See
- Specify Link see.html
- Specify Save As see_button.swf
- ? Flash movie needs to be saved in the same
folder as file linking to it! - 2 Create Flash Button Hear, Feel and
Think - Place cursor next to flash button created
- Insert gt Media gt Flash Button
- Specify Button specifics
- 3 Save File see.html
- 4 Use Save As to create web pages for Hear,
Feel and Think (Remember to give each web
page a unique title) - 5 Test Navigation Structure (press F12)
20
Step 3b Use Flash Buttons for Navigation
- What is missing?
- Currently lack You are here indicator
- 1 Create You are here indicator for see page
- Open file see in button_final folder
- Select See flash button and double click it
- Flash Button Dialog appears
- Select Style Translucent Tab (down)
- Specify Save As see_down.swf
- ? want different file name so not to overwrite
up button - 2 Create You are here indicator for hear,
feel and think web pages
21
Step 4a - Create Images for Navigation
- Launch Fireworks
- Create file navi_categories
- File gt New
- Specify size
- Height 30 pixels
- Width as wide as longest category text 100
- Show Rulers View gt Rulers
- To ensure that text in the different navigation
images is aligned - Create horizontal and vertical guides
- Click and drag from corresponding ruler
- Position guide on canvas and release mouse
button. - Reposition select Pointer Tool and move guide
to desired location - Move guide to specific position
- Double-click the guide.
- Enter new position in the Move Guide dialog box,
and click OK.
22
Step 4b - Create Images for Navigation
- Open file navi_categories
- Create text for UP button
- Unselected state select 10-14pt, regular
- Select Text tool and type your category
- Automatically creates text object
- To change text select correct object select
text with Text Tool - To change color select Color Picker and select
new color - To move text select Pointer Tool (you can use
arrows)(move so it is centered) - Need to change image area
- To enlarge Image gt Canvas Size
- To reduce Use Crop Tool (maintain standard
height)
23
Step 4c - Create Images for Navigation
- Create folder for navigation images
- Create images for each state of a navigation
category - Over bold typeface and 10-14pt type size
(possibly larger than Up) - Up regular typeface and 10-14pt type size
- Select object that contains Over text
- Duplicate object (copy paste) and Name xxx
Up - Select text in object and make it regular or
smaller - Center modified text (use Pointer Tool)
- Down regular typeface, 10-14pt type size and
color red or - Select object that contains Up text
- Duplicate object (copy paste) and Name xxx
Down - Select text in object and change its color
- Over while down bold typeface, 10-14pt type
size (possibly larger than Down) and color
red or - Select object that contains Over text
- Duplicate object (copy paste) and Name xxx
Over While Down - Select text in new layer and change its color
- Make sure the appropriate object are (de)selected
for each state - File gt Export Preview select format
- File name reflects state it presents
Recommended
