
Electroluminescent Lamps PowerPoint PPT Presentation
Title: Electroluminescent Lamps
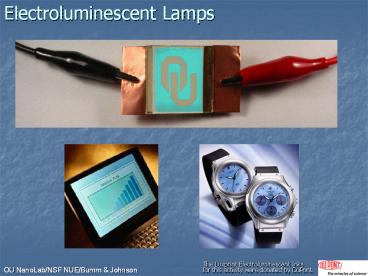
1
Electroluminescent Lamps
The Luxprint Electroluminescent Inksfor this
activity were donated by DuPont.
2
Outline
- Motivation
- History
- Final Schematic
- Useful Physics
- Thin film Capacitors (AC)
- Luminescence from phosphors
- How to make one
- Overview
- Lithography patterning ITO
- Applying the phosphor
- Power up/ testing/ trouble shooting
- Definitions/ Glossary
3
Motivation
- Electroluminescence is the direct conversion of
electricity to light. - Electroluminescence is cool light, unlike
incandescent lamps where light is generated by
heating a filament to high temperatures. - The heat from the lamps barely increase by 1 C
above ambient temperature. - Solid state lighting.
- Unlike incandescent lighting there is no filament
and therefore no critical failure. Light output
decays with age. - EL lamps are probably the most rugged lighting
technology available. - A promising future
- Thanks to recent advances in electronics and
materials chemistry, EL lamps have re-emerged as
an innovative and exciting lighting technique.
Facts taken from An Introduction to Dupont's
Screenprintable EL Material System
4
History of Electroluminescence
- 1936 EL was discovered by a G. Destriau.
- 1940's Chrysler tested EL for Automotive
Applications. - 1950's Sylvania developed and sold EL night
lights. - 1960's The industry saw decline.
- 1970's Acceptance of EL lamps in the aircraft
industry. - 1980's EL hit the automotive market and held on
to aviation. - 1990's EL continues in automotive, aviation, and
is entering consumer markets.
Taken from An Introduction to Dupont's
Screenprintable EL Material System
5
Types of Electroluminescent Devices
- from ETRI
6
ACTFEL Lamps Schematic of Final Lamp
- The ITO and Silver layers act as two plates of a
capacitor. The ITO is transparent, so the
photons can pass through the layer. - The AC current produces a changing electric field
in the capacitor that excites the phosphor. The
excited phosphors emit light. - The dielectric evens out the E field, reflects
light, and prevents the capacitor from shorting.
7
ACTFEL Lamps Cross-section of Final Lamp
8
ACTFEL Lamps Basic Physics
- Alternating Current Thin Film Electroluminescent
Lamps are essentially just capacitors. - The electric field found inside a parallel plate
capacitor is used to excite phosphor molecules. - The excited phosphor emits light.
9
ACTFEL Lamps Basic Physics, Continued
- Small green circles are manganese atoms.
- Large blue circles are excited manganese atoms.
- The horizontal dashes represent mobile electrons
in the phosphor particle.
- Electrons in the phosphor particles are driven by
the electric field. These electrons slam into
manganese atoms in the phosphor and excite them. - The excited manganese atoms relax by emitting a
visible photon. - The motion of the electrons is proportional to
the electric field. - The electric field is proportional to the applied
voltage and inversely proportional to the
electrode separation. Thus the brightness will
increase by raising the voltage or thinning the
phosphor and the dielectric layers.
10
Energy Band Diagram for ACTFEL
11
Making an EL Lamp Overview
- Photolithography patterning ITO
- Applying the phosphor, dielectric, and silver
layers - Power up/ testing/ trouble shooting
12
Patterning the ITO by Photolithography
- One way to shape the EL lamp is by patterning the
ITO electrode. - Only the phosphor under the ITO electrode will be
excited. - Photolithography is used to transfer a pattern.
- The ITO coated glass is covered with a photo
resist - The resist is exposed under a mask of the desired
pattern. - The resist is developed. The exposed sections of
the resist dissolve while the unexposed sections
harden (positive type resist). - See the photolithography slideshow for further
details.
13
Patterning ITO coated slides
- After a pattern has been transferred, the ITO
layer of the ACTFEL lamp can be etched. - A solution of hydrochloric acid and nitric acid
will oxidize and remove the conductive metal
oxide. - The etched pattern shown below was created by
photolithography using the mask shown to the
right. - Other lithographic techniques (such as molecular
beam epitaxy) can be used to etch the ITO - Note The pattern is reversed because the lamp
will be viewed from the opposite side of the
glass.
14
Notes on Etching What type of patterns dont
work?
- The phosphor under the ITO electrode will only be
excited if the ITO has current running through
it. - Notice that the ITO inside the capital "D" is not
connected to the rest of the ITO. - This section of ITO lacks current.
- The pattern to the right represents an etched ITO
pattern on glass. The black parts are where ITO
is present. (positive resist) - The ITO connects to a power source that makes
contact along the right edge of the display (the
red bar).
15
What type of patterns work?
- The design problem in the last example can be
fixed by modifying the etched pattern. - To illuminate the pattern, all the ITO must be
connected to the power source.
- The pattern to the right is the same as the
pattern in the last slide, but the inside of the
D has been connected to the rest of the ITO.
Now this section of the ITO will have power.
16
Applying Thin Films
- After the ITO is patterned the ACTFEL lamp can
made. - Each layer comes packaged separately as a thick
paste (stir before using). - The thickness of each layer is controlled by
using scotch tape as a spacer. - Apply scotch tape along 3-5mm on two parallel
sides of the plate.
- Apply the pastes in sequence using a spatula.
Thin them by scraping a microscope slide across
the layer. - Dry and cure each layer before application of the
next - Each layer is dried in an oven at 130C for 15
minutes. - 1st phosphor (Luxprint 8152)
- 2nd dielectric (Luxprint 8153)
- 3rd conductive silver rear electrode (Luxprint
9145)
17
Applying Thin Films
Cross-section of TFEL display
- The thin films must be applied to the substrate
within defined boundaries to avoid shorting the
capacitor. - Layer Constraints
- The phosphor layer should be as thin as possible
- The dielectric layer should cover all of the
phosphor layer and be as thin as possible without
risking a short in the capacitor. - The silver layer must not touch the ITO. Parts
of the ITO layer are removed in order to extend
the silver layer to the edge of the glass. This
makes it easier to connect the lamp to a power
source.
Phosphor Layer
Dielectric Layer
Silver Layer (Rear Electrode)
The black lines mark the etched ITO pattern, and
are used to accurately place the scotch tape
theyre later removed with acetone.
18
Power Up
- After the thin films are dry, the lamp needs a
power source. - Copper tape is used to make good contacts without
damaging the lamp. - Small pieces of tape are attached to the ITO
layer and the silver layer separately. - The phosphor requires a changing electric field
in order to fluoresce. - A DC voltage will only produce a changing
electric field in a capacitor as it charges. - In order to produce continuous lighting an AC
voltage is required. - Normal 110V 60Hz AC power can be used to light
your lamp. In the lab we use a high frequency
power supply 60-2000 Hz and a few hundred volts,
which gives a brighter light.
Front and back of device
Device with leads on, powered, and in darkness.
19
Trouble Shooting Non-uniformity of Lighting
- Notice the dark regions along the bottom and
upper left corner of the display. - This non-uniformity is caused by an irregularity
in the thickness of the thin films. - The difference in thickness between the center of
the display and the dark band at the bottom is
about 16 microns. - Areas where the film is thinner will be brighter
because the electric field is larger here.
Thicker areas will be dimmer.
20
Definitions/ Glossary
- ACTFEL alternating current thin film
electroluminescence gives off light when
influenced by electrical current. - Electroluminescence the direct conversion of
electrical energy into light. - Thin layer - a very thin deposition of a
colloidal substance (phosphor, dielectric,
silver) onto the ITO coated glass plate. - ITO Indium Tin Oxide (In203Sn02) A thin layer
of indium oxide that has been doped with tin
transparent, conductive coating on glass plate. - Phosphor powders made of materials such as zinc
sulfide, doped with either copper or manganese to
achieve the emission colors when exposed to an
electric field. - Dielectric layer an insulating layer that
serves to even out the electric field across the
phosphor layer and prevents short circuits. The
dielectric in this case is barium titanate. - Electrodes form the plates of the capacitor
one front electrode of transparent ITO and one
back electrode of silver. - Acknowledgements
- The Luxprint Electroluminescent Inks for this lab
were donated by DuPont Microcircuit Materials.
http//www.mcm.dupont.com - Initial development of this lab activity was
performed by James Dizikes and Lloyd Bumm with
the support of a Nanotechnology Undergraduate
Education program grant. NSF DMR-0304664
Recommended
