
Wholehog III PowerPoint PPT Presentation
Title: Wholehog III
1
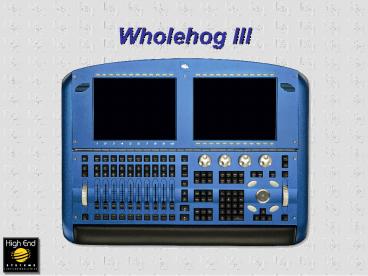
Wholehog III
2
Internal Specs
- Embedded 500MHz G4 PowerPC processor running
Linux OS (not a PC) - 2Mbyte L2 cache
- 256Mbyte SDRAM as standard, expandable to 1 Gbyte
- 40 Gbyte high performance internal hard disk
drive with battery backup to save changes and
shut down console in the event of a power
failure - 100/250Mbyte internal ZIP drive (accessed inside
elbow rest) - 650/700Mbyte internal re-writeable CD-ROM drive
(accessed inside elbow rest) - 100-240v AC auto-switching power supply
3
Wholehog III
- Setting up the Console
- The console does not produce DMX directly
- It is designed to work as part of a network,
linked to other - devices including DMX Processors, Timecode
Processors, - and backup consoles, etc.
- DMX Processors
- Also known as DP-2000s, are used to connect DMX
devices - such as fixtures, dimmers, etc. to the network
- Special Cat-5 Crossover Ethernet cable is
required when - connecting a single DMX Processor directly to
the console. - When multiple devices are being connected to the
console, an - Ethernet switch will need to be used. When
using an Ethernet - switch, crossover cables are not necessary.
4
Wholehog III
- Rear Panel Detail
- Ethernet Port
- Mouse Keyboard
Ports - 2 USB ports
- RS232 Port
- 2 Monitor Ports
- MIDI In and Out Ports
5
Back Panel
Power Input. You can connect the Whole Hog III to
any power supply between 100 and 240V AC
LED reporting on power and battery level. In the
event of a power failure the Whole Hog III uses a
battery backup supply to save any changes and
shutdown the console
6
Back Panel
Two PS2 connectors for mouse and keyboard. Two
USB Ports Audio in and Audio out
7
Back Panel
-RS232 input for show control devices -Two
external VGA monitor inputs -Midi IN and Midi OUT
8
Back Panel
The Ethernet port and LED indicators are on the
far left of the rear of the console. The Ethernet
port is how the console connects to a Whole Hog
III network. A network could be as simple as one
DP-2000, or more complex including several
DP-2000s, plus a Timecode Processor, and other
options. An Ethernet switch is necessary if more
than one device other than the console, is needed
in the system.
LED reporting on data status
9
Distributed Processed DMX
- The Hog III does not have DMX outputs on the
console - Instead, all DMX is processed separately in an
outboard unit called the DP2000 - Each unit processes 4 universes (2048 channels)
- This outboard design allows you to add additional
DP-2000 units, to increase the DMX universes,
and the Refresh rate will remain constant.
10
Wholehog III
- Setting up the Console
11
Playback Wings
USB Playback wings can also be added to the HOG
III for extra playback faders on the Console.
12
MIDI / Timecode Processor
- This unit has VTC and SMPTE Timecode inputs and
outputs, along with MIDI In, OUT, and THRU - You can connect multiple units to a single
network or console, and assign different MIDI or
Timecode sources to different cuelists. - The console also has the same MIDI capabilities,
but VTC and SMPTE Timecode require
one of these units - The MIDI / Timecode Processor unit is a 1u Rack
mount unit that contains LTC, VITC, Midi
IN/Out/Thru and an RS232 port
13
Wholehog III
- Front Panel Detail
- 2 Touchscreens
- 4 Encoder Wheels
- 2 Vertically Mounted Wheels
- Wheel 1, on the right of the console is the
I-wheel, it controls the Intensity of the
fixtures - Wheel 2, on the left of the console is the Rate
wheel, it overrides the speed of a Cue.
- NOTE Wheel 2 is a Spring Wheel
14
Wholehog III
- Front Panel Detail
- Programming Section with
- Editing Buttons Record, Copy, Move, Delete,
and Update - Cue editing buttons Macro, Page, Cue, List, PIG,
Setup, Time, Effect, Set - Fixture and Parameter buttons Group,
Fixture, Position, Color, Beam - Other Cue editing buttons HighLight, Blind,
Clear - New Additional Buttons include Open,
Intensity, Back, Live, Scene, Control, Fan - Keypad
- Trackball
15
Wholehog III
- Front Panel Detail
- Playback Section with
- 10 Playback Masters
- GO, Halt/Back, Assert, Release and Choose
buttons - Grand Master with DBO
- Large Central GO and Halt/Back buttons
16
Programming
The Trackball controls the onscreen mouse
pointer, and when in Pan and Tilt mode, also
controls a fixtures movement. The button to the
upper right of the Trackball will toggle it
between the Trackball, and the mouse. Trackball
mode is indicated by a blue LED inside the
Trackball illuminating.
The function of the four buttons can be
configured in the Preferences window.
17
Programming
- Dedicated Intensity Wheel. The two buttons above
and below the wheel will adjust the Intensity by
10 increments.
18
Programming
- Arrow Select Keys
- Use these keys to move the Selection box around
within a window
19
Playback
Rate Over-ride Wheel This is for direct control
of the current fade running on the chosen
playback.
20
Playback
The ten Playback masters can hold single cues,
or cuelists with
multiple cues, as well as Scenes Each master has
a Play and Pause / Back button Flash Buttons are
below faders
21
Playback
Main Playback Control will effect whatever Master
has its CHOOSE button illuminated.
22
Important Buttons to Know
- The Flying Pig
- Known as PIG
- Acts as a Ctrl/Shift key
- Used in conjunction with
other
buttons - The SET key
- Used to Access the keyboard
- Used to enter information into boxes such as Time
values, or Naming items - Select a box, press SET, enter information and
- press ENTER
23
Wholehog III
- Adjusting Brightness
- Touchscreen Brightness/Contrast
- Press and hold down the Setup
key and adjust the
parameter encoder wheel - Wheel 1 Left Backlight
- Wheel 2 Right Backlight
- Desklights and LED Levels
- Adjust by holding down the Setup key and adjust
the parameter encoder wheel - Wheel 3 Desklight Level
- Wheel 4 LED Brightness
24
Wholehog III
- Quickstart
- Starting a New Show
- Patching
- Basic Cue Programming
- Basic Cuelist Playback
25
Wholehog III
- Starting a Show
- 3 Options available at Startup
- Launch New Show
- Launch Existing Show
- Connect to Show
26
New Show
- Pressing LAUNCH NEW SHOW will open the screen
shown . - The show can then be named and a destination can
be selected for the show file
27
New Show
- Library Window
- Select a library to use for the show. You can
use the standard library in the Libraries/System/
folder, or choose a custom library - Contact FPS for fixture libraries of new
fixture types not found in the current library
28
Windows
- Windows can be opened several ways
- From a Toolbar
- Some windows have dedicated buttons on the Main
Toolbar - Holding the Open Key
- Open Help
- Open Fixture
- Open List
- Open Choose
- Open IPCB Palette buttons
- Open Group, Effect, Fixture buttons
- Open Park
29
Windows
- Windows can be opened several ways
From the Command Line
Specify the window to be opened using the command
line,
then press the Open Key POSITION OPEN, opens the
Position Directory POSITION 2 OPEN, opens
Position 2 window CUE 4 OPEN, opens the editor
window for cue 4 Double Pressing Keys Some
windows open by double pressing the appropriate
key POSITION POSITION, opens the Position
Directory This can be disabled by setting
the double press time to 0
in the Console Key window in the Preferences
window
30
Wholehog III
- Setting Up the Console
- Console Setup Window
- Preferences Window
31
Control Panel Preferences Windows
- Many options for customizing the console are
found in these windows - Control Panel
- Press Setup
- Touch Control Panel on the toolbar on the right
Touchscreen - Preferences Window
- Press Setup
- Touch Preferences on the toolbar on the right
Touchscreen
32
Control Panel Window
- Displays
- Monitor resolution, enable LCDs, enable
touchcscreens, calibrate touchscreens - Keyboard
- Model and layout
- Wings
- Printers
- Time and Date
- Autoload
- Loads show
- upon startup
- Network
- System Info
33
Preferences Window
- Console
- Appearance
- Sensitivity
- Key timings
- Trackball settings
- Edit
- Programming Defaults
- Default Timing
- Default Naming
- Playback
- Cuelist, Scene,
- Misc Playback defaults
- Note Preferences can be imported between shows
34
Using the Command Line
- Entering Syntax Commands
- The Command Line appears at the bottom of the
right touchscreen - Build up a series of keystrokes, and the command
is acted on when Enter is pressed
35
Patching a Show
- Patching is setting up the console with what
type, and how many of each type of fixture you
will be controlling, along with the DMX start
channel for each fixture - Patching is done in The Fixture Window
- To open the Fixture Window
- Hold down the OPEN key, while pressing FIXTURE
pen
36
Fixture Window
37
Patching
- Fixture Schedule Window
- You must select which fixture type, and how many
etc. in the Fixture Schedule window - To open this window, press the Fixture Schedule
button in the top left corner of the Fixture
Window
Fixture Schedule button
38
Fixture Schedule Window
- Each fixture is listed under its
manufacturer - Expand each manufacturer to view the fixtures by
clicking on the adjacent button - Highlight the fixture type to add,
- Press Set, type in the number of fixtures for
this type to be used, and press Enter - Repeat for all fixture types to be used in the
show - Press OK when finished
- The number column shows the number of
fixtures of that type are currently in the show
39
Patching
- User Numbers
A Unique ID, or User number can be assigned to
each fixture allowing for better organization of
the fixtures. - To do this, select the group of fixtures you
want to renumber. You can drag and select. - Then hit Set and type in the starting number,
and press Enter.
40
Patching
- Steps to Patch a Fixture
- Select a Fixture or Fixtures
- Press _at_,
- The window shown will appear
- Select a DMX processor
- and universe
- Type in DMX Start channel
- Press Enter
41
Patching Fixture Window
- Fixture Schedule
- Library of Manufacturers and Fixture
personalities - Remove
- Removes fixture from entire show
- Patch _at_
- Opens the fixture patch window
- Unpatch
- Unpatches the selected fixture(s) w/o removing
programmed show contents for that unit(s) - Replicate Fixtures
- Allows you to create copies of fixtures,
including the programming
- Change Type
- Changes one fixture type for another, and
converts all programmed information that is
applicable in the entire show - Edit Fixtures
- Allows a fixtures defaults to be edited
- Auto Palettes
- Generates Groups and IPCB palettes for patched
fixtures - View by DP
- Shows detailed patch by DP-2000
- Jump Tool buttons
- Selects which fixture type to select if unique ID
numbers have not been assigned
42
View By DP Window
43
Patching Fixture Window
- Fixture Column
- Actual fixture number that you have added
- This cannot be changed but you can reorder the
way they are displayed - Num
- User definable number that is used to select the
fixture - Note
- Any comments about type/location of fixture
- DP
- Displays the DP2000 a fixture is assigned to on
the network - Patch
- Displays the DMX Universe and DMX Address a
fixture is assigned to on a DP2000 - Patch Type
- Displays information pertaining to fixtures with
multiple parts
- Patch Note
- Any comments about type/location of fixture
- Swap Axes
- Pan/Tilt alignment can be swapped from the desk
- Invert Axes
- Pan/Tilt alignment can be inverted from the desk
- Intensity
- Allows a maximum for intensity to be set for a
specific channel (i.e. desk channels) - Color Calibration
- Displays information pertaining to if a fixture
has been calibrated to the Color Picker - Parked
- Displays information as to whether a fixture(s)
has been parked at a specific value onstage
44
Wholehog III
- Software Hierarchy
- Programming a Cue
- Playing Back a Cue
45
Show Hierarchy
- Cues, Cuelists, and Pages
- Cues
- Fundamental building block of the Wholehog III
show - A Cue tells one or more fixtures to change
settings for intensity, beam, color, and/or focus
using delay and fade times - Cuelists
- Organized lists of Cues
- Pages
- Pages are a group of Cuelists assigned to a set
of Masters allowing organization of Cuelists
within a show - Each Page allows 10 Cuelists (more with Expansion
Wings) to be referenced
46
Programming Cues
- Steps to program a simple Cue
- Open the Programmer Window
- Select fixtures or a Group
- Adjust parameter settings using the wheels,
keypad, or palettes - Record the Cue
47
Programming Cues
- Programmer Window
- Cues can be created and edited in the Programmer
this window shows all selected fixtures and any
adjusted parameters - To open press the Programmer button below the
Right Touchscreen
48
Programming
- Selecting Fixtures
- If User Numbers have been assigned in the Fixture
Window - Type the User Number on the keypad followed by
Enter - If User Numbers have not been assigned
- Press Fixture button
- Select the fixture type from the toolbar on the
bottom of the right touchscreen - Type fixture (s) on the keypad
- Press Enter
- If Auto Palettes were generated in the Patch
Window - Press OpenGroup to open the Group Directory
- Press the desired Group button in the Group
Directory
49
Programming
- Keypad Functions
- Use the keypad to select Fixtures,
Groups, Palettes, and Times - Selects more than one item. Example Fixture 8
Fixture 12 - Thru Selects a series of items Cyber 1 Thru 6
- Back Arrow Backspaces through previous item on
the Command Line. Deletes selections as you
backspace through them. - Full Sets Intensity to 100
- _at_ Sets an Intensity level or a patch location.
Example Cyberlight 6 _at_ 50. - / Used for recording Cues to a designated
Playback master Example Record 4/5 would record
Cue 5 on Fader 4 - Enter Completes an operation
50
Parameter Wheelsets
- Intensity
- Options for adjusting Intensity include
- 1. Press the Intensity key and use the 1st
encoder wheel below right touchscreen - 2. Use the dedicated intensity wheel on right
side of console - 3. Using the Command Line, type in a percentage
on keypad followed by Enter
51
Wheelsets
- Some fixtures have more parameters of a
particular type than there are encoder wheels,
those parameters are grouped into wheelsets - Press the parameter key and the choices of
wheelsets will be shown on the toolbar at the top
of the slots toolbar - Select the wheelset you wish to use by pressing
it, or press the parameter type key
repeatedly to cycle through them - Note PIGkind (IPCB) steps backward through the
wheelsets for the kind
52
Parameter Wheelsets
- Color
- After selecting fixtures, press the Color button
on the console to swap to the Color attributes
available for those fixtures
53
Parameter Wheelsets
- Beam
- Parameters include iris, gobos,
frost, focus, zoom, etc - Toggle the Beam button several times to
access all available options
for the selected fixtures
54
Slotted Toolbars
- Slotted toolbars provide quick access to common
library attributes for a fixture - Press the attribute on the toolbar to access a
second toolbar showing the discrete values for
that attribute
55
Programmer Editor Window
- Cells for discrete parameters like Gobo, Color,
Effects Wheels etc., may have drop down menus
available in the Programmer - Select a parameter cell and press SET to access
the specific menu for that attribute
56
Modifying Parameters
- Different ways to control parameter types
- Parameter Wheelsets Intensity, Position, Color,
Beam - Toggle the IPCB buttons and use the Encoder
wheels to set - values for each parameter, or
- Select an IPCB Palette from the corresponding
Palette window, - if Palettes have been created
- Slots toolbar Parameters that have discrete,
rather than continuous - values can be controlled from the Slots toolbar
this allows choices - to be made at the touch of a button
- Spreadsheet a parameters value can be directly
edited in an - editors spreadsheet view
- Click on the cell, press SET, type in a value,
and press Enter - Click on the cell, press SET, and select from the
pop down box
57
Color Picker
- This allows you to choose a color from
the window shown - To open, press the COLOR PICKER button on
the toolbar in the Color Directory window - Pressing the Gel Swatch Book button will open a
Gel Picker window based on Gel Manufacturer
numbers
58
Library Model
- Real World Value
- Fixture Parameters are displayed in units such as
degrees for Pan and Tilt, Hertz for strobe,
RPM for rotation, and even Kelvin for
color correction. - Real World Values speed up programming and allow
several fixtures of different types to be
selected and adjusted at the same time - All programming information in cues is stored as
real world values, allowing a fixture already
Programmed into a show to be easily replaced by
one of a different type.
59
Programming
- Fanning Parameters over a Range
- Use Fan for several fixtures at once to create
symmetrical looks - Examples
60
Fanning
- Fanning using the Parameter Wheels
- Select the fixtures to program
- Press and hold FAN
- Use the center and right parameter wheels for pan
and tilt, opening and closing the fan (other
parameter wheels may also be used)
61
Other Methods of Fanning
- Fanning Other Parameters
- Create a rainbow effect by fanning Color mixing
fixtures - Create varied strobe rates by fanning the strobe
settings - Note these values can be stored as Palettes for
easy recall while building Cues - Fanning in the Programmer (next slide fig 1 2)
- In the Programmer, select a range of cells
- Set, thru , Enter
- The first fixture gets the first value, the last
fixture gets the last value, and those fixtures
in between get values evenly spread across the
intervening range (works in reverse too) - Fanning using the Command Line
- To fan intensities from the Command Line
- Ex (Studio Color) 1 Thru 5 _at_ 10 Thru 50, Enter
62
Fanning from the Programmer
Fig 1
Fig 2
63
Fanning Grouping
- Grouping options
- Part Fans
- Buddying (Ganging) Fans
64
Programming
- Blind
- Hides the output of
the Programmer from the Stage - Using Blind allows you to program a Cue
without having the Cue active onstage - Clearing the Programmer
- Press Clear to empty the contents
of the Programmer Editor Window
65
Programming
- Record the look as a Cue
- Once you have the look ready to record as a cue.
- Press RECORD, followed by the CHOOSE button above
the master you would like to store the cue - The Cue will automatically be set with the
default time specified in the Control Panel - Repeat the process again to add more Cues to the
same Cuelist
66
Recording a Cue
- More ways to record to a Cuelist on a Master
- With a CHOOSE button illuminated, pressing RECORD
followed by ENTER, will record the next cue into
the corresponding master - Press Record 1.5 Enter will record cue number
1.5 to the master which has its CHOOSE button
illuminated - Press Record / Enter to specify a Fader/Cue
- Quickname
- Pressing Set immediately after recording a cue
opens the Quickname prompt box
67
Programming
- Cue State, Tracking, and LTP
- Although the programmer shows all selections made
since pressing Clear, only the parameters which
have changed since the last Record are recorded
into subsequent Cues - As a Cuelist is played back, any recorded
parameter values will pass through from Cue to
Cue this is Tracking - During playback, the console calculates what a
cue should look like (its STATE) based on the
cues prior - Example
- Cue 1 Fixture 1 Position, Intensity BLUE
- Cue 2 Fixture 1 Position Only
- Cue 3 Fixture 1 Position Only
- Cues 2 3 will appear BLUE as the Cues are
played back BLUE will track through from Cue 1 - A parameter will change only when a later value
for that parameter is encountered this is LTP
68
Programming
- Tracking
- Modify the first cue in a range of cues using
tracking and all consecutive cues are modified
accordingly - If a parameter remains untouched in a cue, any
assigned or touched value for that parameter
from other cues will override it the result
could be that the cue, when played back, does not
look the same as when it was recorded - TIP Always assign (Touch) Hard values in a cue
for those parameters you dont want to be
overridden in the cue - Tracking enables several Cuelists to be active at
the same time, or for single parameters to be
overridden during playback from other Cuelists
69
Playback
- Masters
- Each Master controls one Cuelist
- All can run simultaneously or in any combination
70
Playback
- Playback a Cuelist
- Bring the Fader up to Full (it controls Intensity
by default) - Press the GO button above that Master
- Press the Halt/Back button at any time to freeze
the fade
71
Playback
- Masters Detailed
- Each Master contains 4 buttons and 1 fader
- Choose
- Selects the Master during programming operations
- GO
- Starts a Cue fading and starts the Cuelist
executing - Pressing GO while a Cuelist is running skips Cues
or exits a loop - Halt/Back
- Freezes any crossfading cues, and stops the
Cuelist from running - Pressing GO resumes fading and execution of cues
- Pressing Halt/Back after a Cuelist has stopped
fades backward through the Cuelist - Fader
- Controls Intensity by default
- Flash
- Momentarily puts the Intensity of the fixtures
controlled by this playback
to the full programmed value,
or the
percentage of the programmed value set in the
Options window
72
Playback
- Main Controls
- Masters can be linked to the Main Controls by
- Pressing Choose above that Master
- Holding any number of Choose buttons
simultaneously - Main Controls consist of
- Go and Halt
- Goto
- Choose
- Release
- Skip Forward/Skip Back
- Assert
- Rate Wheel
- Left-Hand Parameter Wheel
73
Playback
- Releasing a Master
- Pressing Release will release
the Chosen playbacks control of
fixtures, making the
playback master inactive - PIGRelease will release all active Cuelists
- To release a Cuelist that is not the Chosen
Cuelist - Press and hold Choose above that Master
- Press Release
74
Playback
- Goto
- Advances to any Cue in the selected cuelist using
crossfade time - Goto can be used on the Command Line
- Goto Cue Enter
- Goto Cue Time Enter
- Goto Cue 0 Enter
- Skip Forward/Skip Back
- Steps forward or backward through the Cuelist
75
Playback
- Assert
- Reasserts control of fixtures to the chosen
Master, if other playbacks have taken control
under the LTP rule. - Similar to replaying the current cue of the
chosen master, which is still playing, but the
state has been changed by other playbacks which
have been played after this cue was originally
played.
76
Crossfade Rate Overrides
- Rate Wheel/ Left Hand Parameter Wheel
- A cuelist can have its playback/fade rate
increased or decreased while on a Master this
affects all cue timings in the list - Affects the Chosen Master only
77
Grand Master
- Working with Master Controls
- The GM inhibits the intensities of all fixtures
on the console, including those in the
Programmer, with the exception of those
that are Parked - By default it resides on Master 1 of each Page
- The Flash key below the GM fader acts as a
non-latching blackout key - If you lose your GM, then it has probably been
obscured by cuelists loaded onto later pages - The GM can also be controlled using the GM key
- Hold down the GM key and turn the first parameter
wheel, the I-Wheel or Fader 1 - The GM key LED shows the state of the GM
- Off GM at 100
- On GM at 0
- Slow Flashing GM between 0 and 100
78
Wholehog III
- Editing Existing Cues
- Use Open/Update
- Using the View Cue button
- Press Open then Record, Cue, Insert/Replace/Merge
- Merge
- Use Update
79
Editing Cues
- Cue Editor Window
- To open an Editor for an existing Cue CUE OPEN
- Press the EDIT button
- Make all changes required to the cue
- Press UPDATE to record the changes back into the
same Cue
80
Editing Cues
- Opening the Cue Editor Window using
- the VIEW CUE button
- With a Cuelist Window open,
- Pressing the VIEW CUE button on the Cuelist
window toolbar will open the Cue Editor window,
containing the cue currently playing - Press the EDIT button on the Cue Editor window
toolbar in order to make
changes to the cue - Make all changes
- Press UPDATE
81
Editing Cues
- Once a Cue has been opened, and changes have
been made, if the Editor window is closed without
first using Update to save the cue modifications,
this prompt window opens
82
Editing Cues
- Insert/Replace/Merge Window
- When recording, copying or moving a cue, if
the destination location already has a cue
recorded in it, you will be prompted with the
options of Replace, Merge or Insert - Replace Overwrites the cue information in that
destination - Merge Incorporates the copied information into
the destination cue. If the same
fixtures and parameters are in both cues, the new
values being merged will take priority - Insert creates a new destination cue before the
one chosen, using a point number if
necessary
83
Merge
- From the Programmer or Cue Editor Window, press
Merge Cue Enter to merge directly into the Cue - Using Merge allows edits to be merged into
multiple cues simultaneously - Merge 1-3 Enter will merge the values into cues
1-3
84
Auto Update
- Updating a Cue while it is active onstage
- When a cue is playing, parameter values within
the Cue can be changed and updated without having
to open a Cue Editor Window - Select the fixture(s) in the Programmer
- Make any parameters changes
- Press Update
- Select the desired Cue from the Update Select
Window - Press Enter
85
Groups
- Groups are prerecorded fixture selections,
allowing for quick selection of multiple fixtures - To create a Group
- Select the fixtures desired
- Press Record,
- Press empty Group square
- or
- Type the Group followed by Enter
You can then name the Group by pressing SET,
typing in a name, and then press ENTER
86
Palettes
- Palettes are prerecorded values for parameters
that can be easily recalled and used while
programming - Palettes can be made from any combination of
fixture types, and they can be made for any IPCB
parameter of any fixture - Editing a Palette updates all Cues referencing
that Palette instantly (example Position
Palettes for a touring show)
87
Palettes
- Creating a Palette
- Select the fixtures, and adjust the parameters to
be included in the Palette - Press Record, then
- Press an empty button in the appropriate Palette
Directory, - or
- Press an IPCB button followed by a then Enter
- RECORD COLOR 6 ENTER
- Note if you leave out the Palette location, i.e.
Record, Position, Enter the Palette will be
recorded in the next available button in that
directory - Name the Palette by pressing SET and typing a
label on the keyboard, the press ENTER
88
Palettes
- Using a Palette in a Cue
- Select the fixtures you want to apply the Palette
- Open the Palette directory where the palette is
stored, - then select the palette from the Directory by
pressing the appropriate square, - Or
- Use the Command line syntax
- Select Fixtures, press the IPCB button, the
palette - number, then Enter
- 1 THRU 12 COLOR 6 ENTER
89
Viewing Palettes within Cues
- You can toggle between the Programmer
window displaying the Palette name, or the actual
values for the fixtures using the Show Palettes
button
90
Palettes
- Masking Like the HOG II the HOG III also allows
you to record a palette with masking options.
These option are, use I P C B E T. The new
features with these are that you can use timing
as a mask and also an effect. - There are now 3 ways of using a mask when
recording a palette. - Press Record, then select which parameter kinds
from the masking toolbar - You can now mask using the command line. so you
choose the parameters to include before recording
the palette - Colour Position Record Colour 3 Enter This will
record colour and position information into
colour palette 3 - You can also use a selection to include in your
mask. By default all the fixtures in the
programmer are recorded. Now you can specify
which fixtures to include in the palette - Group 2 Record Position Enter This records only
the settings for the fixtures in Group 2 and
records them into the next available Position
Palette
91
Palettes
- Timing Fixture and individual parameter timings
that have been set in the programmer can be
recorded when you record a palette, and then
applied when the palette is used. The default
setting is not to include timing in a palette. To
use timing in a palette you should use the Time
option in the masking options when recording. - You can also set an overall palette timing when
recording a palette. For example you can record a
colour palette with a fade time of 6 seconds. - Set the parameters of the fixtures as required
- Time 6 Enter sets their fade time to 6 seconds
- Colour Time Record Colour 1 Enter Records
colour and timing info into colour palette 1. - Note timings will only be recorded if USE T is
selected in the record toolbar
92
Palettes
- Editing palettes
- Palettes can be edited in an Editor window. The
easiest way to do this is to open the palette in
the preview editor. To do this select the palette
via the touchscreen and then press OPEN. This
will open the palettes contents into a preview
editor. - Alternatively you use the command line to open
this COLOR 1 OPEN - Once in the preview editor press the EDIT button
to select this for editing.
93
Palette Editor Window
- After all changes have been made, press UPDATE to
update the palette
94
Highlight and Lowlight Palettes
- Right Click on a Palette to assign it as Hi/Lo
Light Palette
95
Copy, Move, Delete
- Copy/Move an Object within a Directory Window
- Object X Copy/Move Object Y
- Delete an Object from a Directory
- Delete Object X
- To delete a range of objects from a starting
point in the directory/list through the end of
the directory/list - Delete Object X gt Enter
96
Views
- Desktop Views
- Stores arrangements of windows for quick access
- Views are managed by the Views Toolbar at the top
of the Left touchscreen - Views are stored in the Views Directory
To open the View Directory - Press the VIEW button followed by OPEN
97
Recording a Desktop View
- Arrange the windows on the console screens to
your liking - Press Record, while pressing a button on the
Views Toolbar
98
Naming a View
- On the Toolbar
- Press SET together with the appropriate button on
the Views toolbar the Quickname window will open - Enter a name, and click on OK
- In the Views Directory
- Open the Views Directory
- Select the View button to be named
- Press SET and the Quickname window will open
- Enter a name, click on OK
99
Recalling a View
- Press the appropriate VIEW Button on the toolbar,
or on the buttons above the left touchscreen, - or
- Press the View button on the toolbar in the far
right corner of the Left touchscreen, then type
in the View on the Keypad, followed by Enter - or
- Open the View Directory, turn off Guard, then
press the View button in the Directory Window
100
View Directory in Spreadsheet View
- Pile On Windows
- By default, when a desktop view is recalled, it
replaces the previous one so that all windows not
part of the new view are closed. - Views can be set to Pile On instead
- Open the View Directory
- Select Spreadsheet view
- Select a views cell in the additive
column - Press the Set key
- Select Yes and press Enter
101
Wholehog III
- Cuelist Window
- Choose Choose
- Open Choose
- Cue Timing Overview
- Wait Time
- Options
102
Cuelists
- Cuelist Directory
- All Cuelists are stored in the Cuelist Directory
and can be referenced on Playback Masters - Viewing the Directory window
- Press OPEN List to open the directory
- Cuelists can be named within the Cuelist
Directory using SET
103
Deleting a Cuelist
- Delete a Cuelist from a Fader
- Hold Delete while pressing Choose
- Adding an existing Cuelist to a Fader
- Type in List Move Choose the list is the
Cuelists number in the Cuelist Directory window
104
Cuelists
- Cue Timing
- Three timing elements for every cue
- One or more Fade Times
- Time parameters will use to get to the new values
of the cue - One or more Delay Times
- Time between pressing GO and when the cue begins
- Wait Time
- Length of time the cue will wait before it
automatically plays - The time starts counting when the previous cue
is played - A Cue can have multiple Fade and Delay times but
only one Wait time
105
Cuelists
- Cue Times Explained
106
Cuelists
- Setting the Wait Time
- Select a Cues wait box and Press Set several
options appear along the top of the Cuelist
window - Halt, Wait, Follow, Timecode, Manual, H,M,S
- Select an option in the Wait toolbar, or
- Type in a Wait time value
- Press Enter
- NOTES
- Type in Follow to add a Follow a wait
time - Times for multiple cues can be set simultaneously
by selecting first Wait time box, holding down
PIG, and selecting the last Wait time box in the
range of cues being edited
107
Cuelist Options
108
Cuelists
- Link Cues
- Links are used to create Loops, or to interrupt
the normal flow of the cuelist by jumping to a
different point - To create a Link cue
- Press Insert Link from within a Cuelist Window
- Link Cues are inserted after the current cue,
the current cue is indicated by ARROW
in the Wait column
109
Link Cues
110
Cuelists
- Link Cues
- You will enter the cue to Link, or jump to in
Fade column. Press SET and enter the cue number,
and press ENTER - You can enter how many times the cues will loop
in the DELAY column. If left empty, it will loop
continuously.
111
Deleting Cues
- 2 options
- Cue Delete Enter, or
- List Cue Delete Enter
- To delete a range of cues
- List Cue thru Delete Enter
112
Copying Cues
- To Copy a Cue into the Programmer
- Cue Copy Enter
- To make a copy of a cue in the same cuelist
- Cue Copy Cue Enter
113
Wholehog III
- Recording Cues with Time
- Fade
- Delay
- Default Timings
114
Recording Cues with Time
- Fade Time
- Length of time for a Cue to execute the specific
parameter changes within the cue - Every cue built is assigned a default Fade time
- The Default Fade Time in a new show is 2 seconds
- Default Timing for all cues can be assigned in
the Preferences Window under the Edit tab
115
Recording Cues with Time
- Delay Time
- Length of time after the Go command is sent
for a cue, until the parameters start the new
command or fade time. - The Default Delay Time for all new cues is 0
seconds
116
Timing Fade, Delay, and Path
- While in an Editor Window
- Select the Time button to toggle the Editor
window to the Time view - Select the cell to be edited, press Set,
enter a value, and press Enter to enter timing
117
Recording Cues with Time Individual Parameter
Timing
- Building Multi-Part Cues
- Each fixture can have its own Fade and Delay
time for each of its parameters - This allows for very dynamic and complex cues to
be created - Example
- Studio Color moves with a 5 sec Fade Time, and 0
seconds Delay - After changing position, the color may have a 6
second fade to another - color, this will need a 5 sec Delay on the
Colour to allow for the move, - After the color change the fixtures may dim to
50 with an 8 sec Fade - Time, this will need at least an 11 sec Delay
Time on the Intensity.
118
Recording Cues with Time
- Different Times for Different
Fixtures - Creating a peel off
effect - 1. Create a cue with the starting position,
- 2. Create the second cue but do not record it
yet, - 3. Change the Programmer View to DELAY.
- 4. Default is 0 seconds, and the first fixture
will use that, - 5. Select 2nd fixture, and assign a 1 second
Delay time to the Pan Tilt - 6. Select 3rd fixture, and assign a 2 second
Delay time to the Pan Tilt - 7. Continue for all fixtures, each with Delay
times 1 second apart - 8. Record as a cue each fixture will now start
its move one second after the previous fixture
119
Recording Cues with Time
- Entering Time for Cues
- During the cue building process, you may
enter the Fade and / or Delay times from - the command line.
- Pressing TIME, X, ENTER, will assign a fade
time to the cue when it is recorded - Pressing TIME, TIME, X, ENTER, will assign a
Delay time to the cue when it is - recorded.
- Pressing TIME, X THRU X, ENTER, Will fan the
Fade times through the fixtures selected. - Pressing COLOUR, TIME, X, ENTER, will assign
time only to the color parameters - Pressing POSITION, TIME, TIME, X, THRU, X,
ENTER, will fan the delay times for the Pan
Tilt parameters
120
Default Timing
- Setting Parameter Default Times
- Under Preferences/Edit/Default Timing
- Set individual default times for each parameter
(Kind Timing) or a Global default time for all
parameters
121
Fanning Times
- To type in a range of Fade or Delay times within
an Editor window for a selected set of fixtures - Select fixtures
- Select entire column of Fade or Delay Cells for
the desired parameter - Press Set
- Type Time X gt (thru) Y
- Press Enter
- Fanned Fade uptimes with a Split Downtime
- Time gt/ Enter
122
Pages
Page
- Page Directory
- Hold Open while pressing Page or press
Page Page - Pages
- Useful way of organizing Cuelists in sets of 10
per Page (without Expansion Wings) - Cuelists are not stored on the Playback Masters.
Masters reference the Cuelist Directory, and
these references are stored on each Page - Changing Pages loads a different set of Cuelists
onto the Masters per each Page
Open
123
Pages
- Creating a New Page
- Press any empty Page button in the Page
Directory, or - Type Page Enter
- Press Set, type in a name, press Enter
- Note toggle on the Guard button in the Directory
Window in order to name the Page without loading
it - Note Right click on a Page to set it as a
Template Page
124
Pages
- Changing Pages
- 3 Methods
- Press Next Page button (hold PIG and press
Next Page to move backwards through the
Directory) - Type Page Enter
- Open the Page Directory and touch a Page button
in the Directory Window
125
Pages
- Options When Changing Pages
- Preferences/Playback Defaults/Misc
- Release All releases all cuelists on the old
page and replaces them with the cuelists on the
new page default option - Holdover if Active keeps active cuelists on
their Master until they are released manually - Temporary Page Holdover hold down a Masters
Choose button while changing Pages - Leave in Background leaves the old cuelist
running in the background and attaches the
incoming cuelist to the Master to get to the
background list, go back to the page where it is
recorded
126
Effects Directory
- To open the Effects Directory Window
- Open Effect
- To use an Effect
- Select fixtures
- Press the desired effect in the Directory Window
- All settings for that effect are controlled
within the Programmer Window on the 4 encoder
wheels - Wh1 Effects Rate
- Wh2 Effects Size
- Wh3 Effects Offset
- Wh4 Effects Length
127
Effects
- Detail
- What they are
- Pre-recorded circles, ballyhoos, figure 8s, gate
chases, etc that can be used for all applicable
fixtures - How they work
- All effects can be added easily by selecting an
effect from the Effect Library. All effects
apply algorithmic calculations to a parameter
setting called a Base Value - How the library and custom effects differ
- The Library stores pre-recorded effects that can
be adjusted via their Rate and Size as well as
Offset and Fanning the effects across several
fixtures - Custom effects are generated by the Effects
Engine built into the Programmer - Every effect can be altered by changing the
values in the Table column (ex Sine, Cosine,
Step, Sawtooth, Ramp, Spiral, Tan and Random) as
well as through adjusting the Offset, Rate and
Size
128
Effects
- Recording Effects in Cues
- Steps
- 1. Select the fixtures for the effect, set
intensity levels and other parameter settings as
desired - 2. Press OPENEffect (if directory is not open
already) - 3. Touch any effect (example Circle)
in the Effects Directory window - 4. Press Record and record this as a cue
129
Effects
- Adjusting an Effect
- Rate
- Rate for an effect can be adjusted with the left
encoder wheel - RateAdjusts the settings in proportion so that
the effect is maintained as it speeds up or slows
down - Size
- Size of an effect can be adjusted with the second
encoder wheel - SizeAdjusts the settings in proportion so that
the effect is maintained as it increases or
decreases in step length
130
Effects
- Adjusting an Effect Offset
- Offset refers to where in an effect cycle a
fixture begins the effect - Offset
- To offset effect parameters for selected
fixtures, use the Offset
wheel - TIP Give each fixture a slightly different
Offset value - Using Fan
- A quick way to evenly spread offsets across a
range of fixtures - Hold FAN while turning the Offset wheel
- Fanned offsets are indicated by ,
- Fans also work on Rate and Size
- Grouping is useful when fanning Offset
131
Effects Engine
- Applying an Effect
Recommended
