
Aids to Navigation Program PowerPoint PPT Presentation
Title: Aids to Navigation Program
1
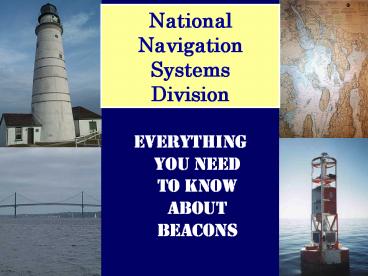
NationalNavigation Systems Division
Everything you need to know about beacons
2
Beacons
3
Training Objectives
- Identification of various structures.
- Proper use and maintenance of retro-reflective
material.
4
Structures
- Structures support visual and audible navigation
equipment in a fixed location at a designed
elevation that establishes the geographic range
of the Aid to Navigation. - Two Classifications
- Lighthouse
- Beacon
5
Lighthouse
- Enclosed edifice that houses protects, displays,
or supports visual, audible, or radio aids to
navigation. - Can be manned or unmanned.
- Located in an offshore, wave swept, exposed
environment. - Or as a landfall object.
6
Beacon
- A support platform for visual and/or audible
aids to navigation. - Simple in design.
- Constructed of wood, concrete or steel.
- May be lighted or unlighted.
7
Design Considerations
- Payload requirements
- Dead load (batteries and equipment)
- Live load (servicing personnel)
- Environmental factors
- Weather (wind, waves, storms)
- Site location (water depth, type of bottom)
- Collision (high destruction areas, ice)
8
Operational Requirements
- Height
- Size
9
Operational Requirements
- Contrast
- Vegetation
- Background
- lights
10
Construction Methods
- WLICs
- Driven with diesel hammer
- ANTs
- Jetting
- Contract
11
Structure Categories
- Single pile
- Multiple pile
12
Single Pile Structure
- Used in protected or semi-exposed locations where
fixity can be attained.
13
Multiple Pile Structures
- Used when fixity can not be achieved with single
pile. - Two categories
- Dolphin
- Platform Structure
14
Dolphin
- Battered pile
- Three to seven piles driven at an angle with the
bottoms spread and the tops secured with wire
rope or bolts and shear connectors.
15
Dolphin
- Cluster pile
- Three or more piles driven vertically with their
surfaces in contact with each other and wrapped
tightly at various heights.
16
Platform Structure
- Three or more separate piles driven vertically,
connected at the top by a platform that spreads
the load over all the piles. Usually is the
foundation for skeleton towers.
17
Materials Used
- Wood
- Economical, if life expectancy is greater than 6
months wood must be treated. - Steel
- Expensive, strong, can be driven into hard
bottoms, must be driven to required height. - Concrete
- Expensive, fragile, must be driven to required
height.
18
Towers
- Two types of towers
- Guyed skeleton
- Supports equipment on land less than 30.
- Free standing skeleton
- Supports equipment on land or marine sites when
over 30.
19
Guyed Skeleton
- Commonly called a TV tower.
- Triangular in shape.
- Galvanized 1 1/4 steel pipe and 3/16 guide
wires. - Each section is 10 ft. in height.
- Usually not built over 30 ft.
20
Free Standing Skeleton Tower
- Commonly called 5 ft pipe towers.
- Constructed of galvanized metal.
- Can be uniform or tapered.
- Usually, not built over 100 ft. in height.
21
Related Equipment
- Ladders
- Most often metal.
- Wood can only be used only for special
circumstances and must meet minimum requirements. - 2x4s nailed to the pile does not meet the
requirements.
22
Safety Belt / Harness
- According to the office of safety
- The use of a safety harness in lieu of a safety
belt is recommended, but not mandatory. - The requirement to use these devices remains at
20, as currently published.
23
Safety Climbing Device
- Will be installed on all structures over 20 ft.
It looks like a pipe with teeth and is
installed on the ladder rungs.
24
A safety climb car is attached to the climbers
safety belt and is slid over the safety climb
rail.
25
As the climber leans back the safety climb
releases allowing ascent
26
If the climber slips the safety climb catches
preventing a fall
27
Battery Box
- Large box is designed to hold up to 4 secondary
batteries. - Small box is designed to hold up to 2 secondary
batteries. - Single battery boxes are available commercially
and are acceptable as long as they are white in
color.
28
Radar Reflector
- Installed when the reflectivity of the structure
doesnt meet the operational requirements. - A standard radar set should detect it at 1.5 to 2
NM when mounted 10 ft above the water. - Must be properly oriented to the channel.
29
Dayboards
- A dayboard shall always be installed for maximum
utility. - The dayboard should be the dominant component of
the silhouette with the battery box hidden behind
it.
30
On what side should you pass this mark?
31
It is a little easier to make the decision in the
daylight!
32
Raising the board makes it more obvious.
33
(No Transcript)
34
Mounting Dayboards
- Dayboards should be fastened so the dayboard
becomes sacrificial in high winds. - Dayboards shall be fastened to meet or exceed a
lifetime of 5 years. - The fasteners shall not pierce the
retro-reflective boarder or characters.
35
Mounting
- Dayboard may be installed approximately 5
degrees from vertical.
36
Mounting
- Whenever possible, dayboards shall be mounted on
an angle to the channel. - The angle will vary to best suit the channel.
- For a straight channel about 30 degrees.
- This makes the number easier to read when abeam.
37
Dayboards
- Dayboards differ in size and shape depending on
the marking system and the specific function. - Each dayboard has a designator composed of a
number followed by a group of letters.
38
Dayboards
- A number gives the width of the dayboard in feet.
39
Dayboards
- The first letter refers to the shape or purpose
of the dayboard.
40
Dayboards
- The second letter represents the key color.
41
Dayboards
- The third letter indicates the color of stripe
(range dayboards only).
42
Dayboards
- Additional information is shown by letters placed
after a dash (-) - I - Intracoastal
- SY - yellow square
- TY - yellow triangle
43
Dayboards
- 6KRW-I
44
Dayboards
- 4JR-SY
45
Nominal Range
- As a mariner approaches a dayboard from a
distance it is first detected as an object apart
from its surroundings.
This is the detection range
46
Nominal Range
- Upon coming closer to the dayboard it can be
recognized as an aid to navigation.
This is the recognition range
47
Nominal Range
- Finally the aid can be identified when the
mariner is close enough to read the numbers and
letters.
This is the identification range
48
Nominal Range
- The nominal range rating is used to classify
dayboards
49
Preparation
- The technical manual provides cutting patterns
for dayboard backings. - Acceptable materials are 3/8 or 1/2 plywood or
1/8 aluminum sheet. - The surface of the dayboard is covered with a
colored vinyl film and retroreflective tape
boarder.
50
Films
51
Retroreflective material
- Commonly called Retro.
- Two manufacturers
- 3M and Reflexite materials may be used together
on the same aid.
- Each manufacturer makes two types of retro
52
Retroreflective materials
- Conformable retro has an aluminum backing and is
used only on buoys. - Non conformable retro has a paper backing and is
used only on dayboards. - Edge sealer is only used on buoys and is not
required on dayboards.
53
Retroreflective materials
- NEW retro is conformable.
- This is SUPER STICKY.
- It is used on dayboards and buoys.
- Edge sealer is NOT required with this material.
54
Manufacturing
- The vinyl film must be heat applied, so most
districts manufacture the boards and apply the
retroreflective tape. - Edge sealant should be used on edges back.
- Preparation by servicing unit should be limited
to selection and application of identifying
marks. - letters, numbers, ICW marks
55
Inspection and Maintenance
- Dayboard surface and backing materials will
deteriorate due to the effects of weathering by - wind,
- rain,
- freezing temperatures, and
- sunlight.
56
Inspection and Maintenance
- Types of delamination are
- Cracking,
- Peeling. And
- Fading.
57
Identifying Marks
- Numbers and letters used on dayboards come in 4
sizes - 8 on 3SGs and 4TRs with 3 digits
- 12 on 3SGs and 4TRs with 1 or 2 digits and
4SGs and 6TRs with 3 digits - 16 on 4SGs and 6TRs with 1 or 2 digits
- and 6SGs and 8TRs with 3 digits
- 24 on 6SGs and 8TRs with 1 or 2 digits
58
Backing Material
- Delamination should not have progressed over more
than 25 percent of the backing material. - Material should not be sufficiently warped to
visibly detract from the signal. - Mounting points should not be softened or
deteriorated to the degree that the board may
come loose during a storm.
59
Films, Numbers, Letters, and Borders
- Delamination of the film should not progress over
10 of the surface area. - Material should not be cracked, checked or
abraded so as to provide a dull or roughened top
surface. - Material attached should not have peeled over
more than 10 of the surface area
60
Replacement or Repair
- Dayboards shall be replaced if any deterioration
is observed. - Dayboards shall be replaced if they cannot
function as intended. - Onsite repairs are permitted if they do not
detract from the intended signal. - Painting of dayboards is prohibited.
61
Fading
- There is no practical way to measure fading.
- Replacement is based on the judgment of servicing
personnel. - It must display the intended signal until the
next scheduled service.
62
. . . more FADING
63
. . . More FADING
64
Dayboards
- There is no character for height in the
designation. - All dayboards including TRs and SGs are as tall
as they are wide.
65
Range dayboards
- Range boards are always twice as tall as they are
wide.
66
REVIEW
67
Port and Starboard Markers
SG
TR
68
Junction Markers
JG
JR
69
Mid - Channel Markers
MR
70
Range Dayboards
KWB
KGW
KWG
KBW
KWR
KRW
KRB
KBR
KBG
KRG
KGB
KGR
71
No Lateral Significance markers
NR
NG
NB
72
Information and Regulatory Markers
Danger
Exclusion Area
Controlled Area
73
Special Purpose Dayboard
NY
74
LED LANTERN
- (Light Emitting Diode)
75
Introduction
- MFG by Carmanah of Canada.
- Approved as a replacement for the 155 mm.
- Used with a 5NFR/5CFR to replace old style TRLB.
- Cost 749.00.
- Programmable flash rhythm (TV remote).
76
Model 701
- Self-powered.
- Omni-directional.
- Single Unit-Solar panels, flasher, battery, DLC
and lantern housed together. - 3 mile range.
77
Model 701
- Available in RED, GREEN, YELLOW, and WHITE.
- Programmable flash characteristic.
- FIXED characteristic has 2 mile range.
78
Model 702
- Larger battery.
- More Solar Panels.
- Designed for use in limited sunlight.
- Same features as 701.
79
Model 702-5
- Same as 702.
- Extra solar panel on top.
- Designed for extremely limited sunlight (less
than 1.5 hrs a day).
80
Model 601
- Not approved for use by USCG.
- 2 NM range.
- Self-contained.
- May be used on private aids.
- Small, lightweight, easy to install,inexpensive.
81
Charging (700 series)
- Charged prior to shipment.
- MUST be recharged if not installed within 2
months of receipt. - Charge by placing in direct sunlight for60
hours. - 60 hours does not include nighttime.
82
Charging With External Charger
- Cell Phone type charger available from mfg.
- Open Lantern, disconnect battery and SP.
- Measure battery voltage.
- Plug charger into battery and charge in
accordance with battery voltage. - DO NOT OVERCHARGE.
83
Charging (cont)
- 701 Lantern
- (15 ahs)
- 4.14 volts- 5 hours
- 3.98-4.14 volts- 15 hrs
- 3.86 or less- 20 hrs
- 702 702-5
- ( 24 ahs)
- 7 hours
- 18 hours
- 27 hours
84
Programming
- Lantern color determined by colored dot near
serial number. - Any flash characteristic can be programmed using
a Universal TV remote control. - Security code must be entered to prevent
accidentally changing characteristic. - Follow instructions supplied with lantern.
85
Installation
- Install with three bolts similar to a 155.
- Use leveling bolts on a structure.
- Bolts can obstruct solar panels, make sure they
protrude only as much as necessary. - Install nylon insulating spacer on buoys to
minimize corrosion.
86
Service Life
- LED lanterns do not burn out.
- Light output degrades over time.
- Replace lanterns according to Duty Cycle.
- 10-29 duty cycle replace every 12 yrs.
- 30-100 replace every 8 years.
- Replace battery every 4 years.
87
Servicing
- Service according to standard interval cycle
established for the aid. - Clean lens with mild soap and water.
- Cover lantern with shroud and time flash
characteristic. - Observe LEDs through lens.
- Replace optic if Dark Sectors are observed.
Recommended
