
Injection Molding Overview PowerPoint PPT Presentation
1 / 147
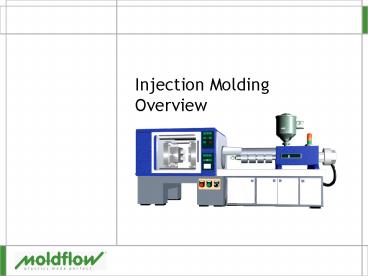
Title: Injection Molding Overview
1
Injection MoldingOverview
2
Injection Molding Machine
3
Injection Molding Terminology
Mold Components
4
Injection Molding Process
- Filling
- Mold closes
- Screw forward
- Frozen polymer skin forms at mold walls
- Packing Time
- Cavity filled
- Pressure applied to polymer
- Cooling occurs
- Gate freezes
5
Injection Molding Process
- Cooling
- Part continues to cool until rigid enough to
withstand ejection - Screw moves back plasticating resin for next shot
- Mold Open
- Part is ejected
6
Injection Molding Cycle
Cycle Time Fill Time Pack Time Cooling
Time Mold Open Time
22 Sec.
1
9
10
2
7
The Injection Mold
a.k.a. Moving Half
a.k.a. Stationary Half
8
Injection Pressure
- Pressure is required to push the plastic into the
mold cavity - Limited by machine capability
- Hydraulic pump limitations
- Usually around 140 180 MPa
- Modern machines can go up to 300 MPa
- Major influence on final part dimensions
9
Variables Affecting Injection Pressure
- Part Design
- Mold Design
- Processing Conditions
- Material Selection
- Each area is affected by other areas
- Some are easily changed, while others are not
10
Pressure - Drives Flow
- Flow is driven by pressure
- Overcomes the melt's resistance to flow
- Plastics flow from high to low pressure areas
- Pressure decreases along the flow length
11
Part Design Affecting Injection Pressure
- Part Thickness
- Surface Area
Thin Part
More surface area to be cooled
Higher Pressure
Higher Pressure
Thick Part
Less surface area to be cooled
Lower Pressure
Lower Pressure
12
Mold Design Affecting Injection Pressure
- Gate size
- Flow length (gate location)
Restrictive Gate ? Higher Pressure
Long Flow Length ? Higher Pressure
Generous Gate ? Lower Pressure
Short Flow Length ? Lower Pressure
13
Processing Conditions Affecting Injection Pressure
- Fill time
Injection Pressure vs Time
Injection Pressure MPa
Optimum time Range
Injection time Sec.
14
Processing Conditions Affecting Injection Pressure
- Melt temperature
- Mold temperature
Colder Melt ? Higher Pressure
Colder Coolant Temperature ? Higher Pressure
Hotter Coolant Temperature ? Lower Pressure
Hotter Melt ? Lower Pressure
15
Material Selection Affecting Injection Pressure
- Different grades of the same material can have
widely different pressure requirements
16
Material Selection Affecting Injection Pressure
- Material selection affects injection pressure
- Different materials have different required
pressures - Resin Flow Properties
- Low melt index g/10 min higher pressure
- High melt index g/10 min lower pressure
17
Factors Affecting Injection Pressure
18
Flow Behavior
- What Does a Plastic Molecule Do in an Injection
Mold?
19
Phases of Molding
- Filling
- Volumetrically fill the cavity
- Pressurization
- Build up pressure in the cavity
- Compensation
- Add extra material to reduce shrinkage
20
Fountain Flow
- Fastest flow rate is in the center of the cross
section - First material in forms frozen skin by the gate
- Last material in is the center of the
cross-section - Has direct influence on molecular and fiber
orientation
Melt
21
Cross-Sectional Flow Molecular Orientation
- Molecular orientation is caused by shear flow
- The highest amount of shear is inside the frozen
layer - Produces the highest orientation
22
Cross-Sectional Heat Transfer
- Should be a balance between
- Heat input from shear
- Heat loss to the tool
23
Pressure and Temperature vs Time
- Pressure will always be a U shaped curve
- Temperature will always fall with as injection
time increases - Optimum molding window has flow front temp near
melt temp
24
Specific Volume pvT Diagram
- Displays relationship of a range processing melt
temperatures and pressures over the specific
volume
25
Shrinkage
- Normally
- Unfilled materials, shrink most in flow direction
- Filled materials, shrink most perpendicular to
flow direction
Parallel
Same material and processing for both parts.
Perpendicular
Top part not considering glass fibers.
Bottom part calculated with fiber orientation.
26
QUESTIONS?
27
Moldflow Design Principles
28
Introduction
- Aim
- Review the Moldflow Design Principles
- Used with MPI
- Why do it
- MPI analyzes molding issues
- Addressed in the Moldflow Design Principles
- Following Moldflow Design Principles reduces
problems - Part design
- Mold design
- Makes parts easier to mold
29
Design Principles
- Use Design Principles and Moldflow technology so
you dont have to do this
30
Design Principles
- Unidirectional and controlled flow pattern
- Flow balancing
- Constant pressure gradient
- Maximum shear stress
- Uniform cooling
- Positioning weld and meld lines
- Avoid hesitation effects
- Avoid underflow
- Balancing with flow leaders and flow deflectors
- Controlled frictional heat
- Thermal shut off for runners
- Acceptable runner/cavity ratio
31
Unidirectional and Controlled Flow Pattern
- Plastic should flow in one direction with a
straight flow front throughout filling - Produces a uni-directional orientation pattern
32
Flow Balancing
- All flow paths within a mold should be balanced,
- Equal fill time and pressure
- Naturally balanced runner system
- Also called geometrically balanced
- Same distance and conditions between the nozzle
and all cavities - All cavities filling at the same time pressure
and temperature
33
Flow Balancing
- Artificially balanced runner system
- Flow length is different between sprue and the
parts - Sizes of the runners are different
- All cavities at the same pressure time
34
Flow Balancing
- Artificially balanced runners
- Limitations
- Very small parts
- Pressure to fill runners is higher than parts
- Parts with very thin sections
- Parts where sink marks are important
- Smaller molding window than naturally balanced
system - The higher the ratio of runner lengths
- More difficult to balance
35
Constant Pressure Gradient
- Most efficient filling pattern has a constant
pressure gradient - Pressure drop per unit length
- Spikes normally indicate a balance problem
Pressure spikes at the end of fill due to
shrinking flow front
36
Maximum Shear Stress
- Shear stress during filling should be less than
the critical level - Value of critical level depends on the material
and application - Generic limit in material database
- Shear Stress at the wall refers to the
frozen/molten layer interface - This will be the maximum shear stress in the
cross section
Material ABS Stress Limit 0.3
MPa Stress is plotted above the material limit
37
Uniform Cooling
- Molded parts should be cooled uniformly cavity to
core - When non-uniform cooling occurs parts bow to the
hot side - Molecules on hot side of the tool have longer
time to cool so they shrink more
38
Uniform Cooling
- On box-like structures
- If the inside corner is hot the walls will bow in
towards the inside
39
Weld and Meld Lines
- Eliminate if possible
- Position in the least sensitive areas,
- Weld Lines
- Formed when two flow fronts meet head on
- Meld Lines
- Formed when two flow fronts meet and flow in the
same direction
40
Hesitation Effects
- Slowing down of the flow front
- Limiting hesitation
- Make wall thickness uniform
- Position gates far from thin features
- Fill faster
41
Avoid Hesitation Effects
DONT use gate size to balance cavities
Low pressure drop in runners
HESITATION EFFECT Material freezes off in the
gate closest to the sprue
Middle cavity is hesitating more than right cavity
42
Avoid Underflow
- A change in flow direction between the time an
area fills and the end of fill - The blue velocity angle arrows should be
perpendicular to the multi-color fill contour
lines
Not Good!
Good
43
Avoid Underflow
44
Flow Leaders and Flow Deflectors
- Subtle increase leader
- Subtle decrease deflector
- Influence the filling pattern
- Create a balanced fill within the part
- Move weld lines
45
Controlled Frictional Heat
- Runners should be sized so there is shear heat in
the runner - Reduces part
- Fill pressure
- Shear stress
- Reduces melt temperature at machine nozzle
- Optimize temperature at part
- Reduce temperature at sprue so temp at part
correct
46
Thermal Shutoff of Runners
- Runners should freeze relative to the part freeze
- No less than 80 - To prevent packing problems
- No more than 200 - To prevent controlling the
cycle time
Smallest runner is OK Largest runner and sprue
may possibly control the cycle time
47
Acceptable Runner/Cavity Ratio
- Design runner systems for high pressure drops
- Minimizes material in the runner
- Lower ratio runner to cavity volume
The volume of the runners should be 20 or less
of the part volume
Volume of parts 5.4 cc Volume of feed system
4.6 cc Feed system 85 of part volume
48
QUESTIONS?
49
Mesh Density Effects - Hesitation
- To pick up hesitation, three rows of elements
across a major change in thickness are required
50
Mesh Density Effects - Weld Lines
- The mesh at the weld line location must be dense
enough to pick up the weld line
51
Mesh Density Effects - Air Traps
- Air traps may not be predicted if the mesh is not
fine enough in thin regions
52
Mesh Detail
- Model must represent FLOW characteristics
- Thickness
- Flow length
- Volume
- Small features of a part should be eliminated
from a flow model - Blends
- Radii
- Fillets
53
Effect of Geometry on Fill Pressure
- Thickness
- Greatest effect on pressure
- Flow length
- Second greatest effect
- Volume
- Virtually no effect
54
A Model With and Without Radii
- No Radii 14 elements gt 61 aspect ratio
- With Radii 561 elements gt61 aspect ratio
No Radii
With Radii
55
Compute Time, Mesh Density and Accuracy
- As mesh density increases
- The compute time increases exponentially
- Limited accuracy improvement
Material, ABS 1.9 mm nominal wall Processing
Cond. 60-235-1 Computer 2.8 GHz, 1 Gig Ram
56
QUESTIONS?
57
Generate Mesh Mesh Control
- Surface curvature control
- Puts finer mesh on curved surfaces
- Proximity control
- Puts finer mesh on surfaces closer together than
global edge length - Chord height must be on for both
No Curvature control
With Curvature control
No Proximity control
With Proximity control
58
QUESTIONS?
59
Gate Placement
- Design Considerations and Analysis
60
Introduction
- Aim
- Review gate placement guidelines
- Run a gate location analysis
- Why do it
- Gate location can be very a critical factor in
overall part quality - Overview
- Look at gate locations and influence on filling
- Run a gate location analysis
- Review results
61
Guidelines for Gate Placement
- Place gates to achieve filling that is
- Balanced
- Unidirectional
- Place gates
- In thicker areas
- Far from thin areas
- Against a wall to prevent jetting
- To prevent weld lines from forming
- In weak regions of the part
- Where they will be visible
- To prevent gas traps
- Add gates to
- Reduce fill pressure
- Prevent overpacking
- Gate placement depends on
- Type of tool 2 or 3 Plate
- Runners Hot or Cold
- Gate Type Edge or Sub
- Tooling or Functional restriction
62
Place Gate to Achieve Balanced Filling
- Very balanced fill
- Unidirectional orientation, possible packing
variation - Mostly balanced fill
- Radial orientation, possible warpage due to
orientation - Mostly balanced fill
- Radial orientation,Large weld line formed at near
EOF - Unbalanced fill
- Weld line forms early, Radial orientation
63
Gate in Thicker Areas
- Helps pack the thicker area better
- Generally lowers pressure to fill the part
The thick area is 5 mm the thin is 2 mm Both
parts are scaled to the same range
64
Gate Far From Thin Areas
- With significant changes in wall thickness
- Avoid gating close to thin areas
- Polymers favor the path of least resistance
- Difficult to filling the thin feature
- If at all
65
Place Gates to Achieve Unidirectional Filling
- Place gates to achieve unidirectional flow
- Molecular orientation consistent across the part
- Reducing warpage
- Best for long narrow parts
- Possible disadvantages
- Non-uniform packing
- Higher fill pressures
66
Add Gates to Reduce Pressure
- With long flow lengths
- Fill pressures may be too high
- Add gates
- Maintaining balance
- Shorter flow length
- To reduce pressure
67
Prevent Overpacking by Adding Gates
- Center gate over packs center rib
- Two gates prevents center rib over pack
- Volumetric shrinkage more uniform
68
QUESTIONS?
69
Results Interpretation/Customize
70
Types of Results
- Single dataset
- One value for filling or packing
- Animation is minimum to maximum of result unit
- Intermediate Results
- Results recorded through time
71
Result Types
- Intermediate Profiled
- Results through the thickness
- Results recorded through time
- XY Plot
- 2D graph of results
- Geometry dependant results
- Highlight
- Text file
72
Single Dataset Results
- Fill time
- Temperature at flow front
- Bulk temperature at end of fill
- Frozen layer fraction at end of fill
- Pressure at V/P switchover
- Pressure at end of fill
- Grow from
- Sink Index
- Time to freeze
- Volumetric shrinkage at ejection
73
Intermediate Results
- Pressure
- Average velocity
- Bulk temperature
- Frozen layer fraction
- Shear rate, bulk
- Shear stress at wall
- Volumetric shrinkage
- Average fiber orientation (Fiber analysis only)
74
Profiled Results
- Shear Rate
- Temperature
- Velocity
- Fiber orientation tensor (fiber flow only)
75
Profiled Results - Terminology
- Triangular elements use Finite Difference methods
- Thickness divided into laminae or laminates
- Profiled results store information on each
laminae - Results on laminae referred to as Normalized
Thickness
76
XY Plot
- Clamp force XY plot
- Show weight XY Plot
- Pressure at injection location XY Plot
- Recommended ram speed XY Plot
77
Geometry Dependant Results (Path Plot)
- Any plot can be made into a plot path
- First node picked is the reference
- X-axis can be defined by
- Distance from first entity
- Total length of path
- X, Y, or Z Coordinate
78
Highlight
- Weld lines
- Customizable
- Air traps
- Clamp force centroid
- At maximum tonnage
79
Properties of the Results
- Results ? Plot properties, Context menu, or
- Property categories
- Animation
- Methods
- Scaling
- Mesh Display
- Optional Settings
- Highlight
- XY Properties (1)
- XY Properties (2)
- Deflection
80
Animation Properties
- Animate result over
- Depends on the result
- Possible methods
- Single dataset
- Time
- Normalized thickness
- Animate result at
- Depends on the result
- Possible methods
- Time
- Normalized thickness
81
Animation Properties
- Animate result over
- Can limit the range of animation
- Normally Time
- Very useful to limit a Flow result to only fill
- Bulk Temperature is a good example
82
Methods Properties
- Sets the style of display
- Normally
- Shaded or Contour
- Some results use other methods
- Vector
- Tensor
- Contour settings used in 3D
83
Scaling Properties
- All frames
- All results at each time step scaled to min/max
of all time steps (Frames) - Per Frame
- Min/max of currently displayed frame
- Specified
- User controlled scale
- Normally best to check OFF extended color
- Extended color will plot the min or max color if
value out of range
84
Mesh Display Properties
- How the model will be displayed
- In most cases, edge display is off
- Filling
- Solid, (most common)
- Transparent
- May need to adjust when overlaying results
Feature lines turned on
85
Optional Settings
- To see elemental results as elements
- Turn off Nodal Averaged
- May need to change animation setting
- Banded useful to see gradients better
86
Highlight
- Set the color for the highlight
- Dataset for weld lines
87
XY Plot Properties(1)
- Independent variable
- If profiled result, it can be set
- Normalized thickness
- Time
- Set axis of independentvariable
- Position legend
88
XY Plot Properties(2)
- Scale X Y axis
- Automatically
- Manually
- Titles
89
Deflection
- Color
- Dataset
- Can show any result over deflected shape
- Magnitude/Component
- All effects
- Component
- X, Y, Z Etc.
- Reference coordinate System
- Coordinate system type
- Scale factor
- Magnitude
- Direction to apply scale to
90
Deflection
91
Scale by Layers
- Results automatically scale by visible layers
All part layers on
Grill layer off, results scaled by visible layers
92
Overlay
- Multiple results can be overlaid
- Procedure
- Display one result
- Highlight the second result
- Right click and select overlay
- Activate first result if necessary
- Only one result can be shaded
- Mesh Display
- May need to set to transparent
93
Lighting
- In preferences dialog
- On viewer tab
- Shading adjusts color to see depth
- Distorts color from scale
- Maximum shading can make results look vivid and
brilliant - best used on 3D results
94
Cutting Plane
- Slices away part
- Useful to see small detail inside the part
- Get a sense of the thicknesson a Fusion model
- More than one plane can be active at one time
- New planes can be created
- The screen is the new plane
95
Help on Interpretation
- F1 key
- Ensure the result window is activated before
pressing F1
96
QUESTIONS?
97
Gate and Runner Design
98
Introduction
- Aim
- Review gate types and runner designs
- Learn how to model feed systems and balance
runners - Why do it
- Critical to properly model gates and to balance
runner systems - Overview
- Review gate designs and how to model
- Learn manual and automatic feed system modeling
- Learn how to balance runners
99
Gate Types
- Manual Trim
- Edge
- Tab
- Sprue
- Diaphragm
- Ring
- Fan
- Flash
- Automatic Trim
- Submarine
- Cashew
- Pin
- Hot drop
- Valve
100
Edge Gate
- Most common manual trim gate
- Thickness 50 to 75 nominal wall
- Typical width 2 to 4 x the thickness
- Can be constant thickness or tapered
- Modeling
- 2-noded beam element
- 3 elementsminimum
- 3D Tets
101
Tab Gate
- Gate goes into tab that goes to the part
- Similar to edge gate
- Used to lower shear stress in the part
- Stress stays in the tab
Tab
Gate
102
Sprue Gate
- Sprue directly into part
- Size at part dependant on sprue orifice size
- Modeled by
- Beam elements
- Midplane
- Fusion
- 3D
- Tets
- 3D
103
Diaphragm Gate
- Used to gate into the inside diameter of round
parts - Normally has thin land at part
- Modeled with shell elements
- Minimum 3 rows across land
104
Ring Gate
- Like a diaphragm gate but is for the outside of
the part - Not recommended
- Difficult to get balanced flow
- Modeled with
- Beams
- Trianglesin gate land
Part and gate land shown without the runner
105
Fan Gate
- Wide edge gate
- Sized to achieve a flat flow front entering the
part - Modeled
- 3D the best
- Midplane
- Combination of beams and tris
- Fusion
- Rather thick and chunky
- May be difficult as fusion
106
Flash Gate
- Similar to ring and fan gates
- Designed to have flat flow front entering part
- Difficult to achieve
- Not recommended
- Modeled
- 3D the best
- Midplane
- Combination of beams and triangles
- Fusion
- Rather thick and chunky
- Must use beams to represent runner portion
107
Submarine Gate
- Tapered round gate that intersects the part below
the parting line - Nominal orifice diameter 25 to 75 nominal wall
- Should have at least 3 elements defining the gate
Parting line
108
Cashew Gate
- Curved tunnel gate
- Difficult to machine
- Possible maintenance problem
109
Pin Gate
- Used in 3 plate molds
- Very small orifice
- Modeled with beams
- Nominal orifice diameter 0.25 to 1.5 mm
110
Hot Drop
- Delivers hot material to the part directly
- Gate geometry and orifice size dependant on type
of hot drop - Orifice size can be critical so the nozzle will
not drool - Modeled by beams
Gate geometry varies widely depending on drop
style and usage
111
Hot Drop
- Orifice transition between
- Hot runner
- Cold runner
- Can set outer heater temperature to a value near
the transition temperature
112
Valve Gate
- Similar to a hot drop but the gate orifice is
closed by a pin - Last element in gate assigned valve gate
controller - Many options for control
- Modeled by beams
113
Elements in a Gate
- Gates should have a minimum of 3 elements across
the gate to accurately predict - Gate freeze time
- Shear rate
- Pressure
114
Gate Sizing
- Gates should be sized using shear rate as a guide
to refine the gate size from nominal values - Shear rate guidelines are found in the material
database
115
Gate Sizing
- Keep the gate shear rate below the material limit
- If the gate geometry allows
- Reduce shear rate to about 20,000 1/sec.
- Easy for large gates
- Edge
- fan
- flash
- Difficult for
- Sub-gates
- hot drops
- Impossible for
- Pin gates
116
QUESTIONS?
117
Runner Balancing
- Changes the size of runner elements
- Each part/flow path takes about the same
- Pressure to fill
- Time to fill
- Process controlled by the target pressure
- Creates a new study with the revised sizes
118
Why Balance the Runners?
- Ensure parts will fill evenly (balanced)
- Ensure packing is uniform
- Larger processing window
- Maintain an acceptable pressure magnitude
- Minimize runner volume
119
Runner Balance Procedure
120
Runner Balance Procedure
- Optimize fill
- All part optimization issues
- Gate location
- Molding conditions
- Model runners
- Constrained as necessary
- Run fill analysis with runners
- Use flow rate rather than injection time
- Ensures proper fill time for the parts
- Switchover _at_ 100
121
Runner Balance Procedure
- Determine Target Pressure
- Pressure at the Injection location
- Higher pressure decreases runner size
- Normally start near the maximum pressure
122
Runner Balance Procedure
- Runner Balance Analysis
- Based on a fill analysis
- Adds a 2nd page to the Process Settings wizard
- Target pressure
- Advanced . . . Runner Balance
- Mill tolerance
- Increment of the runner size change
- Maximum iterations
- No. of analyses run at max
- Time Convergence tolerance
- time difference between first and last cavities
to fill - Pressure Convergence tolerance
- Difference between actual and target pressures
123
Runner Balance Procedure
- Review Runner Balance Results
- Two results created
- Original study
- Screen output file
- Volume Change
- New study
- Contains revised runner sizes
- Has (Runner Balance) appended to the study name
- Has fill analysis results
124
Runner Balance Procedure
- Review Results
- Screen Output runner balance iteration table
- Imbalances should go below tolerances
Balance Target Pressure 70.0000 MPa Mill
Tolerance 0.1000 mm Maximum Iteration
Limit 20 Time Convergence Tolerance
5.0000 Pressure Convergence Tolerance
5.0000 MPa Section Convergence Tolerance
0.7000 Iteration Time Imbalance Pressure
Imbalance Section Imbalance
() (MPa) 0 21.3837
17.3280 0.6160 1
1.1076 6.2320 0.3364 2
2.6103 5.6440
0.3224 3 1.5539 5.5660
0.3094 4 0.1441
5.7650 0.2930 5 1.7397
4.6430 0.2674 Ideal Balance
Complete Allowing for mill tolerance and
pressure control 6 1.7397
4.6430 0.2674
125
Runner Balance Procedure
- Review Results, Volume Change
- Shows runner volume change
- Original to revised
- Negative indicates reduction in volume
- Zero indicates fixed runners
126
Runner Balance Procedure
- Review Results, New Study
- (Runner Balance) appended to the study name
- Time balance
- Is the time to fill the cavities close enough?
- Is 5 OK, or should it be tighter?
- Pressure balance
- Is the pressure even between the cavities?
- If not, is it OK anyway?
- Runner sizes
- Are the runner sizes good, too small or big?
- Can they be averaged or rounded to close standard
sizes?
127
Runner Balance Procedure Review
- Results, Time and Pressure Results
- Time imbalance may be very small
- Pressure may suggest the balance is not close
- Rarely is the pressure balanced
128
Runner Balance Procedure
- Review Results, Revised Thickness
- Review revised runner sizes
- Thickness can be rounded
- Too much change will cause a noticeable balance
129
Runner Balance Procedure
- Review Results, Time to Freeze
- Runner cooling time should not be less than
- 80 of part
- 100 (conservative)
130
Runner Balance Procedure
- Round runner sizes
- Nearest standard size if close
- Re-run fill to validate final sizes
- Validate Beyond Filling
- Packing
- Volumetric shrinkage should be uniform
- Between cavities
- Indicate the runners are not too small
- Across cavities
- Good packing profile
- Warpage
- Linear dimensions should be similar and within
tolerance - Warp shape/magnitude should be similar
131
QUESTIONS?
132
Flow Leaders and Deflectors
133
Flow Leaders and Deflectors
- Subtle changes in nominal wall thickness
- Designed to control the flow front
- Flow leaders
- Thicker parts of the cavity
- Increases the flow front velocity
- Yellow arrow
- Flow deflectors
- Thinner parts of the cavity
- Decreased flow front velocity
- Red arrow
134
Why Use Flow Leaders and Deflectors
- Balance flows
- Move weld lines
135
Advantages and Disadvantages
- Flow Leader
- Advantages
- Reduce shear stress
- After tool is cut flow leader can be added by
removing steel - Disadvantages
- Add material volume
- Possible increase in cycle time
- Flow Deflector
- Advantage
- Reduce material volume
- Disadvantage
- Possible reduction in structural integrity
136
Thickness Changes
- Leaders/deflectors thickness changes
- Should be less than a 25 change from nominal
wall - Thickness transition
- Should be smooth and gradual
- Reality midplane is a step
- Fusion 3D can model a bevel transition
137
Window Cover
- Run three analyses
- Nominal wall
- 1.9 mm flow deflector
- 1.27 mm flow deflector
- Compare results
- Fill time
- Weld line
- Flow front temperature
- Frozen layer thickness
Nominal Wall
1.9 mm th
1.27 mm th
138
Window Cover
- Frozen Layer Fraction in flow deflector
- Thinner the wall thickness the higher the frozen
layer
139
QUESTIONS
140
Solver Parameters
Solver Parameter Tab Mesh Type Mesh Type Mesh Type
Solver Parameter Tab Midplane Fusion 3D
Mesh/Boundary ? ?
Intermediate Output ? ?
Convergence ? ?
Restart ? ?
Fiber Analysis ? ? ?
Core Shift ? ? ?
Interface ?
Flow Analysis ?
Cool Analysis ?
Mesh ?
141
Mesh/Boundary (Midplane / Fusion)
- No. of Laminates
- 8, 10, 12, 14, 16, 18, 20
- Heat transfer coefficient
- Models heat transfer between the plastic and mold
- Higher values indicate better heat transfer
142
Intermediate Output (Midplane / Fusion)
- Set number of intermediate results by
- Constant intervals
- Specified times
- Profiled not recorded by default
143
Flow Analysis (3D)
- Solver setup
- Coupled
- Navier-Stokes
- Optional,- inertia and gravity
- Segregated (legacy solver)
- Intermediate Results
- During filling and packing
- Default 5 steps Normally increase
- Recovery data
- Allows for restart if system failure
144
3D Flow Solvers -Inertia
- Without Inertia
- Very fast run time 0.25 hr
- Best when wall thickness changes not great
- With Inertia
- Most accurate
- Can predict jetting
- Run time 2.0 hr
- Requires very fine mesh
- Many intermediateresults
Navier-Stokes Without inertia
Navier-Stokes With inertia
157,000 elements
145
Mesh (3D)
- Finite difference grid parameters
- Determines number of laminates for beams
- Grid ratio determines mold laminate thickness
- Overmolding interface tolerance
- Overmolding interface temperature solution
146
Difference Between Midplane/Fusion and 3D
- Midplane and Fusion
- Hele-Shaw assumptions applicable
- No pressure variation in thickness
- Velocity calculated from pressure gradient alone
- Laminar flow
- In-plane conduction ignored
- Edge heat loss ignored
- Inertia and gravity ignored
- 3D
- Solves at each node
- Pressure
- Temperature
- 3 Velocity components
- Considers heat conduction in all directions
- Provides option to consider
- Inertia
- Gravity effects
147
3D Injection Location Assignment
- Injection area determined by all surface elements
touching an injection location - Parts
- If fine meshes are used
- Several injection locations may need to be
defined to create a realistic gate area - Runners
- Beams node at end of beam
- tetrahedral runners
- Assign injection locationsto all nodes at the
endof the sprue
Recommended
