
Kobelco SK850LC-9 HYDRAULIC EXCAVATOR Service Repair Manual Instant Download (Book Code No. S5LY0006E04) PowerPoint PPT Presentation
Title: Kobelco SK850LC-9 HYDRAULIC EXCAVATOR Service Repair Manual Instant Download (Book Code No. S5LY0006E04)
1
HYDRAULIC EXCAVATOR
SPECIFICATIONS
MAINTENANCE
SYSTEM
DISASSEMBLING
TROUBLESHOOTING
E/G
OPT.
SHOP MANUAL
SK850LC-9
model
INDEX
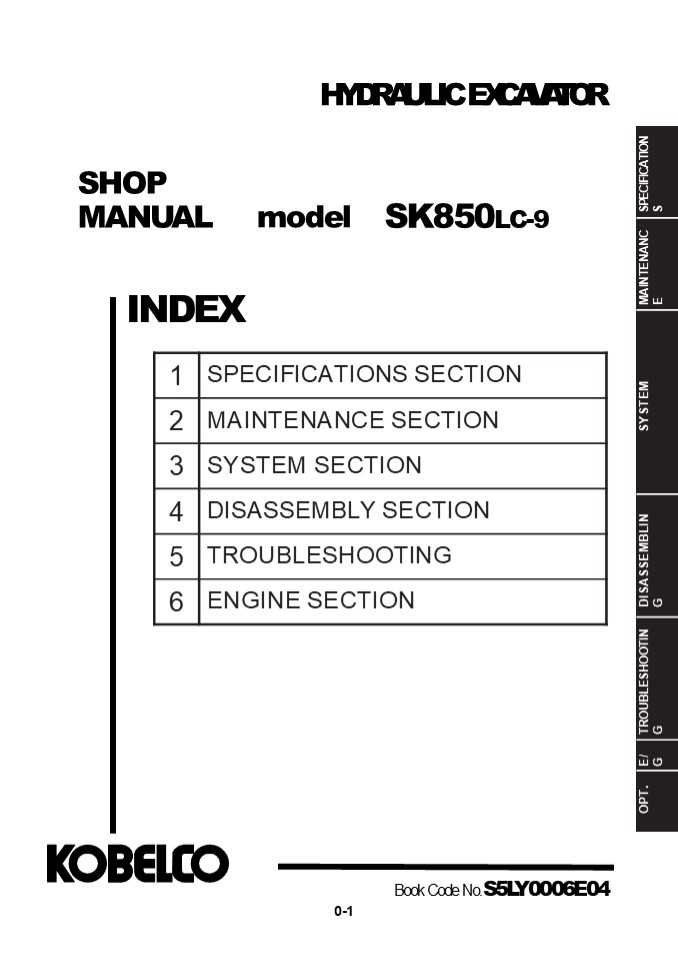
1 SPECIFICATIONS SECTION
2 MAINTENANCE SECTION
3 SYSTEM SECTION
4 DISASSEMBLY SECTION
5 TROUBLESHOOTING
6 ENGINE SECTION
Book Code No.S5LY0006E04 0-1
2
INDEX
SK850LC-9
NA
Book Code No. Distribution YearMonth Book Code No. Distribution YearMonth Book Code No. Distribution YearMonth Title Index No.
S5YN0129E01 2012-12 SPECIFICATIONS OUTLINE 1
S5LY0206E01 2014-05 SPECIFICATIONS SPECIFICATIONS 2
S5LY0306E01 2014-05 SPECIFICATIONS ATTACHMENT DIMENSIONS 3
S5LY1106E01 2012-12 MAINTENANCE TOOLS 11
S5LY1206E01 2015-11 MAINTENANCE STANDARD MAINTENANCE TIME SCHEDULE 12
S5LY1306E02 2014-10 MAINTENANCE MAINTENANCE STANDARD AND TEST PROCEDURE 13
S5LY2106E01 2014-05 SYSTEM MECHATRO CONTROL SYSTEM 21
S5LY2206E01 2014-05 SYSTEM HYDRAULIC SYSTEM 22
S5LY2306E01 2014-05 SYSTEM ELECTRIC SYSTEM 23
S5LY2406E01 2014-05 SYSTEM COMPONENTS SYSTEM 24
S5LY2506E01 2012-12 SYSTEM AIR-CONDITIONER SYSTEM 25
_ SYSTEM
S5YN3129E01 2012-12 DISASSEMBLING DISASSEMBLING ASSEMBLING 31
S5LY3206E01 2014-05 DISASSEMBLING ATTACHMENT 32
S5LY3306E01 2012-12 DISASSEMBLING UPPER STRUCTURE 33
S5LY3406E01 2012-12 DISASSEMBLING TRAVEL SYSTEM 34
S5LY4606E01 2012-12 TROUBLESHOOTING BY ERROR CODES 46
S5LY4706E01 2012-12 TROUBLESHOOTING BY TROUBLE 47
_ TROUBLESHOOTING
_ TROUBLESHOOTING
S5LY5106E02 2016-11 E/G ENGINE 51
_
_
_
LY03-00501 APPLICABLE MACHINES
25 1
33
2
34
3
11
51
12
21 13
46 22
31 23
47
32 24
0-5
3
1. OUTLINE
1. OUTLINE
1
- TABLE OF CONTENTS
- GENERAL PRECAUTIONS FOR MAKING REPAIRS
1-3 - PREPARATION BEFORE DISASSEMBLING
1-3 - SAFETY WHEN DISASSEMBLING AND ASSEMBLING
1-3 - DISASSEMBLING AND ASSEMBLING HYDRAULIC EQUIPMENT
1-4 1.1.4 ELECTRICAL EQUIPMENT
1-6
1.1.5 HYDRAULIC PARTS
1-7 1.1.6 WELD REPAIR
1-7 1.1.7 ENVIRONMENTAL ISSUES
1-7 1.2
INTERNATIONAL UNIT SYSTEM
1-8
Book Code No. S5YN0129E01
1-1
4
https//www.ebooklibonline.com Hello dear
friend! Thank you very much for reading. Enter
the link into your browser. The full manual is
available for immediate download. https//www.eb
ooklibonline.com
5
1. OUTLINE
Issue Date of Issue Applicable Machines Remarks
First Edition December, 2008 SK200-8 YN12-56001 SK210LC-8 YQ12-08001 S5YN0129E01 (SE Asia Oceania)
December, 2010 SK250-8 LQ13-07375 SK260LC-8 LL13-06387 (ANZ)
E485C YS (NHK)
SK480LC-9 YS (NA)
SK225SR YB06-03580 SK225SRLC LA06-02501 (ANZ)
January, 2011 SK330-8 LC11-09068 SK350LC-8 YC11-04950 (ANZ)
September, 2011 SK225SR YB06-03501 (SE Asia)
November, 2011 SK200-8 YN12-H4463H4612 Indonesia (HS Engine)
December, 2011 E140CSR YH07-09001 (NHK-EUR)
SK140SRLC-3 YH07-09001 (NA)
February, 2012 E260CSR(N)LC YU07-04001 (NHK-EUR)
260SR YU07-04001 (NA)
E230CSR YB07- E230CSRLC LA07-03001 (NHK-EUR)
230SR LA07-03001 (NA)
September, 2012 E75CSR YT08-30001 (NHK-EUR)
75SR-3 YT08-30001 (NA)
SK75SR-3 YT07-25001 (SE Asia Oceania)
SK85MSR-3 LF07-05001 (OCE)
October, 2012 E85CMSR LF08-05501 (NHK-EUR)
85CS-3 LF08-05501 (NA)
November, 2012 SK75-8 LG01-H5001 (SE Asia)
E160CBR LH02-01501 (NHK-EUR)
ED160BR LH02-01501 (NA)
December, 2012 SK850LC-9 LY03-00501 (NA)
1-2
6
1. OUTLINE
1.1
GENERAL PRECAUTIONS FOR MAKING REPAIRS
1
1.1.1
PREPARATION BEFORE DISASSEMBLING
- Knowledge of operating procedure
- Read Operator's Manual carefully to understand
the operating procedure. - Cleaning machines
- Clean machines of soil, mud, and dust before
carrying into the service shop. Carrying a soiled
machine into the service shop, causes making
less efficient work and damage of parts. - Inspecting machines
- Confirm the disassembling section before starting
work, determine the disassembly procedure taking
the conditions in work shop into account, and
request to procure necessary parts in advance. - Recording
- Record the following items to keep contact and
prevent malfunction from recurring. - Inspecting date, place
- Model name, Serial number and Record on hour
meter - Trouble condition, place, cause
- Visible oil leak, water leak and damage
- Clogging of filters, oil level, oil quality, oil
contamination and looseness. - Examine the problems on the basis of monthly
operation rate with the last inspection date and
records on hour meter.
1.1.2
SAFETY WHEN DISASSEMBLING AND ASSEMBLING
- (1) Safety
- Wear appropriate clothing, safety shoes, safety
helmet, goggles, and clothes with long sleeves. - Attach "Don't operate" tag to control lever, and
begin a meeting before starting the work. - Before starting inspection and maintenance stop
the engine. - Confirm the position of first-aid kit and fire
extinguisher, and also where to make contact for
emergency measure and ambulance to prepare for
accidents and fire. - Choose a hard, level and safe place, and put
attachment on the ground without fail. - Use hoist, etc. to remove parts of heavy weight
(23kg 50 lb or more). - Use proper tools, and change or repair defective
tools. - Machine and attachment required to work in the
lifting condition should be supported with
supports or blocks securely. - 1-3
7
1. OUTLINE 1.1.3 DISASSEMBLING AND ASSEMBLING
HYDRAULIC EQUIPMENT
- (1) Removing hydraulic equipment assy
- Before removing pipes, release the pressure of
hydraulic oil tank, or open the cover on the
return side to tank, and take out the filter. - Drain the oil in the removed pipes into pan to
prevent the oil from spilling on the ground. - Pipes with plugs or caps to prevent oil leaking,
entry of dust, etc. - Clean the outside surface of equipment, etc.
before disassembling, and drain hydraulic oil and
gear oil before putting them on working bench. - (2) Disassembling hydraulic equipment
- Since performance and function of hydraulic
equipment after disassembly and assembly results
in immunity from responsibility on the
manufacture's side, disassembly, assembly and
modification without permission are strictly
prohibited. - If it is unavoidably necessary to disassemble and
modify, it should be carried out by experts or
personnel qualified through service training. - Make match mark on parts for reassembling.
- Before disassembling, read Disassembling
Instruction in advance, and determine if the
disassembly and assembly are permitted or not. - For parts which are required to use jig and
tools, don't fail to use the specified jig and
tools. - For parts which can not be removed in the
specified procedure, never force removal. First
check for the cause. - The removed parts should be put in order and
tagged so as to install on proper places without
confusion. - For common parts, pay attention to the quantity
and places. - (3) Inspecting parts
- Check that the disassembled parts are free from
adherence, interference and uneven working face. - Measure the wear of parts and clearance, and
record the measured values.
1-4
8
- 1. OUTLINE
- (5) Installing hydraulic equipment
- Confirm hydraulic oil and lubrication oil.
- Air release is required in the following cases
- Change of hydraulic oil
- Replacement of parts on suction pipe side
- Removing and attaching hydraulic pump
- Removing and attaching swing motor
- Removing and attaching travel motor
- Removing and attaching hydraulic cylinder
- For air bleed of hydraulic pump and swing motor,
loosen drain plug on the upper part, start
engine, and run in low idling, then bleed air
until hydraulic oil is comes out. After
completion of comes, tighten plug securely. - For air bleed of travel motor and hydraulic
cylinder, starts engine and operate it for 10
minutes or more at no-load and low speed. - Air in pilot circuit can be bleed out by only
operating digging, swing and traveling motions
thoroughly. - Check hydraulic oil level.
- Move attachments to hydraulic oil check position,
and check hydraulic oil level of tank. Refill oil
if the oil level is lower than the specified
level. - How to check oil level of hydraulic oil tank
1
If hydraulic oil and lubricating oil are not
filled and also air bleed is not performed, the
hydraulic equipment may be damaged.
For cylinder, don't move it to the stroke end at
beginning.
1-5
9
1. OUTLINE 1.1.4 ELECTRICAL EQUIPMENT
- The disassembly of electrical equipment is not
allowed. - Handle equipment with care so as not to drop it
or bump it. - Connector should be removed by unlocking while
holding the connector. Never stress in tension
to the caulked section by pulling wire. - Check that connector is connected and locked
completely. - Engine key off before removing and connecting
connector. - Engine key off before touching terminals of
starter and alternator. - Remove battery grounding terminal before
beginning work close to battery and battery relay
with tools. - Wash machine with care so as not to splash water
on electrical equipment and connector. - When water has entered in the waterproofed
connector, the removing of water is not easy. So
check the removed waterproofed connector with
care to protect it from entry of water. If
moisture adheres on it, dry it completely before
connecting.
Battery fluid is dangerous. The battery fluid is
dilute sulfuric acid, and causes scald and loss
of eyesight by adhering on eyes, skin and
clothes. When the fluid has adhered on them, take
an emergency measure immediately and see a
doctor for medical advice. -When it has adhered
on skin Wash with soap and water. -When it has
got in eyes Wash in water for 10 minutes or more
immediately. -When it has spilled out in large
quantity Use sodium bicarbonate to neutralize,
or wash away with water. -When it was swallowed
Drink milk or water. -When it has adhered on
clothes Wash it immediately.
1-6
10
1. OUTLINE
1.1.5
HYDRAULIC PARTS
1
- (1) O-ring
- Check that O-ring is free from flaw and has
elasticity before fitting. - Even if the size of O-ring is equal, the usage
differs, for example in dynamic and static
sections, the rubber hardness also differs
according to the pressure force, and also the
quality differs depending on the materials to be
seated. So, choose proper O-ring. - Fit O-ring so as to be free from distortion and
bend. - Floating seal should be put in pairs.
- (2) Flexible hose (F hose)
- Even if the connector and length of hose are the
same, the parts differ according to the
withstanding pressure. Use proper parts. - Tighten it to the specified torque, and check
that it is free from twist, over tension,
interference, and oil leak. - 1.1.6 WELD REPAIR
- The weld repair should be carried out by
qualified personnel in the specified procedure
after disconnecting the grounding cable of
battery. If the grounding cable is not
disconnected, the electrical equipment may be
damaged. - Remove parts which may cause fire due to the
entry of spark beforehand. - Repair attachments which are damaged, giving
particular attention to the plated section of
piston rod to protect it from sparks, and don't
fail to cover the section with flame-proof
clothes. - 1.1.7 ENVIRONMENTAL ISSUES
- Engine should be started and operated in the
place where air can be sufficiently ventilated.
1-7
11
- 1. OUTLINE
- 1.2 INTERNATIONAL UNIT SYSTEM
- Introduction
- Although this manual uses the SI units system.
Outline of SI units system is described here. - Given hereinunder are an excerpt of the units
that are related to this manual - Etymology of SI Units
- English International System of units
- Construction of SI Unit System
1-8
12
1. OUTLINE
1
1-9
13
1. OUTLINE
1-10
14
2. SPECIFICATIONS
2. SPECIFICATIONS
2
TABLE OF CONTENTS
2.1 2.2 2.3 2.4
NAME OF COMPONENTS
2-3 GENERAL DIMENSIONS
2-4 WEIGHT OF COMPONENTS
2-6 TRANSPOTATION
2-8
2.4.1 MACHINE PREPARATION
2-9 2.4.2 DIMENSIONS OF ATTACHMENT
2-10 2.5 LIFTING
MACHINE 2-13 2
.6 SPECIFICATIONS AND PERFORMANCE
2-14 2.6.1 SPEED AND
CLIMBING CAPABILITY 2-14
2.6.2 ENGINE
2-14 2.6.3 HYDRAULIC COMPONENTS
2-14 2.6.4 WEIGHT
2-14 2.7
TYPE OF CRAWLER
2-15 2.7.1 SK850LC-9 (3.60m Arm)
2-15 2.8 ENGINE
SPECIFICATION 2-1
6
2.8.1 2.8.2
SPECIFICATIONS 2
-16 ENGINE CHARACTERISTIC CURVE (Hino E13CVV)
2-17
Book Code No. S5LY0206E01
2-1
15
2. SPECIFICATIONS
Issue Date of Issue Applicable Machines Remarks
First edition May, 2014 SK850LC-9 LY03-00501 S5LY0206E01 (NA)
2-2
16
2. SPECIFICATIONS
2.1
NAME OF COMPONENTS
2
2-3
17
2. SPECIFICATIONS
2.2
GENERAL DIMENSIONS
2-4
18
2. SPECIFICATIONS
Item Unit SK850LC-9 SK850LC-9 SK850LC-9 SK850LC-9 SK850LC-9
Item Unit 8.25m (27ft-1in) boom 3.6m (11ft-10in) arm 3.50m3 (4.58cu-yd) Bucket 8.25m (27ft-1in) boom 4.40m (14ft-5in) Long Arm 2.80m3 (3.66cu-yd) Bucket 8.25m (27ft-1in) boom 5.40m (17ft-9in) Long Arm 2.30m3 (3.01cu-yd) Bucket 8.25m (27ft-1in) boom 2.90m (9ft-6in) Short Arm 5.40m3 (7.06cu-yd) Bucket 7.25m (23ft-9in) ME boom 2.90m (9ft-6in) ME Arm 4.60m3 (6.02cu-yd) Bucket
A Overall Length mm (ft-in) 14,530(47'8") 14,480(47'6") 14,220(46'8") 14,600(47'11") 13,590(44'7")
B Overall Height (Including Handrail) mm (ft-in) 4,310(14'2") lt-- lt-- lt-- lt--
C Overall Width of Crawler (Working / Transporting) mm (ft-in) 4,450(14'7") / 3,800(12'6") With 900 mm shoe lt-- lt-- lt-- lt--
D Width of Crawler mm (ft-in) 900(35.4") lt-- lt-- lt-- lt--
E Height to Top Cab mm (ft-in) 3,660(12') lt-- lt-- lt-- lt--
F Ground Clearance of Under Carriage mm (ft-in) 850(33.5") lt-- lt-- lt-- lt--
G Radius of Rear End mm (ft-in) 4,480(14'8") lt-- lt-- lt-- lt--
H Overall Length of Crawler mm (ft-in) 6,380(20'11") lt-- lt-- lt-- lt--
I Center Distance of Tumblers mm (ft-in) 5,140(16'10") lt-- lt-- lt-- lt--
J Ground Clearance of Rear End mm (ft-in) 1,560(5'1") lt-- lt-- lt-- lt--
K Width of Revolving Upper Structure (With catwalk / Without catwalk) mm (ft-in) 4,020(13'2") / 3,190(10'6") lt-- lt-- lt-- lt--
L Basic Machine Length mm (ft-in) 7,660(25'2") lt-- lt-- lt-- lt--
M Overall Height (With Attachment) mm (ft-in) 4,760(15'7") 5,160(16'11") 5,750(18'10") 4,880(16') lt--
2
Dimensions marked do not include the height of
the shoe lug.
2-5
19
2. SPECIFICATIONS
2.3
WEIGHT OF COMPONENTS
Item / Model SK850LC-9
Machine complete kg (lb) 80,600 (177,720)
1. Upper frame assy (Assembly of following ) 31,900 (70,340)
1.1 Upper frame 6,920 (15,260)
1.2 Counter weight
Counter weight (Semi-weighted) 13,300 (29,330)
1.3 Cab 590 (1,300)
1.4 Engine 1,250 (2,756)
1.5 Hydraulic oil tank 575 (1,268)
1.6 Fuel tank 590 (1,300)
1.7 Slewing motor (including reduction unit) 450 (922) X 2
1.8 Control valve 415 (915)
1.9 Boom cylinder 870 (1,920) X 2
1.10 Pin (for mounting boom) 260 (573)
1.11 Pump 155 (342) X 2
1.12 Radiator (including intercooler) 355 (783)
1.13 Oil cooler 290 (640)
2. Lower frame assy (Assembly of following ) 31,670 (69,830)
2.1 Lower frame 11,520 (25,400)
2.2 Slewing bearing 1,215 (2,679)
2.3 Travel motor (including reduction unit) 835 (1,841) X 2
2.4 Upper roller 45 (99) X 6
2.5 Lower roller 145 (320) X 18
2.6 Front idler 515 (1,136) X 2
2.7 Idler adjuster 690 (1,522) X 2
2.8 Sprocket 175 (386) X 2
2.9 Swivel joint 70 (154)
2.10 Track guide 80 (176) X 4
2.11 Track link with 750mm (29.5in) shoes assy 4,535 (10,000) X 2
2.11 Track link with 650mm (25.6in) shoes assy 4,205 (9,272) X 2
2.11 Track link with 900mm (35.4in) shoes assy 5,100 (11,246) X 2
2.11.1 Track link assy 1,900 (4,190) X 2
2-6
20
2. SPECIFICATIONS
Item / Model SK850LC-9
3. Attachment (Assembly of following )
8.25m(27ft-1in)Boom3.60m(11ft-10in)Arm3.50m3(4.58cu-yd)Bucket 15,700 (34,620)
3.1 Bucket assy 2,610 (5,755)
3.2 Arm assy (Assembly of following ) 4,180 (9,217)
3.2.1 Arm 2,680 (5,910)
3.2.2 Bucket cylinder 795 (1,750)
3.2.3 Idler link 85 (187) X 2
3.2.4 Bucket link 370 (820)
3.2.5 Pin (2pcs.for mounting bucket cylinder/2pcs.for mounting bucket) 415 (915)
3.3 Boom assy (Assembly of following ) 8,560 (18,870)
3.3.1 Boom 7,340 (16,190)
3.3.2 Arm cylinder 1,175 (2,590)
3.3.3 Pin (Mounting arm - Mounting arm cylinder) 190 (420)
4. Lubricant and water (Assembly of following ) 1,770 (3,903)
4.1 Hydraulic oil 750 (1,654)
4.2 Engine oil 50 (110)
4.3 Fuel 805 (1,775)
4.4 Water 95 (210)
2
Marks show dry weight.
2-7
21
Suggest For more complete manuals. Please go to
the home page. https//www.ebooklibonline.com If
the above button click is invalid. Please
download this document first, and then click the
above link to download the complete
manual. Thank you so much for reading
22
2. SPECIFICATIONS
2.4
TRANSPOTATION
- Know the total weight, length, width and height
of the machine being transported. - Know route to be traveled. Investigate bridges,
overpasses, height of road signs on route. - Obtain any permits required from proper
government agencies for machine transportation. - Use only a trailer with a rated capacity
sufficient to transport the machine. - Make certain trailer has ramps or a ramp is
available for loading and unloading the machine.
Shoe type mm (in) Overall Width of Crawer mm (ft-in) Weight kg (lb)
650 (25.6) 3,400 (11'2") 47,900 (105,620)
750 (29.5) 3,500 (11'6") 48,500 (106,940)
900 (35.4) 3,800 (12'6") 49,600 (109,370)
Width of upper structure (without width of
catwalk)
2-8
23
2. SPECIFICATIONS
- 2.4.1 MACHINE PREPARATION
- Width of Upper Structure 3,190 mm (10ft-6in)
- Weight 24,000 kg (52,920 lb)
2
Clawler Width Weight
mm ft-in kg lb
650 2-1 22,700 50.050
750 2-5 23,300 51.380
900 2-9 24,400 53,800
- Width of Revolving Upper Structure (Without
catwalk) - This figure shows case of 750mm (29.5 in) width
shoes.
2-9
24
https//www.ebooklibonline.com Hello dear
friend! Thank you very much for reading. Enter
the link into your browser. The full manual is
available for immediate download. https//www.eb
ooklibonline.com
Recommended
