
JOHN DEERE 400 HYDROSTATIC TRACTOR Service Repair Manual Instant Download PowerPoint PPT Presentation
Title: JOHN DEERE 400 HYDROSTATIC TRACTOR Service Repair Manual Instant Download
1
JOHN DEERE 400 HYDROSTATIC
TRACTOR
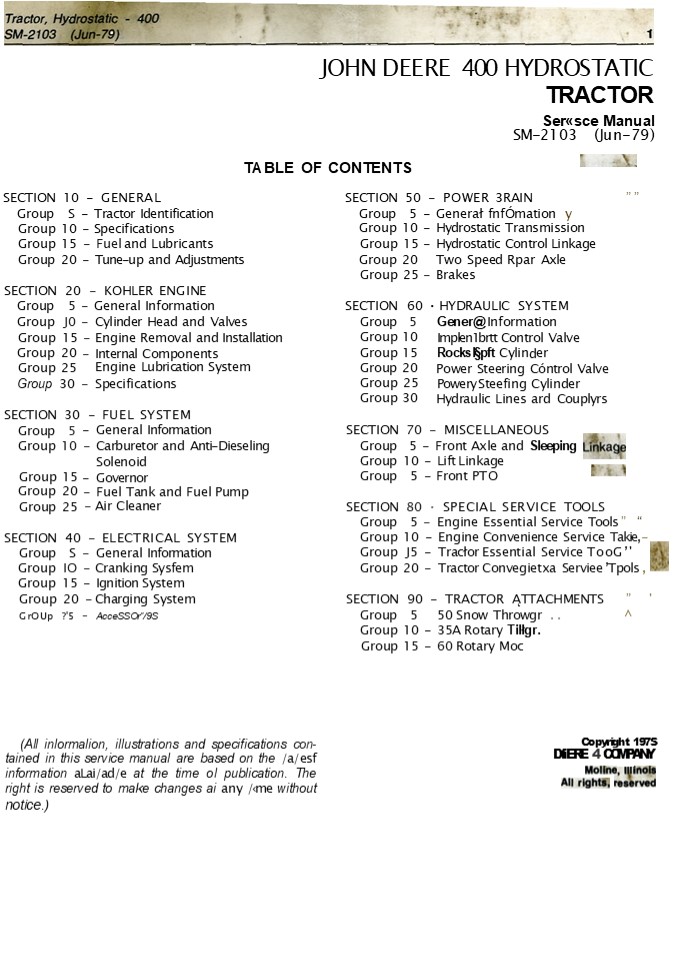
Sersce Manual SM-2103 (Jun-79) TABLE OF CONTENTS
SECTION 10 - GENERAL
SECTION 50 - POWER 3RAIN
Group S - Tractor Identification
Group 5 - General fnfÓmation y
Group 10 - Specifications
Group 10 - Hydrostatic Transmission Group 15 -
Hydrostatic Control Linkage
Group 15 - Fuel and Lubricants Group 20 - Tune-up
and Adjustments
Group 20 Two Speed Rpar Axle Group 25 - Brakes
SECTION 20 - KOHLER ENGINE Group 5 - General
Information Group J0 - Cylinder Head and
Valves Group 15 - Engine Removal and Installation
Group 20 - Internal Components Group 25 Engine
Lubrication System Group 30 - Specifications
SECTION 60 HYDRAULIC SYSTEM
Group 5 Group 10
Gener_at_ Information Implen1brtt Control Valve
Rockslpft Cylinder Power Steering Cóntrol
Valve Powery Steefing Cylinder Hydraulic Lines
ard Couplyrs
Group 15 Group 20 Group 25 Group 30
SECTION 30 - FUEL SYSTEM
Group 5 - General Information
SECTION 70 - MISCELLANEOUS
Group 10 - Carburetor and Anti-Dieseling Solenoid
Group 15 - Governor Group 20 - Fuel Tank and Fuel
Pump
Group 5 - Front Axle and Sleeping
Group 10 - Lift Linkage
Group 5 - Front PTO
Group 25 - Air Cleaner
SECTION 80 SPECIAL SERVICE TOOLS
Group 5 - Engine Essential Service Tools
SECTION 40 - ELECTRICAL SYSTEM
Group 10 - Engine Convenience Service Takie, -
Group J5 - Traclor Essential Service TooG' Group
20 - Tractor Convegietxa Serviee Tpols ,
Group S - General Information
Group IO - Cranking Sysfem Group 15 - Ignition
System
Group 20 - Charging System GrOUp ?'5 -
AcceSSOr/9S
SECTION 90 - TRACTOR ATTACHMENTS
'
Group 5 50 Snow Throwgr . . Group 10 - 35A Rotary
Tillgr. Group 15 - 60 Rotary Moc
Copyright 197S DfiERE 4 COMPANY
(All inlormalion, illustrations and
specifications con- tained in this service manual
are based on the /a/esf information aLai/ad/e at
the time ol publication. The right is reserved to
make changes ai any /me without notice.)
2
Tractor Hydrostatic - 400 SM-2103 (Jun-79
2
INTRODUCTION
This service manua/ contains service and mainte-
nance information for the John Deere 400
Hydrostatic Tractor.
Specifications are found at the end of each
Section for easy reference.
This safety alert symbol identified impor- tant
aafety messages in this manual. When you see
thls symbol, ba alert to the possibility of
personal injury and carefully read the
message that follows.
The manual is divided into sections. Each section
pertains to a certain component or operational
system of the tractor. The information is divided
into groups within each section.
AIR sections of this service manual Should be
care- fully studied by the serviceman. Much basic
informa- tion sucn as the principles of 4-cycle
engine operation, carburetion and ignition have
been omitted. Such in- formation can be found in
any good library and is recommended reading for
the new serviceman before consulting this manual
for serbice procedures.
This manual can be kept in its own cover, or it
can be removed and filed in your service manual
rack or Consumer Product Service Information
Binder.
SI (International System) Units of Measure Metric
equivalents have been included, where ap-
plicable, throughout this service manual.
Emphasis is placed on diagnosing malfunctions,
analysis and testing. Diagnosing malfunctions
lists possible troubles. their causes and how to
correct them. Under specific components these
troubles are analyzed to help the serviceman
understand what is causing the problem so he can
correct it rather than just replace parts and
have the same problem keep recurring.
3
Tractor, Hydrostatic - 400 SM-2103 (Jun-T5)
General TO Tractor Identification 5-1
Section 10 GENERAL Group 5 TRACTOR IDENTIFICATION
TABLE OF CONTENTS
GROUP 20 - TUNE-UP AND ADJUSTMENTS Purpose of
Instructions .......... ....... 20-1
GROUP 5 - TRACTOR IDENTIFICATION Tractor Serial
Number ..... .. ............. ..5-2
Engine Serial Number ...... ..., ... .......5-2
Engine Tune-up.. . . , , ... , .... 20-2 Tractor
Adjustment .............. ...... 20-13
Transmission Serial Number ..... , .........5-2
Rear Axle Serial Number ... . .... .......
5-2 GROUP 10 - SPECIFICATIONS Tractor
Specifications . .............. , .... 10-1 Bolt
Torque Chart ............ ... ....... 10-2 Set
Screw Seating Torque Chart .......... 10-2 GROUP
15 - FUEL AND LUBRICANTS Fuel . . . .
..... ........ , 15-1 Lubricants ..... , .... ,
....... , ........... 15-1 Capacities .... , .
......... .. , .... , ..... 15-2 Service
intervals .. ....... ............. 152
. , 15-2 ..... 1 -3
Checking Engine Crankcase Oil .. Al' O Changing
Engine Oil Filter . . i de'
. ! 54
Chan nng ansm' oon Find FiIter
Lubricating Grease Fittings .. . ...... , ....
15-5
Litho in U.S.A.
4
https//www.ebooklibonline.com Hello dear
friend! Thank you very much for reading. Enter
the link into your browser. The full manual is
available for immediate download. https//www.ebo
oklibonline.com
5
10 General 5-2 tractor Identification
Tractor, Hydrostatic - 400 SM-2103 (Jun-75)
TRACTOR SERIAL NUMBER
TRANSMISSION SERIAL NUMBER
Fig. 1-Tractor Serial /V/Jm/7er
Fig. 3-Transmission Ser/a/ Number
The tractor serial number plate is located jUSt
bE'"
The transmission serial number is stamped on a
tag attached to the transmission, Fig. 3.
low the key switch on the pedestal, Fig. 1.
ENGINE SERIAL NUMBER
REAR AXLE SERIAL NUMBER
Fig, 4-Rear Axle Serial Number
Fig. 2-Engine Serial Number
The engine serial number is located on the
right- hand cylinder head shroud, Fig. 2.
The rear axle serial number is stamped on a
tag attached to the rear axle, Fig. 4.
Litho in U.S.A.
6
Tractor, Hydrostatic - 400 SM-2103 (Run-79)
General 10 Specifications 10-1 Group 10
SPECIFICATIONS
TRACTOR SPECIFICATIONS Transmission .
. JO All-Weather Hydrostatic
ENGINE
Fluid or Equivalent
Manufacturer. . . . . . . . . . . . . . . . . . .
. . . . . . . . . Kohler Model Number ... ...
....... ........... K532QS
Grease Fittings ..... JD Multi-Purpose
Lubricant or Equivalent
Cylinders . .. .. ...... .... ... .......... .
..... 2
Type . . ... . ................. 4 Cycle-Air
Cooled Bore ........... ...........3.375 in.
(8.57 cm) Stroke.... ..... ....... ....3.000 in.
(7.62 cm) Displacement .......... 53.7 cu. in.
(880.14 cc) Horsepower......... .......... 19.9
(14.726 kw) Speeds idle . .. .... ...... , , ...
, ...... 1700-1900 rpm High (No Load)
.............. 3400-3500 rpm
FILTERS
' '
.gne Ot F.!tet M44490
Transmission Oil Filter ... . . .. . . AM35176
GROUND TRAVEL SPEEDS C 3400 RPM Forward Low)
......... Variable 0.5 to 5.6 mph (0.8 to 8.85
km/h) Forward (High)......... Variable .5 to 10.8
mph (0.8 to 17.19 km/h) Reverse (Low) ..........
Variable .5 to 2.1 mph (0.8 to 3.22 km/h Reverse
High) ......... Variable .S to 4.0 mph (0.8 to
6.44 km/h
-
POWER TRAIN Hydrostatic Transmission
........... Sundstrand
1S Series (In-line)
Axle ........ , .. Peerless (2-Speed) Model 2S14
Brakes ..... Individual Rear Wheel (Drum-Type)
HYDRAULICS Control Valve ........... 3-Spool
(Open Center) Outlets .... .. ..... .........., .
, . 2 Sets (Front) Rockshafts ........... , .. ,
Rear Mid-Mounted Both Operated by One
Cylinder) Power Steering ........... Standard
Equipment
DIMENSIONS Wheelbase . .............. 52 in.
(132.08 cm) Over-All Length ..... , .. , , ... 76
in. (193.04 cm) Over-All Height ...... . , .....
46 in. (116.84 cm) Over-All Widfh (Max.) ..... ,
. 49 in. (124.46 cm) Tread Front .............
.... .... 35 in. (88.90 cm) Rear (Wheels In)
.......... 32 in. (81.28 cm) Rear (Wheels
Out)......... 37 in. (93.98 cm)
ELECTRICAL SYSTEM Baery ..... 12-Volt (BCI Group
22F) (AM31186) Ignition ..........................
.. Battery-Coil
14-L7B (AT17208) 4S-L (AM1M5T) H-10 (AM514T )
Spark Plug... Prestolite AC Champion Resistor-
TIRES Standard Front . ............ 18x8.50-8
High-Flotation Rear (GT-12) ..... 26x12.00-12
High-Flotation Accessory (Field Installed) Rear
(GT-14) ...... 26x12.00-12 Traction Tire Tire
Pressure Front (Std. Tire) ... 6 to 16 psi (41
to 110 kPa) Rear . ..........5to 1O psi (34 to
69 kPa)
Type RH-10 (AM37129)
Spark Plug Gap ........0.035 in. (0.8890
mm) Breaker Point Gap ........ 0.020 in. (0.508
mm) Charging Capacity ................... 15 Amps
CAPACITIES Fuel Tank ....... , .. 4.5 U.S.
Gallons (17.034 I) Crankcase ........ , .. ,
... 6 U.S. Pints (2.838 I) Transmission
............ 11 U.S. Pints (5.17 I)
WEIGHT Curb .................. 975 lbs. (442.25
e
FUEL AND LUBRICANTS Fuel ............ Non-Leaded
or Regular Grade (85 Octane or Higher) Crankcase
.............. JD Torq-Gard Supreme (Summer-Above
32F) . . SAE 30 or Equivalent (Winter-Below
32F) SAE 5W-20 or Equivalent In Canada,
compliance with radio intederence regu- lations
certified. Replace spark plug with raaistor spark
plug only.
Inflation will vary with anachment used.
.
Litho in L/.S.A.
7
10 Genera/ 10-2 Specifications
Tractor, Hydrostatic - 400 SM-2103 (Jun-79)
TORQUE CHARTS Bolt Torque Chart AVERAGE
TIGHTENING TORQUE FOR BOLTS (BASED ON 85S OF
YIELO)
!
BOLT SIZE
A17B lb-ft
A17F lb-ft
Nm
lb-in
Nm
lb-In
Nm
1/4 72 6 8 120 10 13.5 168 4 19
5/16 156 IS 17.6 240 20 27 360 30 40.7
3/8 276 23 31.2 420 35 47.5 600 50 67.8
7/16 420 35 47.5 660 55 74.6 960 80 108.S
1/2 660 5S 74.6 1020 85 115.2 1440 120 162.7
9/16 900 75 101.7 1560 130 176.3 2100 175 237.3
5/8 1260 105 142.4 2040 170 230.5 2880 240 325.4
3/4 2220 185 250.8 3600 300 406.7 5100 425 576.2
7/8 1920 160 216.9 5340 445 8220 685 928.7
1 3000 250 339 8040 670 908.4 12360 1030 1396.5
1-1/8 3960 330 447.4 10920 910 1233.8 17520 1460 1979.S
1-1/4 5760 480 650.8 15000 1250 1694.8 24720 2060 2793
B grade bolts larger than 3/4 are sometimes
formed hot rather than cold, which accounts for
the lower mean tightening torque. Set Screw
Seating Torque Charts
inch-Pounds
Newton Dieters (Nm)
9 1.0
9 1.0
20 2.3
33 3.7
87 9.8
5/J6 165 18.6
3/8 290 32.8
7/16 430 48.6
1/2 620 70.1
9/16 620 70.1
5/8 1225 138.4
3/4 2125 240.1
Litho in U.S.A.
8
Tractor, Hydrostatic - 400 SM-2103 (Dec-T6)
General 10 Fuel and Lubricants 15-1
Group 15 FUEL AND LUBRICANTS
FUEL The engine included in this service manual
per- forms at peak efficiency when the
below-listed fuel recommendations are
followed CAUTION Do not fill gas tank when en-
d gine 1s running or hot. Do not emoke when
filling gas tank. Wipe dust and dirt from around
filler cap before re- moving it. Place cap in a
clean area.
JOHN DEERE TORO-GARD SUPREME ENGINE OIL JOHN DEERE TORO-GARD SUPREME ENGINE OIL JOHN DEERE TORO-GARD SUPREME ENGINE OIL JOHN DEERE TORO-GARD SUPREME ENGINE OIL
Air Temperature- Season Oil Viscosity 1/2-pint (0.M65-J) pop-top can (6 per carton) 1-quart 0.9463 1) can
Summer Above 32F (0C) SAE 30 AR63979 AR63218
Winter Below 32F (0 C) SAE 5W-20 AR63980 AR63228
IMPORTANT Do not permit dirt or other for- eign
matter to enter the fuel system because it may
cause hard starting, poor performance and engine
damage. Alwaye uee clean gasoline stor- age cans
and tunnels.
Some increase in oil consumption may be expect-
ed when SAE SW-20 oil is used. Check oil level
frequently.
Fill the gas tank with fresh, clean regular
grade gasoline having an octane rating ol 85 or
higher. We recommend non-leaded gasoline because
it reduces cylinder head deposits. Low-lead or
leaded regular grades are acceptable if the
octane rating is 85 or higher.
If oil other than Torq-Gard Supreme is used, it
must conform to the following specifications.
API Service CD/SE, CD/SD or SD MIL-L-46152 MIL-L-2
104C
DO NOT use premium, ethyl or white gasoline or
regular gasoline having an octane rating below
85. Never use special additives such as
carburetor claarers, sle-icers, or
moisture-removing Iquids in your gasoline.
As further assurance of quality, the oil should
be identified as suitable for API Service
Designation SD.
Transmission .............
John Deere All-Weather Hydrostatic Fluid
IMPORTANT Do not mix oil with gasoline.
LUBRICANTS Effective use of lubricating oils and
greases is per- haps the most important step
toward low upkeep cost, long tractor life, and
satisfactory service. Use only lubricants
specified in this section. Apply them at
intervals and according to the instructions in
the lubrication and periodic service
section. Engine Lubricating Oils We recommend
John Oeere Torq-Gard Supreme engine oil for use
in the engine crankcase. Torq- Gard Supreme
provides superior lubrication under all
conditions. NEVER PUT ADDITIVES IN THE
CRANKCASE. Torq-Gard Supreme oil was formulat- ed
to provide all the protection the engine needs.
Ad- ditives could reduce this protection rather
than help it.
Tractor Grease Fittings , .......... .. .John
Deere Multipurpose Lubricant SAE (Seasonal Grade)
Multipurpose-Type Grease
Litho in u.s.A.
9
10 General 15-2 Fuel and Lu6ricants
Tractor, Hydrostatic - 400 SM-2103 (Dec-76)
CAPACITIES
CHANGING ENGINE CRANKCASE OIL
Fuel Tank
. . . , . .... . 4.5 U.S. gal. (17.034 I)
Crankcase
6 U.S. pt. (2.838 I) (with filler - 7 U.S. pt.
(3.308 I)
Transmission
. Approx. 11 U.S. pt. (5.17 I)
SERVICE INTERVALS
Crankcase (Oil Change) Break-in , . , Regular . ,
, . , Dusty Conditions . Transmission Filter
Change Fluid Change
First 5 hours Every 50 hours Every 8 hours
... .....
100 hours 500 hours
ADipstick
Drain Cap or Drain Valve
rig. z-cngiug Crankcase Oil
Tractor Grease Fittings Spring and Fall CHECKING
ENGINE CRANKCASE OIL LEVEL
Park tractor on a level surface.
Stop engine and raise hood.
Remove dipstick (A), Fig. 2. On 400 Tractors
(Serial No. 30001-55000, remove drain cap (B).
Drain oil into a container. Replace drain cap
afler all oil is drained. On 400 Tractors (Serial
No. 55001 and Up) lurn drain valve (B)
counterclockwise and drain oil inlo a container.
Turn drain valve clockwise until snug after oil
has drained.
IMPORTANT Do not tighten drain valve too tight
with a wrench. Otherwise drain valve will be
damaged.
ADIpstlck
BSale Range
Fig. I -Checking Crankcase Oil Le vet
Park tractor on a level surface. Stop engine and
raise hood. Wipe dust and dirt from around
dipstick (A). Flemove dipstick (A). Fig. 1 Check
that oil level is within the safe ranpe (B) on
the dipstick when the dipstick is installed all
the way.
F ill cr ankca se with oil of the proper
viscosity through dipstick opening. See chart,
page 10-15-1. Fill crankcase until oil level is
within safe range on dipstick I see inset. Fig.
1), (6 U.S. pints l2.838 I I without filter 7
U.S. pints 13.308 I I with filter). Do not
overkill crankcase.
IMPORTANT Check dipstick reading before pouring
in the last 1/2 pint (0.2366 I). Fill only to
"SAFE" range on dipstick, (B, Fig. 1).
Overfilling can cause engine over-heating,
resulting in loss of power and permanent engine
damage.
Replace dipstick in oil fill tube.
Litho in U.S.A.
10
Tractor, Hydrostatic - 400 SM-2103 (Dec76)
Genera/ 10 Fuel and Lubricants 15-3
CHECKING TRANSMISSION FLUIO LEVEL 400 Tractors
(Serial No. 30,001-70,000)
CHANGING ENGINE OIL FILTER
Fig. 3- Zhang/ng Engine Oil Filter Drain engine
crankcase oil, see Fig. 2
Fig. 4-Cheching Transm/ss on Fluid Lavel !Se
aI No. s0,00 i 70.000) NOTE To check
transmission tluid level, park trac tor on a
level surface, leave engine running ai idle,
place hydrosta lie confrollever in
"neutral"position and sei parking brake. Remove
dipstick, Fig. 4 Check thal transmission Iluid
level is at midpoint ol "SAFE range on
dipstick. 400 Tractors (Serial No. 70,001-
Remove tractor right-hand sfde panel.
Turn filter, Fig. 3, counterclockwise lo emove
it. Discard old lilter.
Clean the filter adaptor. Apply a thin film of
clean Oil On the sealing ring of lhe new filter.
Turn new filter clockwise to install it.
II\4PORTANT The oil filter has a by-pass valve
which allows the oil to circulate should the
filter become plugged. Use onI y the correct Jo
hn Deere filter for replacement.
Use a box end wrench and exert light pressure to
seal filter. Do not over-9hten. Over-tightening
filter may damage lilter sealing ring. Replace
drain cap or lighten drain valve and fill
crankcase with oil of the proper viscosity. Fig.
2.
AFluid Level
Fill Plug
Fig. 5-Checking Transmission run (Serial No.
70.00 i - ) Park tractor on a level surface.
Place hydrostatic control lever in neutral"
position and sei parking brake. Leave tractor
engine running at idle speed. When required,
remove fill plug (B) Fig. 5, and add John Deere
All-Weather Hydrostatic Fluid or an equivalent
Type F" AutomotiveAutomatic Transmis- sion
Fluid. Add only enough to bring fluid up to level
(A) on sight tube. IMPORTANT Oo not overkill.
Li'tho in U.S.A.
11
Tractor, Hydrostatic - 400 SM-2103 (Dec-T6)
10 Genera/ 15-4 Fuel and Lu6ricants
CHANGING TRANSMISSION FLUID AND FILTER
Filling Transmission With Fluid 400 Tractors
(Serial No. 30,001-70,000) To 1iII, pour in only
4 quarts (3.80 I) of fluid. Start engine and
check fluid level on dipstick. Add fluid until
level is to the midpoint of the SAFE range on
dipstick.
IMPORTANT After changing fluid and filter and
before operating hydrostatic control lever, start
engine and move inner hydraulic control lever
back and forth several times. Observe that lift
sys- tem is operating before operating
hydrostatic con- trol lever. This insures that
the entire system is filled. 400 Tractors (Serial
No. f0,00I- ) To fifl, add fluid until visible in
sight tube. Start engine and check fluid level.
Add only enough fluid to bring fluid up to level
(A), Fig. 5, page 10-15-3, on sight lube.
AFilter
BDrain Plug
Fig. 6-Changing Transmission Fluid and Filter
Changing Transmission Filter (100 Hour
Intervals) Remove and discard old filter (A),
Fig. 6.
IMPORTANT After changing fluid and filter and
before operating hydrostatic control lever, start
engine and move inner hydraulic control lever
back and forth several times. Observe that lift
sys- tem is operating before operating
hydrostatic con- trol lever. This insures that
the entire system is filled. Do not overkill.
Moisten rubber gasket on new filter with clean
transmission fluid. Fill lilter with clean
transmission fluid prior to installation
Install filter, hand-tighten only. Change
transmission filter as shown above. Check
transmission fluid level, Fig, 4 or 5, and add
fluid as necessary. Changing Transmission Fluid
(500 Hour Intervals) Park tractor on a slightly
upward incline to drain the system. Remove
transmission dipstick. Remove drain plug (B).
Fig. 6. Drain all fluid into a container. Change
transmission filter as shown above. Fill
hydrostatic system with John Deere All-Weather
Hydrostatic Fluid or equivalent type 'F"
Automotive Automatic Transmission Fluid as
follows
Limo in U.S.A.
12
Tractor, Hydrostatic - 400 SM-2103 (Jun-79)
General 10 Fuel and Lubicants 15-5
LUBRICATING GREASE F)TTINGS Lubricate grease
fittings. Figs. 7. 8. 9, and 10, using a John
Oeere Pisto-Luber or hand grease gun. Wipe
fittings clean before and after lubrication. See
chart below for grease fi1ting locations.
Oty. Location
2 8rake Pedal Shaft (Fig. 7
2
2 Front Wheel Hubs (Fig. 8)
2 Front Axle SpinÖles (Fig. 8)
1 HydrauTic Lift Lever Shaft on 400 Tractor (Serial No. 30,001-80,000) (Fig. 9)
1 Steering Column (Fig. 10)
1 PTO Clutch Lever Shaft (Fig. IO)
Fig. 9-Lr/öricafing Hydrauhc Lift Lever Shall on
400 Tractor (Serial No. 30,001 80,000)
Fig, 7-Lubricaiing Brake Pedal Shaft
Fig. i 0-Lubricating Steering Column and PTO
Clutch Le ver SHAGT MO TE Oo not fubricale
steering column unless lhe assembly was repaired.
Steering column is luoricated a/ factory and does
not require periodic lubrication. Remove
righi-hand access panel to lubricate steering
column, Fig. 10. Fig. 8- Lu0ricaiing Front Wheel
Hubs and Axle Spindles
Litho in U.S.A.
13
General 40 Tuno-up an0 Adjustments 20-1
Tractor, Hydrostatic - 400 SM-2103 Jun-79)
Group 20 TUNE-UP AND ADJUSTMENTS PURPOSE OF
INSTRUCTIONS
,-gt
TraCtor Adjustment Tractor adiustmants are made
to assure that en- gine horsepower will be
utilized in the most efficient manner. A thorough
visual inspection of the complete tractor, as you
make the adjustments, will help in de- termining
any extra service required on the tractor.
This group is intended to provide a service
proce- dure for tractors that are running well.
Minor repairs and adjustments made in an orderly
fashion will im- prove the efficiency and
operation of the tractor.
Engine Tune-up Engine tune-up involves checking,
servicing and adjusting engine componentsincludin
g the ignition system, air intake system, fuel
and lubrication sys- tems.
Perform tractor adjustment in the following
order
1. Check transmission fluid.
Perform engine tune-up in the following order
2. Lubricate grease fittings.
1. Clean air intake and engine.
3. Check brake adjustment.
2. Check valve-to-tappet clearance (cold).
4. Adjusf hydrostatic linkage.
3. Check compression.
5. Adjust steering.
4. Check and adjust breaker points.
6. Test hydraulic system.
S. Check spark plug.
7. Check wiring.
6. Check and adjust timing.
8. Check belts and equipment.
7. Service crankcase breather.
9. Check tire pressure.
8. Adjust carburetor.
Tractor adjustment procedures are shown starting
on page fO-20-f3.
- Adjust governor linkage.
- Service air cleaner.
- Check and adjust engine oil pressure.
- Adjust PTO.
- Glean and check battery.
- Change oil and lilter.
- Engine tune-up procedures are shown starting on
page 10-20-2.
Litho in U.S.A.
14
TO General 20-2 Tune-up and Adjustments
Tractor, Hydrostatic - 400 SM-2103 (Jun-79)
ENGINE TUNE-UP
1. Clean Air Intake and Engine
NOTE. Air cleaner should be removed to perform
the rest of Ihe engine tune-up onfi/ it is
serviced and reinstalled, Step 10.
400 Tractor (Serial No. 30,001-80,000)
Aside Panel BPedestal Screens
COil Cooler DBottom Screen
Fig. 1 Cleaning Air Intake
AIntake Hose Heat Shie\d F 9
ESeal FElement
CWing Nut 1\r Cleaner Covar l'ving Air
Cleaner E/emsn/
Remove side panels (A), Fig Remove pedestal
screens (B) Clean oil cooler (C) with a soft
brush. Clean boltom screen (D).
Remove intake hose (A) from air cleaner cover
(D), Fig. 3. Remove wing nut (C), air cleaner
cover (D). seal (E), and element (F). Remove
intake hose (A) from heat shield (B).
AEngine
BCylinder Heed Shroude
F-iq. 2-Cle.ining Engine
Clean outside ol engine (A), Fig. 2 Remove
cylinder head shrouds (B). Clean area of engine
enclosed by shrouding Reinstall cylinder head
shrouds (B)
ASlotted Screws and Washers Map Screw and Lock
Washer -ig. d-Removing Air Cteanar Base
CBase DGasket
Remove four slotted screws and washers (A), Fig.
4.
Remove cap screw and washer (B). Remove base (C)
and gasket (D)
Litho in U S.A.
15
Tractor, Hydrostatic - 4D0 SM-2103 (Run-79)
General IO Tune-up and Adjustments 20-3 Measure
valve-to-tappet clearance (A) on No. 1 cylinder
with a flat feeler gauge. Fig. 6. Intake
valve-to-tappet clearance should be 0.008
to 0.010 inch (0.20 to 0.25 mm). Exhaust
valve-to-tappet clearance should be 0.017 to
0.020 inch (0.43 to 0.50 mm). To adjust, hold
flal area of tappet (B) with an open- end wrench.
Turn adjusting screw (C) with an open- end wrench
into or out of tappet until proper clearance is
reached. Repeat procedure for No. 2 (right-hand)
piston. Reinstall valve covers and gaskets.
400 Tractor (Serial No. 80,00t -
)
3. Check Compression NOTE. Compression should be
checked while en- gine is warm. Run engine for
several minutes at lull ihrotlle. Shut engine
off. Remove Doih spark plugs. Oo noi r8instaII
spark p/ugs until you have checked com- pression,
breaker points and spark plug.
AAir Filter E\ement BWing Nul
CCover OAtr Cleaner 6ase
Fig. 5-Removing Air C/eaner
Remove wing nut (B), cover (C), air filter
element (A), and air cleaner base (D), Fip. 5 2.
Check Valve-to-Tappet Clearance NOTE.
Valve-la-lappel clearance must be checked when
engine i's cold, II engine is warm, check valve-
to-tappei c/earance adler tune-up procedure is
com - p/eted and engine has cooled.
ACompression Gauge
Spark Plug Hoie
Fig. 7-Testing Compression
Set throttle and choke in wide-open position.
Check each cylinder several times. Place JDM-59
compression gauge (A), Fig. 7, in spark plug
Stole (B). Hold key switch in START" position
for several seconos and observe the com- pression
gauge reading Consistent readings of 110 to 120
psi indicate good compression. Low readings
indicate a blown head gasket, warped cylinder
head, worn piston rings, leaky va1ves, incorrect
valve-to-tappet clearance or piston damage.
AValveto-Tappet Clearance BFlat Area of Tappet
CAdjueting Screw
Fig. 6-Checking Valve-to- Tappet Cteardnce Remove
valve covers and gaskets (not illustrated).
ROtate engine by hand in directiOn of normal
rotation until No. 1 piston (left-hand) is
top-dead-center on compression stroke, Both
valves will be closed in this position.
Litho in U.S.A.
16
10 General 20-4 Tune-up and Adjustments
Tractor. Hydrostatic - 400 SM-2103 (Jun-79)
4. Check and Adjust Breaker Points
ABreaker Point Lead Slotted Screw and Lock Wesher
CBreaker Point Assembly
AFlat Fealer Gauga Gap Adjuatlng Screw Fig.
8-Checking and Adjusting Breaker Poini Gap
Fig. 9- Replacing Breaker Pons
Disconnect bleaker point lead (A), Fig. 9
Remove breaker point cover (not illustrated).
Remove two slotted screws and lock washers (B)
Rotafe flywheel manually in direction of normal
ro- tation until points are fully open.
Remove breaker point assembly IC)
Measure Dreaker point gap with a flat leeler
gauge (A), Fig. 8. Gap should be 0.020 inch
(0.508 mm) when fully open
Install new breaker point assembly (C).
Install two slotted screws and lock washers (B)
Tighten screws.
To adjust, loosen point gap adjusting screw (B).
AdjUst gap to 0.020 inch (0.508 mm) Securely
tighten gap ad\usting scew (B).
Install breaker point lead A)
Adtust breaker points. Fig. 8
Check condition of breaker points. Replace badly
burned or pitted breaker points, Fig. g. If
points have been dressed down wilh a point file
as a temporary lield fix, replace the points. If
po nls ar8 tXidized. rub a piece of coarse cloth
across surfaces. Clean dirty or oily points with
cloth, but make sure no particles of lint are
left between surfaces.
Install breaker point cov9r. Make sure seal on
breaker point lead is seated in breaker point
cover when installed.
Lilho in U.S.A.
17
flFäcfor, Hydrostatic - 400 (Jun-79)
General IO
d Ad
5. Check Spark plug
Cap Scæ'le and Lock washer Throttle cable BraCket
CSmall hale Expansion Plug
AFI8t Feel6r Gauge
Wlre Gauge
Remove cap screw and lock washer (A), Fig.
1.
Move th ottle Cable bracket (B) out of way. bul
do non
stretch cable
Analyse Spark plug (reter to Spark Plug Analysis
in
SeCtiOn 40),
Enl8rge email holy fC) with Remote shavings
from engine. Remove expansion plLig (D/
3gt8ùnch dril bit.
Rep/ace spark plug if I' gçgäfy
Regap
lLîg tO 0.035-inch(0.889 mm). Bend only the
outer electrOdB when setting gäp. A wire gauge
(B) should be used, because a plain, flat feefer
gauge (A) CQnnotaccuratefy measure fhe trua width
of ffe spam AlWays use a new spark plug gasket
when replacing spark plug.
/nsta/l both spark _at_fU_at_S. TO7que spark pi
to 2'2
ft-lbs. (29.8s Nuj.
Connect spark plug wire to each plUg,
6. Check and Adjust Timing f\IOTP Some engines
were bui
ReQtifier- Reguletor
B SP Timing Matk
hole ihal was lœ seui. shawn, Fig. 11.
Enlarpe
Uemove rectifier-regulator (A). Fip Rotafe
flywheet manuaTly u i se is visable
2. tminp mark (B)
Chaîk The rap of the projectionbetween S" ano
"p "
Reinstall recfifier-regulador (A)
Make sUre rectifier-
regulapor ü/\d all Conf ecrio/1s arg tigtt.
t.itho in tt. 5. .
18
10 General 20-6 Tune-up and Adi stmenis Several
types of timing fights are available. Follow
manufacturer's instructions for the type used.
The procedure below is for timing light JDM-60.
Tractor, Hydrostatic - 400 SM 2J 03 Jun-79
Governor Fig. f4-Adjusting Ti'ming
Loosen two cap screws (A), Fig, 14.
A11mlng ftole Tlmlng Light Hola
CDM-60 Tlming Llght
Rotate governor (B) clockwise or counterclockwise
until chalk mark is centered in timing hole as
the timing light IlaShes.
Fig. I3-Cteching Timing
Connect red timing light lead to positive ( )
battery ctbl!
Tighten two cap screws (A)
Connect black timing light lead to negative ( -
Daf- tery cable.
Recheck timing, Fig. T3, after cap screws have
Deen tightened
Install timing light connector over either spark
plug wire. Startengine and run at idle speed
(1700-1900 rpm). Aim timing light (C) through
timing light hole (B), Fig. The chalk mark on
the flywheel (see Fig. 12), should show in the
center of the timing hole (A), as the timing
light flashes. If timing is off, adjust as Shown
in Fig. 14. Disconnect timing light from battery
and spark plug
A6ap Screw and Lock Washer Throttle Cable Bracket
Small Hole DExpansion Plug
Fig. IS-Installing fhroitla Ca0Ie
8racket Install expansion plug (D), Fig.
15. Move throttle cable bracket (B) into correct
position. Install cap screw and lock washer (A).
19
Tractor, Hydrostatic - 400 SM-2103 (Jun-79)
General 10 June-up and Adjustments 20-7
7. Service Crankshaft Breather
Stamp Hoee
breather Housing DGasket
ECsp Screw and Lock Waaher
A Ciamp BHose
CBreather Housing DGasket
ECap Screw and Lock Washer
Fig. i 8-InstaIling Crankcase Breather
Fig. 16- Removing Crankcase Breather
Install gasket (D) and breather housing (C). Fig.
18.
Loosen clamp (A), Fig. 16. Remove hose (B) from
crankcase breather housing IC)
Install two cap screws and lock washers (E).
Tighten cap screws.
Remove two cap screws and lock washers (E)
Install hose (B) on breather housing C)
Flemove breather housing IC and gasket (D)
Secure hose with clamp (A).
If breather valve, Fig. \7, is stuck, it can be
cleaned with solvent to remove dirt and grime. If
solvent does not release valve, pry the value out
of housing. Press new valve into housing until it
is flush with housing.
Litho in U.S.A.
20
Suggest If the above button click is invalid.
Please download this document first, and then
click the above link to download the complete
manual. Thank you so much for reading
21
10 Genera/ 'TO-8 Tune-up and Adjustments
8. Adjust Carburetor Initial Adjustment
Slowly turn mixture needle open past the point of
smoothest operation until the engine just begins
to run rough (over-rich mixture). Turn the
mixture needle closed until it is positioned
half-way between lean mixture and over-rich
mixture. This mixture should be rich enough for
best performance under load.
Asolenold Laad Bdam Nut
Anti-olaaallng Solenoid DBrackat
Close high-speed mixture needle (A). Fig. 19,
finger-tight then. open 2 full turns. Close idle
mixture
needle (B) finger-tight then, open 1-1/4 tufns.
This initial adjustment will permit the engine to
be started and warmed-up before making final
adjustment.
Check engine idle speed with a tachometer. It
should be 1700-1900 rpm.
Final Adjustment
If engine idle speed is incorrect, shut off
tractor. Disconnect solenoid lead (A), Fig. 21.
Loosen jam nut (B). Turn anti-dieeeling solenoid
(C) into bracket to in- crease idle speed or away
mom bracket to decrease idle speed. Install
solenoid lead (A). Slart tractor and run engine
at idle speed. Check engine speed (1700-1900
rpm). Repeat procedure if necessary untit idle
speed is correct.
Fig. 0-Adjusting HP Speed
Tighten jam nut (B).
Run engine with throttle lever in FAST" position
(3400 to 3500 rpm). Allow engine to warm up. Turn
heh-peed mixture needle, Fig. 20, closed until
engine starte to lose speed (lean mixture). Note
position of the mixture naedle.
Litho in U.S.A.
22
https//www.ebooklibonline.com Hello dear
friend! Thank you very much for reading. Enter
the link into your browser. The full manual is
available for immediate download. https//www.ebo
oklibonline.com
Recommended
