
LED Backlit Panel - KrutLED Wholeslaler PowerPoint PPT Presentation
Title: LED Backlit Panel - KrutLED Wholeslaler
1
Article No Version Prepared By Checked By
06.23
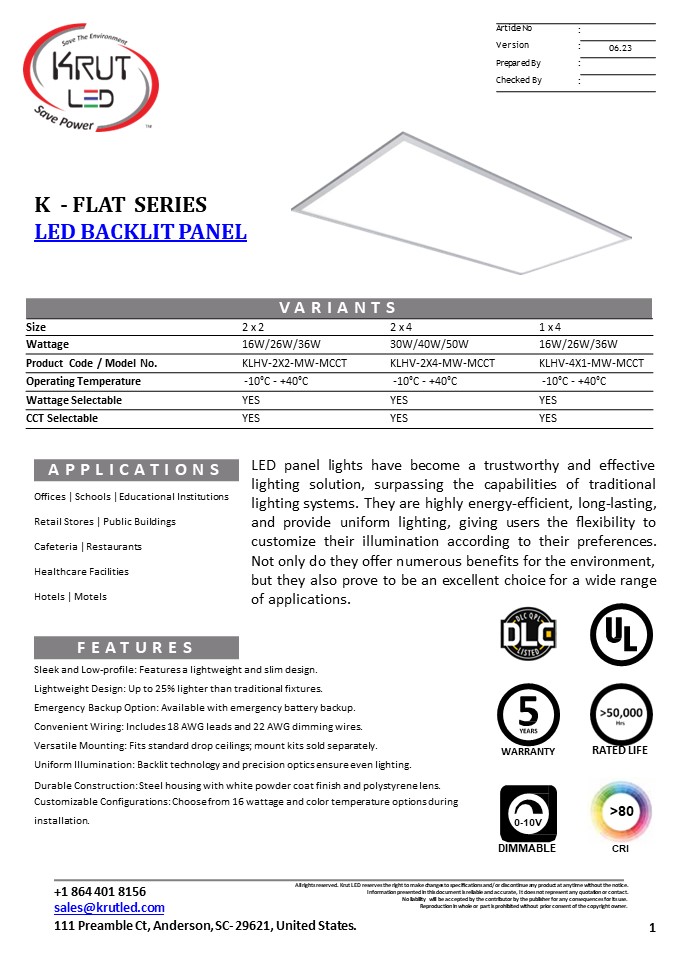
K - FLAT SERIES LED BACKLIT PANEL
V A R I A N T S
Size 2 x 2 2 x 4 1 x 4
Wattage 16W/26W/36W 30W/40W/50W 16W/26W/36W
Product Code / Model No. KLHV-2X2-MW-MCCT KLHV-2X4-MW-MCCT KLHV-4X1-MW-MCCT
Operating Temperature -10C - 40C -10C - 40C -10C - 40C
Wattage Selectable YES YES YES
CCT Selectable YES YES YES
LED panel lights have become a trustworthy and
e?ective lighting solution, surpassing the
capabilities of traditional lighting systems.
They are highly energy-efficient, long-lasting,
and provide uniform lighting, giving users the
?exibility to customize their illumination
according to their preferences. Not only do they
o?er numerous benefits for the environment, but
they also prove to be an excellent choice for a
wide range of applications.
A P P L I C A T I O N S
Offices Schools Educational Institutions
Retail Stores Public Buildings
Cafeteria Restaurants
Healthcare Facilities
Hotels Motels
F E A T U R E S
Sleek and Low-profile Features a lightweight and
slim design. Lightweight Design Up to 25
lighter than traditional fixtures. Emergency
Backup Option Available with emergency battery
backup. Convenient Wiring Includes 18 AWG leads
and 22 AWG dimming wires.
Versatile Mounting Fits standard drop ceilings
mount kits sold separately. Uniform
Illumination Backlit technology and precision
optics ensure even lighting. Durable
Construction Steel housing with white powder
coat finish and polystyrene lens.
RATED LIFE
WARRANTY
Customizable Configurations Choose from 16
wattage and color temperature options during
installation.
gt80
0-10V
DIMMABLE
CRI
1 864 401 8156 sales_at_krutled.com
2
Article No Version Prepared By Checked By
06.23
T E C H S P E C S
Variants 2 x 2 1 x 4 2 x 4
Product Wattage 16W/26W/36W 30W/40W/50W
Input Voltage Range 100-277 VAC 100-277 VAC
Input Frequency 50/60 Hz 50/60 Hz
Power Factor gt 0.9 gt 0.9
THDA lt 20 lt 20
Dimming 0-10 V 0-10 V
Minimum Dimming 0 0
Driver Type (CC/CV) CC CC
Driver Efficiency gt 85 gt 85
Surge Projection (CM) 4 KV 4 KV
Surge Projection (DM) 2 KV 2 KV
Driver Output Voltage 36V 36V
Driver Output Current 450mA / 700mA / 950mA 850mA / 950mA / 1250mA
Driver Output Ripple Current lt 30 lt 30
Driver Class Class 2 Class 2
Variants O P T I C A L P A R A M E T 2 x 2 1 x 4 E R S 2 x 4
Total Lumens (Min) 1805lm/2912lm/4066lm 3400 lm / 4520 lm / 5500 lm
Product Efficacy (Min) 115 lm/W 115 lm/W
Product CCT 3500K/4000K/5000K 3500K/4000K/5000K
CCT Range 3465K 169 / 3985K 219 / 5028K 283 3465K 169 / 3985K 219 / 5028K 283
Product CRI gt 80 Ra gt 80 Ra
LED Package 2835 - 1W 2835 - 1W
Lens Material (If Any) PMMA PMMA
Product Beam Angle 110 110
Di?user Material Polystyrene Polystyrene
Di?user Transmission 85 85
1 864 401 8156 sales_at_krutled.com
3
Article No Version Prepared By Checked By
06.23
D I M E N S I O N S
4x2 1213 47.756"
22 603 23.740"
35 1.378" 8.44 0.332"
35 1.378" 8.4 0.331"
37.7 1.484"
4x1 1213 47.756"
37.7 1.484"
20 0.787"
20 0.787"
35 1.378" 8.4 0.331"
35 1.378"
20 0.787"
603 23.740"
603 23.740"
303 11.929"
35 1.378"
35 1.378"
34.3 1.350"
M E C H A N I C A L M E C H A N I C A L P A R A M E T E R S P A R A M E T E R S
Size 2 x 2 2 x 2 2 x 4 2 x 4 1 x 4
Product Overall Dimension (in MM) Product Overall Dimension (in MM) 603 X 603 X 40 603 X 603 X 40 1213 X 603 X 40 1213 X 303 X 40
Housing Material Housing Material Formed Sheet-steel Formed Sheet-steel Formed Sheet-steel Formed Sheet-steel
Frame Material Frame Material Aluminium Extrusion Aluminium Extrusion Aluminium Extrusion Aluminium Extrusion
Housing Color (RAL Shade) Housing Color (RAL Shade) Close to RAL9003 Close to RAL9003 Close to RAL9003 Close to RAL9003
Frame Color (RAL Shade) Frame Color (RAL Shade) Close to RAL9003 Close to RAL9003 Close to RAL9003 Close to RAL9003
Powder Coating Type (EP/PP) Powder Coating Type (EP/PP) EP EP EP EP
IP Protection IP Protection 20 20 20 20
IK Protection IK Protection 3 3 3 3
Hardware Material Hardware Material Plated Steel Plated Steel Plated Steel Plated Steel
Product Net Weight Product Net Weight 4.40 lbs 4.40 lbs 7.94 lbs 4.40 lbs
P A C K A G I N G P A C K A G I N G P A C K A G I N G P A C K A G I N G P A C K A G I N G P A C K A G I N G
Size Product Dim .(in) Product Gross Weight Master Carton Dim. (in) Net Weight Case Lot
2 x 2 23.74 x 23.74 x 1.57 4.40 lbs 25.11 x 3.74 x 25.40 1.98 lbs 2
2 x 4 47.75 x 23.74 x 1.57 7.94 lbs 49.53 x 3.74 x 25.40 3.97 lbs 2
1 x 4 47.75 x 11.93 x 1.57 4.40 lbs 49.53 x 3.74 x 13.58 2.31 lbs 2
S H I P P I N G S H I P P I N G S H I P P I N G S H I P P I N G S H I P P I N G
Size Master Carton Dim. (in) Product Gross Weight 40 Feet HQ Container (Case) Per Pallet (Case)
2 x 2 25.11 x 3.74 x 25.40 4.40 lbs 1860 60
2 x 4 49.53 x 3.74 x 25.40 7.94 lbs 951 30
1 x 4 49.53 x 3.74 x 13.58 4.40 lbs 1771 60
1 864 401 8156 sales_at_krutled.com
4
Article No Version Prepared By Checked By
06.23
I N S T A L L A T I O N G U I D E
- Remove the Ceiling Panel
- a. Remove the grid tile from the ceiling
- Connect the wires
- Lift the fixture to the ceiling
- Follow the steps as below
- Complete the installation
- Slid the fixture into the ceiling grid
- Attach earthquake clips by bending over the grid
rails - Restore power to the fixture
- Open the junction box
- a. Unscrew and remove the junction box cover (1)
from the fixture
- Connect the dimming wires
- Connect the purple wire from the fixture to the
purple (DIM) supply wire - Connect the gray wire from the fixture to the
gray (DIM-) supply wire - Secure the two connections using the remaining
two supplied wire nuts (AA). - Wrap the two wire connections with electrical
tape for a more secure - connection (electrical tape not included)
AA
1
- Connect The supply wires
- Connect the green ground wire from the fixture
to the supply ground wire - Connect the white wire from the fixture to the
supply white wire (neutral wire) - Connect the black wire from the fixture to the
supply black wire (live wire) - Secure the three connections using
- three of the supplied wire nuts (AA).
- Wrap the three wire connections with electrical
tape for a more secure connection (electrical
tape not included)
- Reinstall the junction box cover
- Position the wires back inside the junction box
- Reinstall the junction box cover (1), Secure
with screw
1
AA
1 864 401 8156 sales_at_krutled.com
Recommended
