
Shush Liner Acoustic Wall Panels PowerPoint PPT Presentation
Title: Shush Liner Acoustic Wall Panels
1
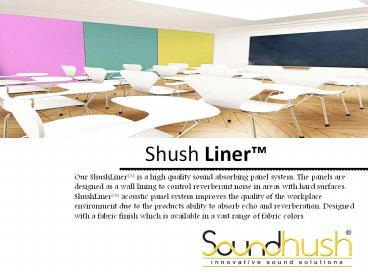
Shush Liner
Our ShushLiner is a high quality sound absorbing
panel system. The panels are designed as a wall
lining to control reverberant noise in areas with
hard surfaces. ShushLiner acoustic panel system
improves the quality of the workplace environment
due to the products ability to absorb echo and
reverberation. Designed with a fabric finish
which is available in a vast range of fabric
colors.
2
What is ShushLiner?
Ideal for any internal environment where first
impressions count and noise management enhances
the quality of space Designed to transform any
area into a vehicle for creating the perfect
impression. ShushLiner acoustic wall panels are
available in standard size panels and can be
manufactured in customized sizes to meet your
requirement.
ShushLiner acoustic wall panels offer a fabric
faced panel solution for areas where there is an
echo and reverberation problem. The acoustic wall
panels are extensively used in schools, offices,
restaurants, studios, sports and community halls
and meeting rooms. The list is endless. ShushLiner
panels perform on several fronts. As well as
solving your acoustic problem, they also come to
you pre-decorated to offer a tasteful level of
decoration by injecting colour and texture into
your desired setting.
3
ADVANTAGES OF SHUSHLINER Outstanding sound
absorption performance Class A and Class C
Over 100 standard fabric colors available High
content of recyclable material Easy
installation method Very quick availability
The ShushLiner acoustic wall panels can change
the aesthetics of a room as well as making it
acoustically correct. We offer a wide variety of
fabric colours which come in both standard and
superior fabric finishes. Clients are able to
select a fabric of their own choice. Should this
be the chosen option a small sample of the fabric
would be required to check suitability. ShushLiner
is applied to the wall with impaling clips and
ShushBond contact adhesive.
4
Technical Acoustic Performance
5
ShushLiner Bespoke System
ShushLiner Bespoke system allows for a secure
installation of ShushLiner panels without the
added aesthetic of visible trims. Instead, each
panel is custom manufactured to the size required
and the fabric is wrapped around all 4 edges. The
panel is simply bonded to the wall by using our
impaling clips and ShushBond adhesive.
http//www.soundhush.com/
6
Our impaling clips ShushBond contact adhesive
make light work of installations - Whether your
applying panels to concrete, masonry, wood,
plaster, or metal. Our Impaling clips are
available in 2 different depths to accommodate
both panel thicknesses. The correct clips
quantities will be included with your order,
whatever the thickness. Standard Sizes (25mm
or 40mm thickness) 1200 x 900mm
1200 x 2100mm 1200 x 1200mm
1200 x 2400mm 1200 x 1800mm
1200 x 2700mm Due to the directional weave in
our fabrics, it is essential that the height
width dimension of each panel be stated when
ordering Dimensional tolerance of panels /- 4mm.
We recommend using the following number of
impaling clips for the appropriate panel sizes.
ShushLiner Bespoke System Components
7
Installation
Ensure all wall surfaces to which the panel will
be applied to are clean and dry. Panels can be
fixed to most surfaces including concrete,
plasterboard and block work providing they are
solid. Wallpaper should be removed. Gloss paint
roughened. Emulsion paint brushed with a stiff
brush.
http//www.soundhush.com/products/acoustic-wall-pa
nels/
8
(No Transcript)
9
Step 2
Step 3
After waiting for the adhesive to dry (2-5
minutes at 23C) carefully align the panel to the
marked area and push gently - allowing the clip
spikes to bite into the panel. Once confident
with the panel positioning, press firmly over the
entirity of the surface and ensure maximum
contact has been made with the wall.
Spray ShushBond contact adhesive vertically onto
the panels reverse surface and horizontally onto
the desired installation area. Be sure to spray
over the clips with hushBond. !!! ShushBond
should be applied to 100 of the surface area on
both surfaces !!
Note SoundHush Ltd will not accept any liability
for the loss or damage that may occur of any kind
which is outside of our control. We strongly
instruct to make sure the product suitability is
confirmed by doing your own tests. Panels MUST be
checked for colour shading differences, flaws,
defects or damage prior to installation. Once
installation has been commenced, the panels are
deemed to have arrived in perfect condition any
of the above reported after installation will not
be covered by your warranty
10
For More Information Contact US
- Soundhush Ltd
- Unit 2, Warren Barn Farm
- Little Milton
- Oxfordshire
- OX44 7PR
- United Kingdom
- Telephone 01844 27 88 88
- info_at_soundhush.com
http//www.soundhush.com/products/acoustic-wall-pa
nels/
Recommended
