
Remove Simple Background In Photoshop: Step-by-Step PowerPoint PPT Presentation
Title: Remove Simple Background In Photoshop: Step-by-Step
1
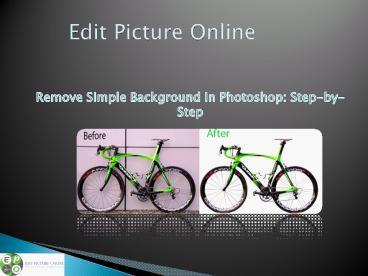
Edit Picture Online
Remove Simple Background In Photoshop
Step-by-Step
2
Background Remove
Step1. Open in Photoshop photo editor- Open the
picture that you wish to edit in the Photoshop
elements. Step2. Route to the Layers window-
This can be easily found under the Windows menu.
Most of the unedited images have a single layer
called the Background. Right click on this gt
select Layer from Background. This step would
open up a New Layer window. Without changing
anything, click OK, this would transform the
Background layer to Layer 0, unlocking the
image for further edits.
3
Clipping Path Service
Step3. Magic Eraser Tool- Click and hold the
Eraser Tool icon to open the Eraser Tool menu.
Select the Magic Eraser Tool from the
options. Step4. Modify Magic Eraser settings-
After selecting Magic Eraser, adjust its
settings like this Set Tolerance to somewhere
between 20 and30. Set Opacity to 100
percent. Check both Contiguous and
Anti-aliasing boxes.
4
Cut out Image Background
Step5. Remove the background- Simply click on
the background and Magic Eraser will remove the
selected colour and the related hues in case of
gradient backgrounds (like in the picture above),
turning it into a transparent background.
Step6. Minor corrections- Zoom into your
picture and make small corrections (like in
between the twigs, in reference to the picture
above) with Eraser Tool.
5
Image Retouch Service
Step7. Placing object on a separate Layer- Use
Lasso Tool from the Tool Box to draw a rough
outline around your object. Now press
CtrlShiftJ to create a New Layer via Cut.
This would place your object on a separate Layer
from the old background. You can now delete Layer
0. Step8. Saving the changes- Press CtrlS or
choose Save option in the File menu to save your
image. This object on a transparent background
can now be overlaid on any existing image.
6
Contact Us
U.S.A Office 2637 E Atlantic Blvd 28492
Pompano Beach , FL 33062 U.S.A Skype
editpictureonline.com Phone No 1 954 246
0960 info_at_editpictureonline.com http//editpictu
reonline.com
Bangladesh Office House-18, Road-02, Block-D,
Mirpur-01, , Dhaka , 1216 Bangladesh Phone No
8801719537896 Skype editpictureonline.com
info_at_editpictureonline.com http//editpictureon
line.com
Germany Office Regensburg liebhart strasse
-33 , 93053, Germany. 353 1 436 9003 Skype
editpictureonline.com info_at_editpictureonline.com
http//editpictureonline.com
Recommended
