
Sea of Indolence Lost Ark – Abyss Dungeon Guide PowerPoint PPT Presentation
Title: Sea of Indolence Lost Ark – Abyss Dungeon Guide
1
Sea of Indolence Lost Ark Abyss Dungeon Guide
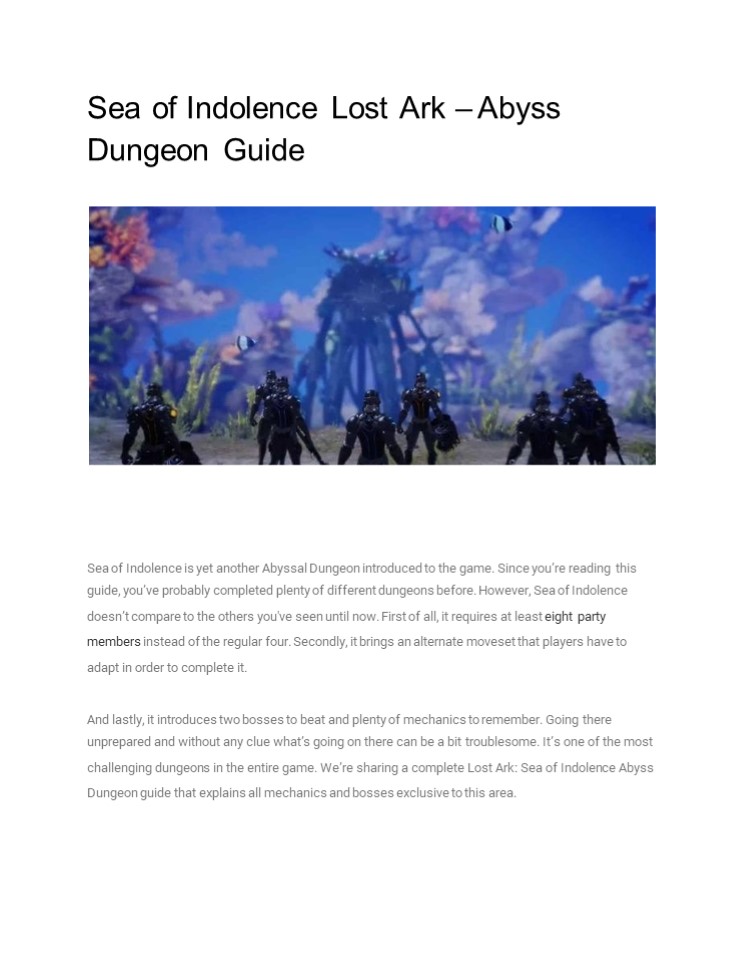
Sea of Indolence is yet another Abyssal Dungeon
introduced to the game. Since youre reading
this guide, youve probably completed plenty of
different dungeons before. However, Sea of
Indolence doesnt compare to the others you've
seen until now. First of all, it requires at
least eight party members instead of the regular
four. Secondly, it brings an alternate moveset
that players have to adapt in order to complete
it. And lastly, it introduces two bosses to
beat and plenty of mechanics to remember. Going
there unprepared and without any clue whats
going on there can be a bit troublesome. Its one
of the most challenging dungeons in the entire
game. Were sharing a complete Lost Ark Sea of
Indolence Abyss Dungeon guide that explains all
mechanics and bosses exclusive to this area.
2
- For more Lost Ark tips, make sure to check out
MMOPixel, a trustworthy MMORPG gold shop. If you
need to buy gold, here has cheap Lost Ark Gold
for sale. - Sea of Indolence Abyss Dungeon Preparations
- Sea of Indolence is the third Tier 2 Abyssal
Dungeon. Since its a late-game area, there are
plenty of requirements to ful?ll before entering
this area. - You and your party members must have at least 960
Item Level. - Its the ?rst dungeon that requires eight people.
- Take a Paladin, Gunlancer, or Soul?st with you.
Paladin will clear the damage stack effects by
using the Holy Protection purify tripod.
Souls?sts and Gunlancers share a similar ability
with the right selection of skills and tripods. - Bring some Elemental HP Potions as they can be
used seven times instead of ?ve. They also
respawn a few seconds after you consume them. - Dark Grenades lower the last bosss defense by
20 for ten seconds. Use them multiple times to
make this ?ght a bit shorter. - Use Grudge and Spirit Absorption engravings.
Part One Shankrima Strategy Path and First Boss
3
The ?rst section of Sea of Indolence Abyssal
Dungeon is another mob-clearing area. However,
it features a new system where players ?ght
underwater in a specially-built suit. As you
delve deeper, the mob swarm will increase, but
its nothing you should be afraid of. Its
somewhat repetitive and overly long. Its the
best opportunity to learn new skills coming from
these special suits. Youll spend some time here
before moving to the next area.
4
First Boss - Deep Sea Orboros
Orboros is the gatekeeper protecting the sacred
place and the next part of the dungeon. Your gear
or profession wont matter much here since youll
be limited to the weapon tied to your scuba gear.
It doesnt matter much, though, since the ?ght
is incredibly basic. Orboros looks like a
three-headed dragon or hydra with plenty of
attacks that arent hard to dodge. You will
recognize its attacks by the red color on the
ground. It will show how much area the attack
will cover when launched. Simply move out of the
way, and youll be ?ne. Watch for his tail
swipes, as they can deal solid damage. He also
has one mechanic you should be aware of and
utilize against him.
5
Mini-Boss Shark Creature
In the middle of the ?ght, Orboros will spawn a
shark summon. He doesnt have any special
attacks hes just a large mob with a lot of hp.
Once he spawns, everyone should immediately
switch to killing him instead. Hes not bu?ng
Orboros in any way, and taking him out ?rst is
highly bene?cial for your team. Upon killing
him, your team will receive a massive damage buff
that will quickly eliminate Orboros remaining
health bars. Deep Sea Orboros
Abilities Orboros is the ?rst main boss in this
dungeon, but you can quickly die if you
underestimate him. He has a variety of his own
attacks and AoE spells. Heres a table showing
them all. Attack Name Description
6
Lightning Orbs Blue Lightning Orbs are summoned around the arena from time to time and are present throughout the three Dungeons of the Gate of Paradise. They explode and leave a damaging ?eld behind if they aren't destroyed beforehand.
Water Blast Orboros' three heads spray a cone of high-pressure water in three directions. These waves deal on-hit damage and push players back a decent amount.
Poison Field Summons The Boss summons a myriad of small circular red telegraphs that ?ll almost immediately. When ?lled, they explode with purple poison, dealing damage. This attack can last a while, and because they're staggered to explode at different increments, it takes players by surprise the most.
Poisonous Auras Orboros summons a Poisonous Aura that deals constant damage to any players standing in it. It lasts long enough to tear through the health of anyone ignoring it.
7
Part Two More Monsters and Second Boss
After defeating Orboros, you and your team will
be blown away from your wetsuits. Now you can
play the rest of the Sea of Indolence using your
regular moveset. This introduces an Oxygen
Mechanic, showing the amount of oxygen in the
form of a Breath Circle. Always keep an eye on
the oxygen meter and its re?ll spots on the
mini-map. Otherwise, youll start losing hp if
you wont re?ll the oxygen. Once again, youll
have to ?ght your way through the mob-clearing
area. It takes a while, but this time it takes
place in one small area, and enemies will come
in waves. After dealing with them, its time to
deal with the second boss.
Second Boss Indolence Guardian Akam
8
Akam is the ?nal boss of this area, the immensely
tall monster that you may know from
Feiton questline. However, this time, youre
going to ?ght his underwater sibling. The ?ght
consists of two phases. Fighting vs. Akam is
quite different because his legs will break down
after losing a hefty amount of hp. Pay
attention to his Wipe mechanic in the form of
Deadly Shockwave. There are also yellow
telegraph attacks that deal high damage and
quickly deplete your oxygen meter. Youll
generally be safe as long as you stay out of red
and yellow circles. All of his regular abilities
are explained further down, but its worth
describing in detail some crucial mechanics he
possesses.
9
Unique Mechanic Deadly Shockwave
A few times throughout the ?ght, Akam slams both
hands down, creating a wide, red area with
a small safe zone appearing on a random party
member. The entire party needs to run to the
golden circle quickly. This attack can even
one-shot everyone outside the safe spot and apply
Akams Petrify, making it the most irritating
mechanic. He can also perform it in his second
phase, where hes missing his legs.
10
Unique Mechanic Yellow Telegraphs
Attacks with a yellow telegraph, apart from
dealing damage, will also deplete your oxygen.
Its not very deadly, but if you ?nd yourself out
of oxygen mid-?ght, you must search for oxygen
bubbles instead of ?ghting.
11
Unique Mechanic Petrification
Any attack from Akam will place a stack on you.
Upon reaching four stacks, it will apply a stun
on you. The only way to break out of it is to ask
your party member for help. The purple bar on top
of your character will show you how many times
you need to get hit to free yourself from being
stunned. Tip Use Panaceas to prevent stun upon
reaching three stacks. Indolence Sentinel Akam
Abilities Akam has eight different types of
regular attacks. Learning them the hard way is
not very convenient, so better take a look at
all of his abilities described below.
12
Attack Name Description
Back-Kick The boss stomps slightly in front of itself before sweeping its leg straight into a back kick. After a short interval, the water trail left behind by this kick then explodes, knocking players up and applying more of the Petrify Debuff.
Stomp The Guardian makes a large stomping attack in front of itself and then creates a red telegraph indicating its range. Go under his legs as its the only safe zone.
Full-Circle Stomp Akam stomps four times in a circular fashion, creating large AoEs around each Stomp that deal damage and apply Petrify stacks.
Petri?cation Beam While standing straight up, Akam creates a blue circle on the ground, instantly applying Petri?cation debuff to anyone inside it. He then moves the spotlight in a horizontal path, catching anyone who went to free his allies.
Charging Petri?cation Beam Second Phase Akam will dash backward and charge forward using its Petrifcation Beam in a wide cone in front of it. Any player whos not at Akam's side will be Petri?ed during this charge.
Multi-Hand Slam Second Phase Akam circularly slams his hands around four times. These rotations create shockwave circles with a safe zone protecting anyone from being hit.
13
O2 Draining Orbs Second Phase The Boss summons a variety of Red Orbs around the arena. These Red Orbs put a yellow conical telegraph in front of them that sends out a shockwave, dealing moderate damage and draining the O2 meter substantially for anyone hit.
Underwater Lightning Second Phase Akam summons blue lightning at random locations around the arena. These lightning bolts create a small circular environmental hazard before they strike, leaving a brief hazard after as well.
Conclusion Sea of Indolence is one of few
Abyssal Dungeons available in the game. After
beating Akam, youll be able to enter Tranquil
Karkosa and Alarics Sanctuary. We hope with our
Abyssal Dungeon guide, you and your teammates
can complete it without breaking a sweat. In the
meantime, check other Lost Ark guides available
at MMOPIXEL! Source https//www.mmopixel.com/n
ews/lost-ark-pirate-coins-see-how-to-gather-as-muc
h-as-you-can.ht ml
Recommended
