
Basic Map and Compass Skills PowerPoint PPT Presentation
1 / 25
Title: Basic Map and Compass Skills
1
Basic Map andCompass Skills
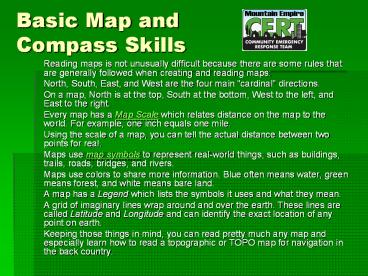
- Reading maps is not unusually difficult because
there are some rules that are generally followed
when creating and reading maps - North, South, East, and West are the four main
"cardinal" directions. - On a map, North is at the top, South at the
bottom, West to the left, and East to the right. - Every map has a Map Scale which relates distance
on the map to the world. For example, one inch
equals one mile. - Using the scale of a map, you can tell the actual
distance between two points for real. - Maps use map symbols to represent real-world
things, such as buildings, trails, roads,
bridges, and rivers. - Maps use colors to share more information. Blue
often means water, green means forest, and white
means bare land. - A map has a Legend which lists the symbols it
uses and what they mean. - A grid of imaginary lines wrap around and over
the earth. These lines are called Latitude and
Longitude and can identify the exact location of
any point on earth. - Keeping those things in mind, you can read pretty
much any map and especially learn how to read a
topographic or TOPO map for navigation in the
back country.
2
- This simple road direction map contains a lot of
information - North is marked in the upper-left corner so you
know which way this map relates to the world. - The Scale is marked. One inch equals 5 miles, so
you can tell it is about 15 miles from Seattle to
Woodinville. - Main roads are included so you can find the best
route direction between two locations. - Roads are labeled so you know what to look for
when navigating. - Bodies of water are colored blue.
- So, you can see even a simple road map is packed
with good direction and navigation information.
The maps we use for hiking are even more packed
with details.
3
- The TOPO map on the right bottom represents the
land in the Google aerial photo above it. Notice
the buildings and roads on the map can be seen in
the photo.
4
(No Transcript)
5
(No Transcript)
6
- LatitudeIf you could stand at the center of the
earth, you could look out at the surface of the
earth all around you. With the North Pole
directly above your head, if you looked straight
ahead in any direction, you would be looking at
the equator. This imaginary line is exactly
halfway between the north and south poles and has
a latitude of 0 degrees because you are looking
straight ahead at an angle of 0 degrees. If you
look up a bit, maybe at an angle of 30 degrees,
you have increased your latitude to 30 degrees
North. Continue to look up higher and higher
until you are looking straight above you at the
north pole which is 90 degrees North.
7
- LongitudeLongitude is the angle east or west
around the earth, just like latitude is the angle
north and south. Longitude lines are called
meridians. - For latitudes, we have two fixed points - the
north and south poles - that we use as end
points. But, going around the earth, there is no
start or stop, it just keeps spinning and
spinning. So, an arbitrary spot was chosen to be
the Start point for longitudes. This spot is the
Royal Observatory in Greenwich, UK. The longitude
line that runs through it is called the Prime
Meridian and is longitude zero degrees. ( its
also the place where Greenwich mean time starts.)
Notice that longitude lines are not parallel. The
closer to the poles you get, the shorter the
distance between meridians until they all
actually converge at the poles.
8
Our completed map looks like this.
Well, degrees are fine and good, but the earth is
almost 25000 miles around so dividing that into
360 pieces means each degree is about 69 miles
wide around the equator. That isn't very precise.
To help with that, each degree is divided into 60
minutes and each minute is divided into 60
seconds. USGS topographic maps are called 7.5
minute maps because they span 7.5 minutes of
latitude and 7.5 minutes of longitude.
9
- Latitude Longitude (Refer to your TOPO MAP)
- Latitude and longitude is the most common grid
system used for navigation. It will allow you to
pinpoint your location with a high degree of
accuracy. Latitude is angular distance measured
north and south of the Equator. The Equator is 0
degrees. As you go north of the equator the,
latitude increases all the way up to 90 degrees
at the north pole. If you go south of the
equator, the latitude increases all the way up to
90 degrees at the south pole. In the northern
hemisphere the latitude is always given in
degrees north and in the southern hemisphere it
is given in degrees south. - Longitude works the same way. It is angular
distance measured east and west of the Prime
Meridian. The prime meridian is 0 degrees
longitude. As you go east from the prime
meridian, the longitude increases to 180 degrees.
As you go west from the prime meridian longitude
increases to 180 degrees. The 180 degree meridian
is also known as the international date line. In
the eastern hemisphere the longitude is given in
degrees east and in the western hemisphere it is
given in degrees west.
10
- This example of a very simple topographic map
shows many common features. Keep your eyes open
to see these features on other maps and you will
start to understand how a TOPO map works. - Even without elevation numbers, clues that 1 is
a hill include streams converging away from the
hilltop, contour lines pointing sharply towards
the hilltop (indicating draws), contour lines
pointing widely away from the hilltop (indicating
rounded ridges).
11
Using contour lines, you can tell a lot about the
terrain, including steepness, ruggedness, and
ground cover. On the image above, look at point
A. There are no contour lines around this
location so it is relatively flat here and a good
place for a campground by the lake. You can tell
from the elevation listed at marker 3095 that the
campground is at 10155 feet. You can also tell
the elevation change between each contour line by
looking at the Index lines. Notice that the Index
line near point B is labeled 11600 feet and the
one due north of it is labeled 10400 feet - that
is a difference of 1200 feet. Between these two
Index lines are two more Index lines so each
index line represents a change in 400 feet of
elevation - 10400, 10800, 11200, and 11600.
Count the lines between two index lines and you
should see there are 4 lines which cause the 400
feet between the two index lines to be divided
into 5 intervals, each one being 80 feet in
elevation. So, now we know that on this map every
contour line represents 80 feet of elevation
change.
12
If you follow a single contour line, your
elevation remains constant. For example, starting
at point X and following the Index line to the
NorthEast, around, and down South to point Y, you
would stay at about 10,800 feet. When you cross
contour lines, you are either hiking up or down.
Look at the two routes to get to the peak at
point B - the red route and the blue route. Each
path reaches the top, but the blue route is three
times as long as the red route. That means it
covers more distance to gain the same elevation
so it is a more gradual slope - and probably an
easier hike. Going up the red route may require a
lot of scrambling and hard work.
13
Township and Range System
- The Township and Range system, sometimes called
the Public Lands Survey System, was developed to
help parcel out western lands as the country
expanded. The system takes many western states
and divides them up using a base line and a
principal meridian. As you go to the east or west
of the principal meridian, the range increases in
that direction. If you go north or south of the
base line, the township increases. This system
divides the land up into townships and ranges
that are 36 square miles each.
14
- In the diagram, the square with the X in it would
be defined as township 2 south (T.2S), range 3
east (R.3E). Each township and range is then
subdivided into 36 sections. Each section is one
mile square. Individual sections are then
subdivided into half sections and quarter
sections and so on. On a TOPO map, you will
notice a grid with red lines and text
crisscrossing the map. The lines represent the
boarders of the various sections in the township
and range of that area. In the map below you can
see sections 23, 24, 26 and 25 of T.22N, R.7E.
15
Map Scale
- Any scale can be used for a map, but a few common
scales have been settled on for use by most
organizations - 124,000 - primary scaled used by USGS for
mapping the United States in topographic form. 1
inch on the map equals 24000 inches in the real
world, which is the same as 2,000 feet. This
scale is used on the over 54,000 quadrangle maps
covering the entire country. They are also called
7.5 minute quadrangles because the area covered
by one map is 7.5 minutes of latitude high by 7.5
minutes of longitude wide on paper that is about
29 inches high and 22 inches wide. - 163,360 - 1 inch equals 1 mile
- 150,000
- 1250,000
- 11,000,000
16
- The smaller the number on the bottom of the map
scale, the more detailed the map will be. A
110,000 map will show objects ten times as large
as a 1100,000 map but will only show 1/10th the
land area on the same sized piece of paper. - Here is an example of a Bar Scale found on a map.
The scale shows that about 1.25 inches equals 5
miles. The smaller increments to the left of zero
are each 1 mile and are used to estimate smaller
distances. Notice the scale is 1/250000 - that
means 1 inch on the map is equal to 250,000
inches on the real land. (5 miles 55280 feet
5528012 inches 316800 inches. 316800 inches /
250000 1.27 inches) - By including a map scale like the image below, if
the map is photocopied and reduced in size, the
scale can still be used. Otherwise, 1 inch would
no longer equal what it should.
17
- Large scale maps or small scale maps.
- A large scale map shows greater detail because
the scale is a larger fraction than a small scale
map.Large scale maps have a scale of 150,000 or
greater (124,000, 110,000, ...).Maps with
scales from 150,000 to 1250,000 are considered
intermediate.Small scale maps are those with
scales smaller than 1250,000. A map of the world
that fits on two pages of letter sized paper
would be very small scale with a scale of around
1100,00,000. - Here are 3 views of the same location on maps
with different scales
18
Next step The Compass
There are four cardinal points on a compass -
North, South, East, and West. When reading a
compass, and telling other people directions, you
need to wipe "right" and "left" out of your
vocabulary. Right and Left are relative
directions and differ depending on your location
and direction, but the cardinal points are
constant.
19
How a Compass Works
- There is a huge magnetic field around the earth.
It is huge, but it is not very strong. The
magnetized needle in a compass is aligned with
this magnetic field. As the image to the right
shows, the composition of the earth acts as a
huge bar magnet sitting upside down in the middle
of the planet. Since its South end is at the
north pole and its North end is at the south
pole, the North end of a compass needle is pulled
north. Your compass has to have a very light
needle sitting on a pivot that has almost no
friction. This is because the earth's magnetic
field is weak and would not be able to turn the
needle.
20
Compass Points
- There are four cardinal points on a compass -
North, South, East, and West. When reading a
compass, and telling other people directions, you
need to wipe "right" and "left" out of your
vocabulary. Right and Left are relative
directions and differ depending on your location
and direction, but the cardinal points are
constant. The direction halfway between North and
East is an intercardinal point and is called
NorthEast. The other three intercardinal points
are SouthEast, SouthWest, and NorthWest.
21
Basic Compass Reading
- No matter the compass, one end of the needle
always points North. On a mountaineering compass,
it is almost always the RED end, but its a good
idea to test your compass before starting to use
it. - To read your compass.
- Hold your compass steadily in your hand so the
base plate is level and the direction-of-travel
arrow is pointing straight away from you. - Hold it about halfway between your face and waist
in a comfortable arm position with your elbow
bent and compass held close to your stomach. - Look down at the compass and see where the needle
points. - This compass is pointing due North (also 0
degrees)
22
This compass is pointing East (90 degrees) ?
- The top compass needle is pointing towards East
so I must be pointing East, right? No, no, no!To
find my direction, I must turn the compass dial
until the North mark and the "Orienting Arrow"
are lined up with the North end of the needle
(bottom compass). Then I can read the heading
that is at the Index Pointer spot (the butt of
the direction-of-travel arrow).Since the
Orienting Arrow is usually two parallel lines on
the floor of the compass housing, a good thing to
memorize is RED IN THE SHED - Now we know we are really heading West (270
degrees)
23
Take a Bearing
- By simply moving your compass with your body and
using the N-E-S-W markings, you can get a good
idea which way you are going. This is often all
you need from your compass. But, you've probably
noticed on your compass, there are also numbers
and tiny lines. These represent the 360 degrees
in a circle that surrounds you no matter where
you are. When you need to find your way from one
particular place to another, you need to use
these numbers to find out the bearing to that
remote place. The direction you are going is
called your heading. Heading and Bearing are
pretty much the same thing. The image to the
right is showing a compass heading of about 250
degrees.
24
- Determining the bearing to an object is just like
finding your heading. Turn to face the object and
do the steps for determining your heading. Here's
a simple exercise to try... - On a hike in Wyoming, you see a strange rock
formation off in the distance. Using your
compass, you take a bearing to it as shown top
right. - Learning how to use a compass to follow a line of
travel is simply pausing to take a reading
occasionally while hiking. In the picture below
right, you're trying to find your way to the lake
in the distance to refill your water supply. In
this opening in the forest, you pause to take a
bearing to the lake and see that it is about 220
degrees.Ahead of you, there is no trail and you
drop into thick forest. You won't be able to see
the lake or easy landmarks for quite awhile.As
you walk, you need to occasionally check your
heading on the compass to ensure you are still
heading 220 degrees.
25
- Web Resources
- This Power Point and a more extensive Word
document is available at www.campofire.org.
(Double click on the CERT logo.) - E-book, Reading TOPO Maps. http//www.map-reading.
com/intro.php - How to read TOPO Maps http//www.ghosttowns.com/t
opotmaps.html - Compass and Map Skills http//www.compassdude.com
/default.shtml - www.google.com Try various searches for map
reading and how to use _____ (fill in your
subject. Try it with and without the quotation
marks.
Recommended
