

How to Set Up Touch ID on iPhone and iPad? PowerPoint PPT Presentation
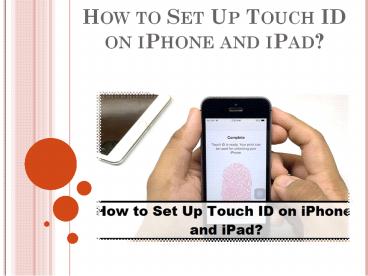
Title: How to Set Up Touch ID on iPhone and iPad?
1
How to Set Up Touch ID on iPhone and iPad?
2
Topics
- Introduction
- Know the Options to Get Started with Your New iOS
Device - Setting Up Touch ID Over iPhone and iPad
- Setting Up Touch ID Supported iPhone and iPad as
New
3
Introduction
1yellowbook.com
Touch ID is one of the best, quick and secure
ways to make the device safe and user-oriented.
The recent editions of Apple devices like iPhone
SE and iPad Air 4 are coming with this new safety
feature. If you have purchased any of these two
gadgets, then you must want to read this post.
4
Know the Options to Get Started with Your New iOS
Device
1yellowbook.com
Here are the different ways to get started with
your new iPhone and iPad using the Touch ID
encryption feature
- Setting up the device as the new one means
starting everything You have to begin using
scratch if never used online services or a
smartphone before this point of time. - Restoring from the older iPad, iPhone, or iPad
Touch Backup You can efficiently perform the
restoring and backing-up process from your
previous iOS device using online iCloud Storage
or over your USB using iTunes. It applies to the
users having an older device and those who want
to move to the new one. - Importing from Blackberry, Android, and Windows
Phone Apple provided an app in Google Play to
make your android device easy to use, but you can
use online services to transfer lots of data from
any previous device. It is only applied to the
users who want to switch to the iPad and iPhone.
5
Setting Up Touch ID Over iPhone and iPad
1yellowbook.com
Everything starts off a similar process
regardless of whether you are restoring from
backup, setting up a new device, or switching
from an older or another one. If you want to set
up the Touch ID on your iOS device, follow these
straightforward steps
- Tap the option slide to set up. You need to
slide your finger across your devices screen to
get started. - Select the language of your choice. In case you
have purchased your smartphone or iPad in your
country, then your device will automatically pick
the appropriate option. - Now, you have to select your local region and
country. It will automatically set to the default
location where you purchased the product. - Select a Wi-Fi network and type the passcode into
relevant boxes. In case you are not in the range
of Wi-Fi or dont have the stable access, you can
select the option Use Cellular instead for your
iPad or iPhone with data. - Wait for some time for the iOS device to get
activated. It may take some time for the
procedure to complete. - Now, select the option whether you like to
activate the Location Services or not. You can
deactivate the service, but it is advised to turn
on the necessary location for some useful apps to
work, such as Maps. - After that, you have to set up a secure Touch ID
or Password. If you want to skip this step, then
tap the option Set Up Touch ID Later but finally,
security is necessary for all the gadgets in
todays world.
6
Setting Up Touch ID Supported iPhone and iPad as
New
1yellowbook.com
Below are the detailed instructions to let you
understand how you can set up a Touch ID over
supported iPhone and iPad as new In case you
are new to the iOS device and dont want to
transfer your data, then heres what you require
to perform next.
- First of all, you need to sync your device to the
iCloud account. You have some related options
for the same. Read them all - Log in to your iCloud account. Here, you need to
type your Apple ID username and password. - Hit the option Use Different Apple IDs for
iTunes and iCloud. - Then, create a free and new Apple ID.
- Now, hit the tab Skip This Step if you dont
like to do the same right now or you havent any
Apple ID yet. You can go back and set up the one
or log in using the Settings app on your device
at any moment you want. - Next, read the Terms and Conditions page and then
hit the I Agree option there. - Set up an Apple Pay account if it is serviceable
in your location. - Now, create an iCloud Keychain if you wish to
sync and store your passwords across all your
synced devices. - Next, set up a Siri account if you want
additional assistance from Siri on your smart
device. - After that, set up Hey Siri, if you like to
automatically trigger Siri assistant using
Apples smart and virtual assistance. - Then, hit the option Send Diagnostic Info to
Apple when issues arise in apps, otherwise hit
the option Dont Send. - Lastly, switch on the Display Zoom option if you
want additional visual accessibility of a more
extensive interface.
7
Everleig is a Blog expert and has been working in
the technology industry since 2003. As a
technical expert, Everleig has written technical
blogs, manuals, white papers, and reviews for
many websites such as 1yellowbook.com Source To
uch ID on iPhone and iPad
8
1yellowbook.com
follow us on
https//www.facebook.com/technohub922/
https//www.linkedin.com/in/mila-williams-ab14a81b
a/
https//twitter.com/compose/tweet
https//www.pinterest.co.uk/milawilliams922/
Recommended

