
IGES Geo Reader PowerPoint PPT Presentation
1 / 29
Title: IGES Geo Reader
1
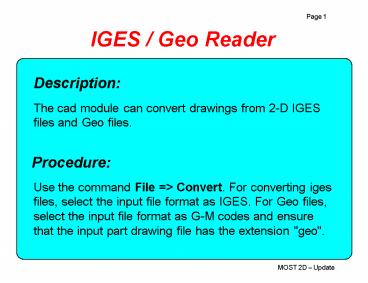
IGES / Geo Reader
Description
The cad module can convert drawings from 2-D IGES
files and Geo files.
Procedure
Use the command File gt Convert. For converting
iges files, select the input file format as IGES.
For Geo files, select the input file format as
G-M codes and ensure that the input part drawing
file has the extension "geo".
2
INCH to MM Conversion
Description
Internally, the cad as well cam module stores
linear dimensions in MM. This facility helps you
convert part drawing files / dxf files defined in
INCH units.
Procedure
Specify the scale factor of 25.4 in the File
Conversion dialog box, while converting dxf files
defined in INCH.
3
Smart Profile Selection
Description
You can select profiles having similar properties
(like, type, size, etc.) quickly for editing
operations. This is especially useful while
deleting very small entities from a drawing.
Procedure
Select the command Edit gt Select and specify one
or more conditions for selecting a profile, like
its type or size.
4
Read Spline / Ellipse
Description
You can import a spline or an ellipse from a dxf
file, if it has been defined after setting the
relevant variable in acad, as explained below.
Procedure
Set PSPLINE 1 before defining a spline or set
PELLIPSE 1 before defining an ellipse. You can
also use one of the macros developed by us in our
cad module for defining an ellipse.
5
Bevel
Description
You can define single / double / triple bevel
operation on any line / arc in the part drawing.
You can also generate cnc codes for the same for
selected controllers, for which we have the G-M
code specification.
Procedure
Use the command Tools gt Bevel gt Define Bevel to
define a bevel. Use the command Tools gt Bevel gt
Multiple Pass to convert a bevel into multiple
torch passes, while cutting with a single -
rotating torch.
6
Machining Allowance
Description
The offset command offsets all the entities in
the drawing uniformly by equal distance. This
feature allows you to offset only a selected
entity with a click of the mouse.
Procedure
Use the command Tools gt Machining Allowance.
7
Mark Centrelines
Description
You can generate marking lines (for powdermarking
or plasma marking) for marking the centrelines of
all the circular holes in a part drawing with a
click of the mouse.
Procedure
Use the command Tools gt Mark Centrelines.
8
Edit Nested Drawings
Description
You can modify the drawing of a shape even after
nesting. You can also extract a shape drawing
from the nested shapelist.
Procedure
Use the command Job gt Shapelist gt Reload to
modify a part drawing after nesting. Use the
button named Download in the Shapelist dialog box
to extract a drawing.
9
Pattern
Description
You can generate a group (mini-nest) of different
types of shapes and then nest it automatically
using the software. Such a group is called a
pattern.
Procedure
Use the command Job gt Shapelist gt Add Pattern
for adding the mini-nest. Define the quantity of
individual shapes which make the pattern and
define the pattern quantity as zero.
10
Circular Corner Loops
Description
The default corner loop generated by the software
is triangular. The feature allows you to draw
smooth corner loops, using a circular arc.
Procedure
Specify the loop parameter as a negative number
in the corner loop generation dialog box.
11
Master Layout
Description
You can make multiple copies of a nested layout
by defining its frequency manually. You can also
instruct the software to make maximum copies of
each layout during automatic nesting phase.
Procedure
Use the command Tools gt Frequency to define the
frequency of a layout. Use the command Job gt
Options gt General gt Master Layout Efficiency to
define the cutoff efficiency during auto nesting
phase.
12
Display of Warnings
Description
You can view the error locations on graphical
screen. You can also assign different colours to
different types of errors.
Procedure
Use the command View gt Details gt Warnings to
switch the error display on / off. You can set
the colour for each type of error using the
command Job gt Options gt Appearance gt Colour.
13
Extend Leadin
Description
You can extend leadin / leadout. This is
especially useful if your controller requires
leadio consisting of 2 or more entities. You can
also reduce piercing by extending joining
leadio of successive cutting cycles.
Procedure
In ITEM, you can either set the extension lengths
using Tools gt Option gt Extend or call Insert gt
Extend Leadin after defining leadio. In MOST,
you have to use Leadio gt Extend Leadin to extend
leadio.
14
Copy Leadin
Description
You can copy leadio defined on one cutting cycle
to all the similar cutting cycles in the layout,
belonging to the same parent shape type, which
have been nested at the same angle.
Procedure
Select all the shapes on which you want to copy
the leadio. Next, run Leadio gt Copy Leadin.
Finally, select the cutting cycle which contains
the reference leadio which you want to copy.
15
Edit Sequence Block
Description
You can shift a block (range) of successive
cutting cycles with a click of mouse i.e. you can
tell the software to re-order all the 10 cycles
from sequence no. 21 to 30 and re-start them from
sequence no. 51 instead.
Procedure
Use the command Cut gt Sequence gt Edit Sequence
Block to shift or reverse a sequence block.
16
Multi Link
Description
Now you can also link those cutting cycles which
are not located side by side and reduce the total
number of piercing points. Note, you can also
link multiple cutting cycles progressively.
Procedure
Use the command Cut gt Link gt Multi Link for
linking multiple cutting cycles. The command Cut
gt Link gt Simple Link supports simple linking
command, similar to the previous version of the
software.
17
Automatic Chaining
Description
You can chain all the selected shapes in a nested
layout automatically, with a click of the mouse.
Procedure
Use the command Cut gt Chain gt Automatic Chain.
18
Avoid Torch Collision
Description
MOST shows torch hit locations on graphical
screen in appropriate colours, when you view the
warnings. You can reduce torch hits by
regenerating cutting sequence / leadin of
relevant cutting cycles or by defining a bypass.
Procedure
Use the command Cut gt Avoid Torch Hit to reduce
the chances of a torch hit. Use the command Cut
gt Bypass to generate an alternative rapid motion
path for the torch.
19
Grid
Description
Grid allows you an easy way to draw simple
shortcut contours, like a horizontal through cut,
vertical through cut or a cut between two
specified points in a nested layout.
Procedure
Use the command Contour gt Draw gt Grid and pick
the guide points one by one. (Note, while drawing
a mesh, it is better to type the X / Y
coordinates of the selected point by pressing the
key F7 on the keyboard.)
20
Copy Contour
Description
You can copy a contour / shortcut / link in a
layout. If it is done properly, the software will
automatically ask you whether you want to repeat
the contour uniformly in the form of an array,
across X as well as Y axis.
Procedure
Use the command Contour gt Copy Contour for
copying a contour. (Note, if you want to copy a
link, you must first define the cutting sequence
and leadio of the affected cutting cycles before
running this command.)
21
Pinch
Description
You can pierce a little away from the main
contact point on the shape profile and touch the
profile later at tangent using the pinching
facility. This will reduce the excess heat
generation at the point of contact.
Procedure
Use the command Leadio gt Automatic Leadin gt
Pinch. (Set the pinch radius as zero, if you do
not want to use this feature. But, do not set the
pinch radius less than the kerf because that will
result in incorrect cutting.)
22
Process Priority
Description
You can sequence different machining processes
(like drilling, punching, cutting, etc.) with a
click of mouse. You can also sequence all the
holes together before cutting any external shape
boundary, using this feature.
Procedure
You can use the command Cut gt Sequence gt
Process Priority to sequence all these processes
automatically.
23
Corner Slowdown
Description
The software can slowdown the cutting tool while
approaching the end of an entity by breaking it
into two entities and setting their feed values
(F-code in gcode file) as per the slowdown factor
specified by the user.
Procedure
You can set the slowdown factor as well as
slowdown length using Job gt Options gt Toolpath.
(Note, this facility is implemented for certain
controllers only, for which we have the relevant
G-M code specification.)
24
Customizable Annotations
Description
You can customize the contents of the annotations
which appear on the side of each nested layout.
You can also restrict the height of the
annotation table to the nested height (instead of
stock height), if necessary.
Procedure
You can customize the annotations by defining the
relevant settings under the command Job gt
Options gt User.
25
Customizable Printing
Description
You can design the contents as well as form of
the report page using a print template. You can
also customize the paper size and other printing
options to suit your specific requirements.
Procedure
You can register a print template file with the
software using the command Job gt Options gt
Folder gt Print Settings File. You can set the
other printing parameters using Job gt Options gt
Print.
26
Machine Setup
Description
You can register the machine axes (X,Y) as well
as the preferred home position of the torch, so
that MOST can generate cnc codes accordingly. You
can also set the view angle on your screen as per
the machine axes.
Procedure
You can set the machine parameters using File gt
Default Parameters. You can set the view angle
using the commands View gt Rotate View and View
gt Mirror Axis.
27
Alternative Nesting Corner
Description
The software allows you to choose one of the two
starting corners from the reference edge of the
stock, for automatic nesting. For some machines,
you may find it more convenient to work with the
second nesting corner.
Procedure
You can enable or disable the use of second
(alternative) nesting corner using the command
Job gt Options gt General gt Use Nesting Corner 2.
28
Pan Using Keyboard
Description
You can shift the view without breaking a parent
command which may require mouse based input.
(Note, the menu based command View gt Pan would
break the parent command.)
Procedure
You can pan on left / right / top / bottom side
of the screen by pressing the appropriate arrow
key on your keyboard.
29
Zoom Previous
Description
You can zoom to the previous view of the nested
layout.
Procedure
Select the Backspace key.
Recommended
