
Suturing Basics PowerPoint PPT Presentation
1 / 38
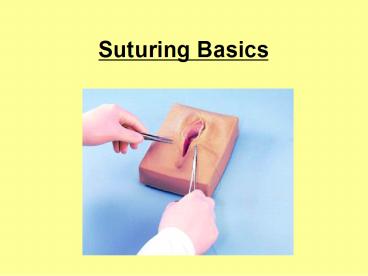
Title: Suturing Basics
1
Suturing Basics
2
TOPICS
- Sutures
- Knots
- Wounds (classification healing)
- Wound Closure
- Postoperative Wound Care
- Local Anaesthetics
- Surgical Instruments
- Scrubbing
- Obtaining Haemostasis
- Skin Flaps
3
(No Transcript)
4
Suture Material
- 3 ways of classifying suture material
- Natural or Synthetic
- Absorbable or Non-Absorbable
- Monofilament or Braided/Twisted
5
Silk Catgut
- Natural
- Silk, linen, catgut
- Synthetic polymer
- Polypropylene, polyester, polyamide
Polypropylene Polyester
6
- Absorbable
- catgut, polydioxanone, polyglycolic acid
- Used for deep tissues, membranes, subcuticular
skin closure - Non-Absorbable
- polyester, nylon, stainless steel
- Used for skin (removed) some deep structures
(tendons, vessels, nerve repairs not removed)
7
- Monofilament
- Polypropylene
- Polydioxanone
- Nylon
- Multifilament
- Catgut (twisted)
- Polyester
- Silk (braided)
8
HOW DOES THE SUTURE MATERIAL AFFECT THE SECURITY
OF THE SUTURE-KNOT?
- The security of any tied suture is improved by
the use of certain patterns the friction
between threads. - Friction factor is affected by size of contact
area between threads, tightness of tying,
suture material used. - How many knots ???
9
So what type should I use?
- The most commonly used suture materials for
interrupted exposed skin sutures are nylon
polyprolene. - Sutures that are buried, or run in the skin (eg.
subcuticular suture), may use either
nonabsorbable, or absorbable materials.
10
Surgical Needle
- Curvature
- Most common, general use in all tissues
- ¼
- 3/8
- ½
- 5/8
- J-shaped
11
(No Transcript)
12
Using needle holder, grasp needle about 2/3rds
of the way back from point.
13
Needle Holder
- Remember!!! Thumb ring finger into needle
holders rings (NOT your middle finger!)
14
X
NOT YOUR MIDDLE FINGER!!!
15
Index finger stabilizes the instrument by resting
on the shaft.
16
Surgical Scissors
17
Cutting Skin Sutures
- With skin sutures, leave 3-4mm tail.
- Tail amount of suture left above knot
- Tail is left because it helps prevent loosening
or undoing of sutures. - REMEMBER Always ask the surgeon the desired
length of suture tail before cutting!!
18
Cutting Deep Sutures
- Buried sutures are left within the body.
- Cut the suture on the knot, leaving no tail
behind. - REMEMBER Always ask the surgeon the desired
length of suture tail before cutting!!
19
FORCEPS
- Grasp forceps between thumb middle finger,
while index finger is used for stabilization. - If possible, use forceps to grasp dermis, rather
than epidermis or skin surface itself. This
helps prevent marking injuring of skin at wound
edge.
20
SIMPLE INTERRUPTED suture
21
VERTICAL MATTRESSsuture
22
VERTICAL MATTRESSsuture
- This suture is best used in creases areas of
natural inversion (eg. back of hand, or other
sites of loose skin). - The 2nd mini-suture
- in the same line as the main suture
- Needle is inserted to pick up just the skin
(epidermis dermis) of both wound edges. - ensures eversion of the skin edges
23
Simple Interrupted vs. Vertical Mattress
- This suture is best used in creases areas of
natural inversion (eg. back of hand, or other
sites of loose skin).
24
How many knots?
- With a braided material, such as silk, a 3rd
throw (replicating the first) would be placed to
secure the knot. - If a slippery monofilament material, such as
nylon were being used, one would place 5 or 6
throws of alternating construction in order to
minimize knot slippage.
25
Important points to think about
- Tightly tied sutures can cause ischaemia wound
edge necrosis. Gentle but firm knots minimal
wound tension will minimize these factors. - Remember, keep skin edges everted, NOT inverted!
26
When can I remove the sutures?
- Face 3-4 days
- Scalp 5 days
- Trunk 7 days
- Arm or leg 7-10 days
- Foot 10-14 days
27
Now you are ready to practice!
28
Practice! Practice! Practice!
29
(No Transcript)
30
KNOTS
31
KNOT TYING Is it really all that important?
- A patients life may depend on the security of
one ligature. Slippage of a tie may result in a
life-threatening haemorrhage.
32
Tying Knots
- Square (reef) knot
- Surgeons knot
33
Square knot
34
Surgeons knot
35
Whats the difference between these 2 knots?
- Square knot
- Surgeons knot
36
(No Transcript)
37
The END
38
Granny knot
Recommended
