
Module Table of Contents PowerPoint PPT Presentation
1 / 11
Title: Module Table of Contents
1
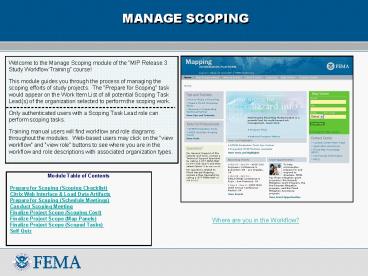
MANAGE SCOPING
Welcome to the Manage Scoping module of the MIP
Release 3 Study Workflow Training course! This
module guides you through the process of managing
the scoping efforts of study projects. The
Prepare for Scoping task would appear on the
Work Item List of all potential Scoping Task
Lead(s) of the organization selected to perform
the scoping work. Only authenticated users with
a Scoping Task Lead role can perform scoping
tasks. Training manual users will find
workflow and role diagrams throughout the
modules. Web-based users may click on the view
workflow and view role buttons to see where
you are in the workflow and role descriptions
with associated organization types.
- Module Table of Contents
- Prepare for Scoping (Scoping Checklist)
- Citrix Web Interface Load Data Artifacts
- Prepare for Scoping (Schedule Meetings)
- Conduct Scoping Meeting
- Finalize Project Scope (Scoping Cost)
- Finalize Project Scope (Map Panels)
- Finalize Project Scope (Scoped Tasks)
- Self Quiz
Where are you in the Workflow?
2
(No Transcript)
3
Prepare for Scoping/Scoping Checklist
MANAGE SCOPING
The Scoping Checklist screen allows you to verify
that certain required scoping tasks were
performed. If you have not completed all the
tasks, you will need to log out and wait until
each of the required activities has been
completed (and associated boxes checked).
Clicking the Save Work button will save the data
you have entered however, you can not save a
screen that is only partially completed. Reminder
Online Help content provides assistance to
users and is available throughout the
MIP. Throughout this module the role performing
the activity and a numerical or descriptive
identifier for the screen are displayed in bold
on the bottom left and right hand corners of the
screen shot to the right.
Manage Scoping ROLE Scoping Task
Lead Description of Role Responsible for the
scoping process (includes preparing and
conducting the scoping meeting, and finalizing
the scope of the project). Organization Type
Assigned Scoping Org. Any org type could
register to do this task. SS06 Prepare for
scoping
Where are you in the Workflow?
4
(No Transcript)
5
Citrix Web Interface Load Data Artifacts
MANAGE SCOPING
New Functionality in MIP Release 3 There are
several places throughout the workflow where the
Citrix Web Interface and the Load Data Artifacts
portlet are available. While in the workflow,
you will notice the Citrix Web Interface and the
Load Data Artifacts portlet under the Scoping
Checklist. Click the Online Help button for
detailed help content about accessing the MIP
Production Tools through the Citrix Web Interface
or uploading data to the MIP through the Load
Data Artifacts portlet.
6
Citrix Web Interface Load Data Artifacts
MANAGE SCOPING
New Functionality in MIP Release 3 Regarding the
Citrix Web Interface, Single Sign-on Capability
is now available. Upon initial sign-on from the
MIP portal, single sign-on capability provides
registered Citrix users access to the MIP
Production Tools (e.g. DFIRM Tools and WISE
Tools) with each subsequent log in to the
MIP. Contact MIPHelp at miphelp_at_mapmodteam.com
or call 1-877-FEMA-MAP (1-877-336-2627), select
option 2, to sign up for a Citrix account or to
verify your account information. All of the
scoping screens will provide access to the MIP
Production Tools through Citrix. You can upload
your scoping data (e.g. pre-scoping data, meeting
minutes, meeting directions/maps) via the Load
Data Artifacts portlet, and you will need to
enter submission details since metadata will not
accompany your scoping data.
7
Prepare for Scoping/Schedule Meetings
MANAGE SCOPING
The Schedule Meetings screen allows you to enter
proposed scoping meeting details (i.e. meeting
date, time and location). Click Add Meeting to
save meeting information. Multiple scoping
meetings can be planned. The proposed scoping
meeting details can be modified or deleted on the
Conduct Scoping Meeting screen. For all study
workflow tasks, there will be a Review screen
(where all task information entered can be
reviewed) and a Complete Task screen.
8
Conduct Scoping Meeting
MANAGE SCOPING
The Conduct Scoping Meeting task allows you to
modify or delete the planned scoping meeting(s)
to reflect the actual scoping meeting(s) that
occurred (the planned meeting(s) appear below).
For each scoping meeting, click Modify to enter
the communities in attendance, to indicate
whether ordinances were collected and to verify
that meeting minutes were collected. You can
also modify the meeting date, time and location.
Click Add Meeting to save scoping meeting
details. New scoping meetings can also be
entered (for scoping meetings not previously
planned). Caution Do not enter the same meeting
twice. This will cause duplicate meetings to be
saved in the database.
Manage Scoping ROLE Scoping Task
Lead Description of Role Responsible for the
scoping process (includes preparing and
conducting the scoping meeting, and finalizing
the scope of the project). Organization Type
Assigned Scoping Org. Any org type could
register to do this task. SS07 Conduct scoping
meeting
Where are you in the Workflow?
9
(No Transcript)
10
Finalize Project Scope/Scoping Cost
MANAGE SCOPING
After the scoping meetings are conducted, the
Finalize Project Scope task will appear on the
Work Item List of all potential Scoping Task
Lead(s) of the organization selected to perform
the scoping work. The Scoping Cost screen allows
you to verify that the Scoping tool was populated
and to track actual funds spent on scoping
efforts. Click Add Cost after scoping fund
data is entered. You can add multiple scoping
costs before clicking Continue if the funds
came from a different fiscal year. Note The
Non-FEMA Funds Spent field is to enter funds
contributed to the scoping task by a leverage
partner. If no Non-FEMA funds were spent, users
may enter 0.
Manage Scoping ROLE Scoping Task
Lead Description of Role Responsible for the
scoping process (includes preparing and
conducting the scoping meeting, and finalizing
the scope of the project). Organization Type
Assigned Scoping Org. Any org type could
register to do this task. SS08 Finalize project
scope
Where are you in the Workflow?
11
(No Transcript)
12
Finalize Project Scope/Map Panels
MANAGE SCOPING
The goal of the Map Panels screen is to select
the currently effective map panels that will be
affected by the study. You may choose to select
panels individually from the drop-down list,
clicking Add Map Panel after selecting each
panel. Or you can click Add All to select all
map panels for the study area (this may be useful
for countywide study projects). Note The
effective map panels in the drop-down list should
match the data at the Map Service Center. The
13
Finalize Project Scope/Scoped Tasks
MANAGE SCOPING
Select the Scoped Tasks (data development tasks)
which were identified during scoping. Make sure
you select the largest possible set of tasks
because any of these tasks can be removed from
the workflow later on but these tasks can not be
added later. Select the areas affected by the
study carefully. Click Add Area for each area
selected. If an area is not selected at this
time it can not be added later in the workflow
(unless you contact miphelp_at_mapmodteam.com).
Select the approximate percentage of the
affected area(s).
14
Finalize Project Scope/Scoped Tasks
MANAGE SCOPING
(Continued) Once the information entered has been
reviewed and the Complete Task button has been
clicked, the Obligate Project Funds task will
appear on the Work Item List of all potential
Study Project Administrator(s) associated with
the geography of the project study responsible
for funding and planning the Data Development
Tasks, Independent QA Tasks, and Mapping Tasks
for each study area. Take the time to complete
the short Self Quiz on the following page before
proceeding to the next training module.
15
Self Quiz
MANAGE SCOPING
1. Prepare for Scoping task would appear on the
Work Item List of all potential Study Project
Administrator(s) of the organization selected to
perform the scoping work. True or False 2.
Funds contributed to the scoping effort by a
leverage partner can be captured. True or
False 3. A scoped task (data development task)
can be added later in the workflow if it is not
selected as part of finalizing the project scope.
. True or False This concludes the Manage
Scoping module of the MIP Release 3 Study
Workflow Training course. Please proceed to the
next module in the course, Manage Flood
Engineering.
Answers 1. False 2. True 3. False
Recommended
