
Insect Collections PowerPoint PPT Presentation
1 / 16
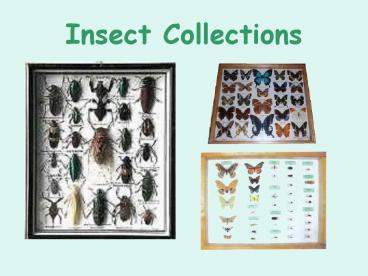
Title: Insect Collections
1
Insect Collections
2
Arthropods
- Insects belong to the largest phylum of animals
known as arthropods. Many small arthropods are
mistaken for insects such as spiders, ticks,
millipedes, centipedes.
Click to watch video
3
All Insects Must Have
- three body parts - head, thorax, and abdomen
- six jointed legs
- two antennae to sense the world around them
- an exoskeleton (outside skeleton)
Click to watch video
4
Where do I find insects
- Insects feed on leaves, stems, roots, flowers and
fruits. - The best insect collecting is often in diverse
habitats. - Always be careful not to damage plants when
collecting your insects. - Dig in soil or chop into a dying tree or rotting
log to discover some interesting insects. - Collect insects before the first frost, usually
by mid September.
5
Preserving Insects
- The Killing Jar Insects must
be killed before pinning and mounting. Killing
jars are used as a sort of small scale
fumigation to kill collected insects as rapidly
as possible, using a liquid fumigant or killing
agent (nail polish remover - must contain ethyl
acetate) that produces a toxic atmosphere that
the insect cannot breath.
- It is possible to make suitable killing jars
with nearly any jar used for jam or jelly and
baby food jars are especially handy. Do not use
plastic containers, because the chemical killing
agent may damage them.
6
- In the bottom of each jar, place about 1 to 1 1/2
inches of absorbent material, such as cotton,
shredded newspaper, or sawdust. With paper-or
fiber-filled jars, cut a cardboard circle just
slightly larger than the inside diameter of the
jar and push it into the opening against the
material in the bottom. Wrap the outside bottom
third of each jar with masking tape to prevent
cuts in case the jar is broken. Attach a label
that says POISON to each jar and store the jars
out of reach of children (or irresponsible
adults) until you are ready to go collecting.
- As the killing jar is used, it will lose its
strength so the killing agent must be replenished
from time to time. Also, tear up some strips of
paper, crumple them slightly and place them in
each jar. This will help to prevent insects from
damaging one another.
7
- If a killing jar is not available, freezing is
another way to kill insects. Simply place your
specimens in a plastic bag (the Zip-Lock kind is
nice) or small jar and put them in the freezer
for an hour or two. - Do not handle them again until they are thawed or
legs and antennae may break. And dont forget
them in the freezer. Insects, like food, left
too long in the freezer for several days or weeks
will desiccate and remain dry and stiff, even
when thawed. - If pinned when dry, these insects will break
during handling and wings, especially of
Lepidoptera, will be impossible to spread. - Remember that specimen quality is an important
consideration in grading insect collections.
8
Butterflies Moths
- Pinching the thorax of large butterflies or moths
before placing them in the killing jar will
prevent them from flopping around and damaging
the wings. - Squeeze them for 20-30 seconds between thumb and
index finger and put them in the killing jar. - This procedure stuns the insects so they do not
flutter once inside the jar. - Remove butterflies and moths from the killing jar
fairly soon so their wings do not become soaked
with killing agent.
9
Relaxing Jar
- We recognize that while insects should be pinned
on the same day they were collected, this is not
always possible. - So before pinning these specimens left in the
killing jar or freezer too long, to restore their
flexibility, it is necessary to relax them. - By placing them in a relaxing jar at high
humidity for a few days we can restore their
flexibility enough to allow pinning without
damage to the specimens. - Relaxing is always a risky process and, if
carelessly done, the specimens may be ruined.
10
Making a Relaxing Jar
- Use a separate jar as the relaxer.
- Place some absorbent material such as newspaper,
sand or cotton in the bottom. - Cut a blotting paper disk to fit tightly inside.
- Moisten the material with water and add a drop or
two of ethyl acetate, Lysol, or laundry beach to
prevent mold. - Place insects on the paper, close the jar tightly
and let it sit for about 2-3 days. - Check the jar. If the insects are flexible, mount
them immediately. - If the specimens are still too stiff, keep them
in the relaxer for a few more days, but watch
them carefully. Insects will mold and decompose
if held in the relaxer too long.
11
Pinning Insects
- The proper way to pin an insect depends on the
type of insect that you have collected. - The diagram illustrates the proper way to pin
various orders of insects. - Note that the pin is usually just slightly to the
right of the midline of the insect. - Specimens should also be level and squarely
mounted on the pin as shown. - The use of a pinning block will help in obtaining
proper height and positioning.
12
How To Make A Pinning Block
- Make the block from strips of wood or Styrofoam
1-inch wide by 1/4 inch thick. - Cut a 3-inch, a 2 inch and a 1-inch long piece
from your wood strip, and glue them together in
step fashion as shown. - Next, drill three small holes as shown all the
way through the block. You can use a small sized
finishing nail for the drill bit. - Then glue another 3 inch strip to the bottom of
the block to cover the bottom of the drilled
holes.
13
How To Use A Pinning Block
- On the top step of the pinning block place the
pin in the insect thorax in the proper position. - Push the insect close to the pin head.
- Remove the pin from the top step, reverse it and
place the head of the pin in the lowest step of
the pinning block. - Push the insect down as far as it will go.
- This will result in positioning each insect about
one-fourth inch from the pin head. - The middle step on the block is to position the
collection label. - The lowest step is used to position the insect
identification label.
14
Labels
- Make your labels using, TNR-size 8, with your
computer and print them off. - Trim labels so the edges make nice, clean, and
flat rectangles. - Two labels should be placed on the pin below each
insect specimen. - Both labels should be of the same size and lined
up parallel to the length of the body of the
insect (not cross-wise). - The insect head should be at the left and the
label should read from left to right. - The top label should have the location where the
insect was collected (ex found on a tomato
plant) and the collection date. - The lower label should show the name of the
insect.
15
When pinning and spreading a butterfly or moth
- Cut several thin strips of paper about 1/4" wide
and 8"-10" long. - Pick up the insect by the thorax and carefully
push a pin through the middle of the thorax. - Adjust the position of the butterfly on the pin
and make sure that it is level, both on the sides
and in both front and back. - Place the pin into the hole in the tallest step
of the pinning block, being careful not to damage
the fragile wings. - Adjust the width of the groove in the spreading
board to be just slightly wider than the body of
the butterfly. - Remove the pinned insect from the pinning block
and push the pin into the slot of your spreading
board until the bases of the wings are just level
with the top of the two side pieces. - Slip a paper strip between the wings (if they are
upright) and use it to force the wings on one
side down into position. - Pin the ends of the paper down to hold the wings
loosely in place. - Repeat this with the wings on the other side.
16
- Take another insect pin or needle and slip the
point through the leading edge of the right
forewing (there is a strong vein just at the
front edge of each wing) near its attachment to
the thorax. - Loosen the forward end of the paper strip and
gradually bring the forewing up into final
position. - Pin the wing down with a paper strip.
- Repeat this procedure with the forewing on the
other side. - Using the same technique, bring both hind wings
into proper position and fasten all four wings
firmly with the paper strips. - Position antennae with pins and if the abdomen
has drooped, prop it up with pins so that it
dries in a natural position. - Allow specimens to dry for several days before
you remove the pins.
Recommended
