
Spring Clean Your Computer PowerPoint PPT Presentation
1 / 57
Title: Spring Clean Your Computer
1
2
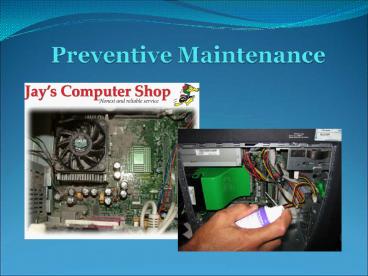
(No Transcript)
3
- You spend a lot of money on your equipment take
care of it and it will take care of you..
4
Section 1 Before Beginning
5
Are You Backed Up?
- Before starting your maintenance work make sure
youve backed up your priceless photos and
documents!
If you dont know how, ask a kid to show you!
6
Create a Restore Point
- If you dont have Ghost, True Image or a similar
type of full hard drive backup you will want to
make a Restore Point just in case things go wrong.
Note Creating a Restore Point does not
necessarily mean that you will be able to restore
from all things, if something should go wrong. It
is very rudimentary, but better then nothing!.
7
Creating a Restore Point
For Windows XP 1. Click Start, point to All
Programs, point to Accessories / System
Tools and click System Restore. 2. On the
Welcome page, click Create a restore point. 3.
On the Create a Restore Point page, enter a
descriptive name for your restore point and
then click Create. The Restore Point
Created page confirms that the new restore point
has been created.
8
Creating a Restore Point
For Windows Vista 1. Click on Start / Computer
/ Properties / System Protection tab 2. Click on
Create button. You'll be prompted for a name
you might want to give it a useful name that
you'll be able to easily identify later.
3. Click the Create button, and then the system
will create the restore point. 4. When
it's all finished, you'll get a message saying
it's completed successfully. Now you are
ready to start your Preventive Maintenance
routine
9
Section 2 Checking Backup Systems
10
Data/OS Power Backups
- Check that your data/OS backup system is working.
- Is Norton Ghost, Acronis True Image, Mozy, or
whatever your backup system - running? - Do you see recent backup dates?
- Check that your Uninterruptible Power Supply is
working. - Is it on?
- Try pulling the computers power cord out of it.
Is the computer still running?
11
Section 3Air Flow
12
Do you have room around your computer for air to
flow?
Check Air Flow
Deadly
Bad Not enough room for air to circulate
Good
gt
13
Here the computers have room to breathe out their
hot air!
Air Flow
14
Section 4How to Clean Your Computer
15
Cleaning Your Computer Case
- Clean with water, never use household detergents
on plastic cases as they can become discolored. - If you need to remove a stubborn stain add just a
little detergent to a cloth and try a small
section first.
16
Cleaning Your Keyboard and Mouse
- According to a report done by ABC News in May,
2008 your keyboard and mouse can carry a host of
harmful bacteria - including E. coli and staph! - You should clean the keys and mouse with rubbing
alcohol regularly. - Turn the keyboard upside down and spray it gently
with compressed air a couple of times a year, too.
17
Cleaning Your Keyboard
- If you spill coffee or soda on the keyboard.
- 1. Immediately flip it over so that it drains
out onto a cloth or something and unplug it from
the computer. - 2. Clean up keys with water or rubbing alcohol.
Do so while turned upside down. - 3. After drying for 24 hours, plug back in.
- 4. If really bad, flush it clean with distilled
water . Flip it on its back to dry and wait till
completely dry before plugging back in.
18
Cleaning inside your computer
- Keeping your computer in shape with a regularly
scheduled cleaning may prevent your system from
going down on you. Maybe even save you a trip to
the repairman. - Tools youll need
- Philips screwdriver
- A can of compressed air
19
Cleaning inside your computer
- How often?
- Once or twice a year for 95 of people will do
just fine. - If your computer is in an industrial environment
with a lot of dust then you might need to do it
more often.
20
Cleaning inside your computer
- Caked-on dust around the CPU Fan can cause
overheating problems, such as - Spontaneous shut downs and restarts
- Blue screens
- Erratic behavior
21
Cleaning inside your computer
- Here the motherboard is covered with caked-on
dust that can fry a motherboard.
22
Cleaning inside your computer
- Warning
- Disconnect the computer power from the wall
outlet.Do not open the Power Supply EVER! - Static
- Discharge yourself by touching the metal case.
- Avoid touching components inside the case.
- Dont use a vacuum to clean within the case.
- Water
- When using compressed air, never hold thecan on
one component too long, keep it moving. or
condensed water will build up.
23
Cleaning inside your computer
- Open the case
- If required, use a screwdriver to remove the side
of the case. - With most cases, the back side will have three
screws holding the cases side panel on. Remove
them.
24
Cleaning inside your computer
Pull away the side panel.
25
Cleaning inside your computer
- Start with the power supply.
- Blow compressed air into the fan/s of the power
supply. - There may be a fan on the bottom of the power
supply too.
26
Cleaning inside your computer
- Now spray the case fans, both front and back.
27
Cleaning inside your computer
- Air vents in the front of the computer are often
missed when dusting around the house. - Do this one often.
28
Cleaning inside your computer
- Use short bursts of 2 or 3 seconds only on the
motherboard. The compressed air can produce ice
which turns to liquid on the parts if you do more
then 2 or 3 second bursts.
29
Parts Identification
gt
30
Cleaning Laptops
31
Cleaning Laptops
- Hold fan with a pencil while spraying. If you
dont you may damage it.
- Spray through the exhaust ports on the outside.
32
Cleaning Laptops
- If you can easily open the fan compartments like
below, go ahead, but only if you are comfortable
in doing so. - Always remove the battery before working inside a
laptop. - Be careful to watch where the parts go back in
when youre done!
33
Cleaning Monitors
- The next tips apply to
- Laptop Screens
- LCDs
- HDTVs
- Projection TVs
- Plasma TVs
34
Cleaning Monitors
- Never spray liquid directly onto the screen. It
can drip down and inside the monitor. - Instead moisten your cloth with the cleaning
solution.
35
Cleaning Monitors
- Always use a soft cloth, (old cotton T-shirt) or
micro fiber cloth. Some materials, such as paper
towels, toilet paper, or old dirty rags, can
cause scratches and damage the screen. - Be careful on your first pass over, remove all
the big dirt lightly or you'll get scratches.
36
Cleaning Monitors
- Do not use household cleaners that contain any of
the following agents - Acetone
- Ethyl alcohol
- Toluene
- Ethyl acid
- Ammonia
- Methyl chloride
37
Cleaning Monitors
- So how do you clean an LCD monitor screen
without buying one of those expensive bottled
cleaning solutions?
38
Cleaning Monitors
- Make your own solution for cleaning LCD monitors.
- Mix in a bottle
- 50 Distilled water
- 50 Isopropyl alcohol.
39
Section 5 Strengthen Your Hard Drives Health
40
Run CHKDSK Utility
- Heres a tip that could save you from losing your
data and maybe a trip to the repairman. - Run Check Disk twice a year.
- Takes anywhere from 5 minutes to 2 hrs depending
on the size and speed of the hard drive. - CHKDSK scans your hard drive checking for and
correcting a wide range of hard drive problems
such as - Bad sectors and damaged or unusable areas of the
hard drive which it marks and prevents your
computer from using in the future. - It also automatically checks and fixes file
system errors that could cripple the computer. - Be sure to always run this before defragging.
41
Run CHKDSK Utility
- To run CHKDSK in Vista
- Click on Start
- Computer
- Right-click on hard drive
- Properties
42
Run CHKDSK Utility
- Click on Tools Tab
- Check Now Button
- Checkmark both disk options.
- Click Start
43
Section 6Speeding Up Your Computer
44
Remove Un-Needed System Tray Apps
- Those icons down by the clock represent programs
that start up as your computer boots. - Many are not needed and slow your computer down.
- Open msconfig to remove these unwanted startup
programs. - Go to Start
- Run (in XP) in Vista use the search bar)
- Type msconfig
- Click the Startup tab.
45
Remove Un-Needed System Tray Apps
- Uncheck the box next to the ones you don't need.
You can start them yourself when you need them. - Do not uncheck ones of these types -
- Microsoft Windows Operating System
- Your Anti-Virus
- You can safely uncheck ones with these words in
them. - Adobe
- AOL
- iTunes
- Instant Messenger
- Realplayer
- Office
- OpenOffice
46
Defrag Hard Drive
- A disk defragmenter rearranges fragmented data on
your hard drive so it can work more efficiently
(quickly). - There are many out there, both paid and free,
that can do this. My only advice is dont use
Vistas defragmenter, because it is as slow as
molasses, and a big step backward from XPs
built-in one. - For a free defragmenter look at
- Power Defragmenter 3.0 (freeware) for XP and
Vista - Note It requires Contig by Sysinternals to run,
(also freeware) which it will install
automatically. - For a paid solution look at one called -
- Diskkeeper 2009 - Costs 29.95 for personal use.
47
XPs Built-in Disk Defragmenter
- To run go to -
- Start
- All Programs
- Accessories
- System Tools
- Disk Defragmenter
- Note
- Run in Safemode
48
- Fragmented areas are in red.
- Before
After
49
Registry Cleaners
- When it comes to registry cleaners, my motto is
If it ain't broke, dont fix it.Mess with the
registry and it will mess with you!
- System Mechanic, Regcure, WinCleaner etc. all
sound great, but every once in a while I get a
computer in that does not work anymore because
someone used one to clean their registry. - So, do I ever say you should you use one? Yes.
- If your computer is running slow and you have
done all the other mentioned steps in this
presentation to speed it up, such as adding
memory, defragging, deleting system tray apps,
etc., then back up your system and go for it.
50
Section 7 Identify Needed Upgrades
51
Should You Upgrade?
- First, is it worth upgrading?
- If its over 7 years old(2002)no, its probably
not worth upgrading. Its most likely cheaper to
buy a new computer. - Is the Processor (CPU) really old? (Pentium 4 2.5
GHz or older). If so, then it is best to buy a
new computer.
52
Check Processor (CPU) Capacity
- Go to -
- Start
- Rightclick Computer
- Properties
gt
53
Check Processor (CPU) Capacity
- Minimum to run smoothly (in most situations). If
less then minimum do not upgrade, buy a new PC.
54
Check Memory Capacity
Minimum to run smoothly XP - 1GB or more Vista -
2GBs Windows 7 - 2GBs
System Type32bit systems have a limit of 3GBs of
memory.
gt
55
Check Hard Drive Capacity
- Make sure you have plenty of hard drive space
available for the future. - Very low free space can cause your computer to
run slow so make sure you have at least 25 free. - Click on Start
- Computer (My Computer)
- Right-click on C drive
- Properties
56
(No Transcript)
57
The End
Recommended
