
Embedding Graphics in Web Pages PowerPoint PPT Presentation
Title: Embedding Graphics in Web Pages
1
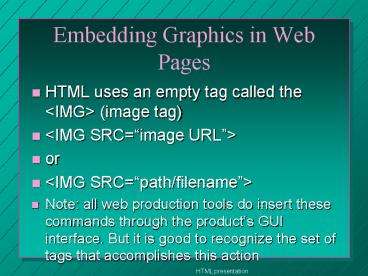
Embedding Graphics in Web Pages
- HTML uses an empty tag called the (image
tag) - or
- Note all web production tools do insert these
commands through the products GUI interface. But
it is good to recognize the set of tags that
accomplishes this action
2
Background Graphics
- tag is inserted after the tag
3
Contrast and Brightness Rules
- If you use a light background, choose dark font
colors - Light font-dark background
- You may need to adjust your font color when
choosing a new background
4
Adding a background or graphic to your Homepage
- You can use a simple editor and type in the HTML
commands from the previous slides - or use Word
5
Word and Web Pages
- Coverts Word format into HTML
- You can start out fresh by entering File-New
- or
- You can convert existing Word files into HTML
- or
- You can update existing HTML files by bringing
them into the Word environment.
6
New
- Lauch Word
- File-New
- If all the goodies were loaded, you will see a
tabbed table and the last section is labeled Web
Pages, else you will not see this area, but we
can get around that in the next slide. - select Web Pages
- Try out the templates! Click on one and you are
off and running. Just like word-processing in Word
7
No Web Page Tab
- This just means all the examples were not loaded
for this installation - Just load a blank document (a normal empty Word
document) General tab and use the Blank Document
template. - Do all the normal word-processing (just like you
did for lab 5 - http//www.cs.bsu.edu/tanksale/cs104/fall2001/lab
s/lab5.htm
8
Saving a HTML file from Word
- Now when saving use
- File-Save as HTML
- If this option is not present on you File Menu,
use Save as ... - when the Save Window appears, change the Save as
type to - HTML document.
9
Existing Word files into HTML
- Lauch Word
- File-Open
- select Word file
- do the editing
- Must save as HTML (see previous slide)
- note, it will save it under the same filename but
with the html extension
10
Update existing HTML Using Word
- Launch Word
- File-Open
- when the Open window appears, make sure you
change Files of type to - All files (.)
- Now you can see all the files and you can select
the appropriate HTML file. - When saving, save as HTML (Please see slide
Saving a HTML file from Word)
11
Inserting Graphics using Word
- This is no difference if you inserting them for a
Word document or a HTML document. - Insert-picture
- However, these graphics must be in the gif or
jpeg format for the Web. - Word clip art is saved in gif format
12
Changing the Background using Word
- By default, most browsers display text in black
on a gray or white background. You can change
the default color scheme. - On the menu bar, click the Format menu, point to
Background - Here you can select from
- No Fill
- many defined colors
- More Colors
- and Fill Effects...
13
Changing the Background using Word-selecting the
Fill Effects
14
Other Background Images
- Word provides a selection of background images
that you can use for the background of a Web page
(see last slide) - Additionally, you can use just about any image
for a background as long it is a file in the gif
or jpeg format. To select a file that you have,
click the Other Texture button in the Texture tab
area.
15
Questions
Recommended
