
This lesson will cover: PowerPoint PPT Presentation
1 / 36
Title: This lesson will cover:
1
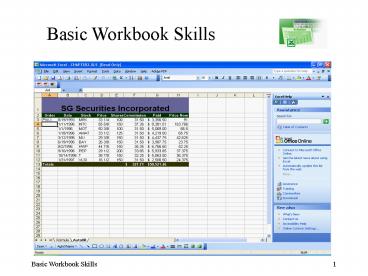
Basic Workbook Skills
2
Basic Workbook Skills
- This lesson will cover
- What is a Workbook?
- How to
- Open a Workbook
- Move around the Worksheet
- Store Data in a Cell
- Use AutoFill
- Use the Office Clipboard
- Use Smart Tags
- Save and Close a Workbook
These topics are from Chapter 2 of the text...
3
What is a Workbook?
- Excel 2003 stores data in files which are called
Workbooks - Workbooks are made up of Worksheets
- Worksheets are made up of Columns and Rows
- The basic unit of a Workbook (or spreadsheet) is
a Cell - Excel 2003 workbook files have the extension
.xls - The maximum number of worksheets a workbook can
have is 255 - The maximum worksheet size is 65,536 rows by 256
columns - Objects, such as charts, images or drawings
exist on top of the cells, not in them. - These concepts are basic to understanding and
using Excel
4
Navigating in a Worksheet
Name Box
Vertical Scroll Bar
Tab Scrolling Buttons
Horizontal Scroll Bar
5
Opening a Workbook
- As is usual with most Windows based programs,
there are several ways to do things with Excel - To Create a new workbook
- Click the new button in the standard toolbar
- or click on the Create a New Workbook link in
the task pane - To open an existing workbook
- Open the File menu
- Select Open
- Select the file from the Open windows
listing, or browse to find the one you want - or
- Use the shortcut keysCtrlO to display the Open
window - Select the file from the list
6
New Window
Open
Save
7
First select Open from the File menuor use the
CtrlO shortcut.
Save as can be used to save the current file with
a different nameor use the CtrlS shortcut
You could also select from the Most Recently
Used (MRU) list, if the file you want to open is
listed there...
8
Store Data in a Cell
- Literal data is a distinct set of data like 255
or 01/01/2002 it does not change unless you do it
manually. Excel stores such data by simply
entering it into an Active cell. - To activate a cell and enter data
- Activate the cell by clicking on it or using the
keyboard to move to it - Type the data
- Press the Enter key, the Tab key, any of the
four arrow keys, or use the mouse to click
anywhere else on the worksheet
9
Basic Data Types
- Excel uses 3 basic types of data
- Numeric values Number type data can include
any number mixed with the following characters
- ( ) , / . E e. If you try to enter a
number that is to big for a cell, Excel will
display a set of number signs () in the
cell. - Text Excel uses text mainly for labels. But you
can also use numbers as text. A cell defined as
holding textual data can have up to 32,767
characters - in it (only 1024 are displayed). Storing numbers
as text prevents them from being used as numbers
in calculationsthey are considered alphanumeric
text. - Formulas Formulas are instructions to Excel to
perform some type of operation and return the
result in the cell. Formulas are entered by
first entering an equal sign ( ) followed by
the formula. Excel usually thinks that anything
preceded by an equal sign is a formula.
10
A numeric value is numeric data that you store in
a cell.
11
A text value is alphanumeric data that you store
in a cell. A text cell can hold up to 255 text
characters.
12
Dates are treated as separate text in Excel.
13
Sometimes, you store numbers that need to be
treated as text in a cell. You can select from
Smart Tag as shown.
14
Excel provides the AutoComplete feature to make
your text entry easier.
15
Working with Formulas
- Calculations placed in a cell are called formulas
in Excel. - Formulas begin with an equal sign ( ) so Excel
knows that you arent entering simple data. - Formulas are constructed of numbers, cell
references (or cell names) and operators, such
as lt gt - / - A simple formula might look like (B3H6)-D6
- More complex formulas might include functions,
which are predefined calculations that Excel
offers to save time - A more complex formula might look like
- AVE(B3B16) H6
- This formula uses the AVErage function, which
returns the average of a set of numbers.
16
Working with Formulas
- Putting together a Calculation
- Activate the cell you want the calculation
result to be displayed in - Type an equal sign
- then type the values, references, operators
and functions into the cell - Press enter and that should do it, the actual
text you typed should be replaced with the
result of the calculation.
17
Here you see the formula The value 5 plus 2
times 3, or as shown in the Formula bar 523
18
Formulas using cell name
19
Common Formula Errors
- The REF! error value occurs when a cell
reference is not valid. Deleting or changing
cells referred to by other formulas can cause the
error. - The NAME? error value occurs when Excel doesn't
recognize text in a formula, such as misspelling
the name of a function, or entering text in a
formula without enclosing the text in double
quotation marks. Also, omitting a colon () in a
range reference can be the cause. - The NULL! error value occurs when you specify
an intersection of two areas that do not
intersect. To refer to two areas that don't
intersect, use the union operator, the comma (,).
For example, if the formula sums two ranges, make
sure a comma separates the two ranges
(SUM(A1A10,C1C10)). - The NUM! error value occurs when there is a
number problem in a formula or function, or
entering a formula that produces a number too
large or too small to be represented in Excel.
Using an unacceptable argument in a function that
requires a numeric argument can also be the cause.
20
Common Formula Errors
- The VALUE! error value occurs when the wrong
type of argument or operand is used, or if the
Formula AutoCorrect feature cannot correct the
formula. Entering text when the formula requires
a number or a logical value, such as TRUE or
FALSE, or supplying a range to an operator or a
function that requires a single value (not a
range) can also be the cause. - The DIV/0! error value occurs when a formula
divides by 0 (zero). - The N/A error value occurs when a value is not
available to a function or formula. If certain
cells on your worksheet will contain data that is
not yet available, enter N/A in those cells.
Formulas that refer to those cells will then
return N/A instead of attempting to calculate a
value. - A error value occurs when the cell
contains a number, date, or time that is wider
than the cell or when the cell contains a date
and/or time formula that produces a negative
result.
21
Using AutoFill
- Excels AutoFill feature is used for those times
when you need to enter data in some sort of
predictable sequence. For instance, suppose you
need to enter a column of numbers from 1 to 1000.
You could type them all in one by one, or you
could use AutoFill. - Highlight a set of cells that are already in a
sequence - Drag the the selection over the entire range you
want to enteror - Use the Fill command from the Edit menu
- You really need to see this one
22
Enter a series of numbers, to the right you see
1,2,3 in adjacent cells. Then you select all
three of the cells and grab the small handle at
the lower right of the selected range of
cells. You then drag the cells in the direction
you want to insert the numbers.
as you move the mouse pointer you will see each
new cell value displayed. When you release the
mouse button
23
The tag that appears at the end of the series
provides you with more ways to customize the
AutoFill
The new range of cells will be created in the
pattern established by the first three cellsin
this case 1,2,3,4,5,6, and so on.
24
AutoFill can use many patterns, here the pattern
3, 9 and 27 was used. Each value is 3 times the
previous (except 3). The first new cell value
should have been 81 and then 243, right? Pay
attention to the series you are using and if
necessary you may have to further define it in
the Fill options.
You can access a quick set of AutoFill options by
right clicking on the tag at the end of the new
range of cells. Sometimes you may need more
choices
25
The AutoFill options can be accessed from the
Edit menu under the Fill command. Here you see
the Series configuration dialog. It takes some
practice to master many of these settings, but
there is the Whats this help available to help
you along.
26
The Office Clipboard
The Office Clipboard is related to the system
Clipboard in the following ways When you copy
multiple items to the Office Clipboard, the last
item you copy is always copied to the system
Clipboard. When you clear the Office Clipboard,
the system Clipboard is also cleared. When you
use the Paste command, the Paste button, or the
shortcut keys (CTRLV), you paste the contents of
the system Clipboard, not the Office Clipboard
27
You activate or open the Office Clipboard by
selecting the Office Clipboard command from the
Edit menu
The Clipboard opens a pane on the right with all
the objects currently in the Clipboard buffer
shownthe only object here is a screen capture
taken for one of the previous slides. Notice the
PowerPoint icon to the right of the image, this
tells you which Office program used it
28
You can paste any of the objects in the Clipboard
to the active worksheet by clicking the object as
listed in the Clipboard pane
You can change several of the Clipboards options
by clicking the Options button at the bottom of
the Clipboard pane.
29
Smart Tags
You can save time by using smart tags to perform
actions in Excel that you'd usually open other
programs to perform. Excel recognizes certain
types of data that it labels with smart tags. The
type of actions you can take depend on the data
that Excel recognizes and labels with a smart
tag. When Excel recognizes types of data, the
data is marked with a smart tag indicator - a
purple triangle in a worksheet cell. To find out
what actions are available with a smart tag, move
the insertion point over the text with a smart
tag indicator.
30
Smart Tags
Since Smart Tags are turned off by default you
may have to make sure smart tags are turned on.
To do this
On the Tools menu, click AutoCorrect options.
Click the Smart Tags tab, and select the Label
data with smart tags check box.
31
When you click on the Smart Tag you are given a
choice of actionsfor example you could make this
stock quote refreshable. That way it would
always display a current price as long as the PC
on which the workbook was opened had a valid
Internet connection.
32
Smart Tags
You can get other Smart Tags to use with your
documents that provide information from such
sources as LexisNexis, Federal Express, ESPN,
Expedia and many more, by accessing the Office
website at http//office.microsoft.com/Services/
category.aspx?cid4
33
Saving and Closing a Workbook
Saving changes to your workbook should be done
continually as you work in Excel. Every 10 or 15
minutes stop and save your work as a
safeguard. A new workbook that has never been
saved, in reality, doesnt exist, except in your
computers memory. It must be savedin Windows
terminology, Saved as When you save an Excel
workbook the default file type is as an Excel
workbook (.xls), but you can also save it as a
web page (.htm), a text file (.txt), or even as a
Lotus 1-2-3 file (.wk4), not to mention older
file versions of Excel.
34
Saving and Closing a Workbook
To Save or Close a file, or to Exit Excel you can
use the File menu
- The File menu offers commands to
- Create a new workbook
- Open a file
- Close a open workbook
- Save an existing file
- Save a new file (Save As)
- Setup your page margins, paper type and other
page related options - Print your work
- and Exit the program
35
To exit Excel, or just close the current
worksheet use the File menuto Close the current
worksheet select Close
To Exit the program, which will also close the
current worksheet select Exitremember to save
your work if necessary.
36
- If you select Exit or Close with an unsaved
workbook you will be prompted to save it - Select
- Yes to save your changes
- No to Close or Exit and Not Save your changes,
or - Cancel to return to the workbook and Not Exit or
Close the workbook.
Recommended
