
Intro to Soils and Soil Fertility - PowerPoint PPT Presentation
1 / 50
Title:
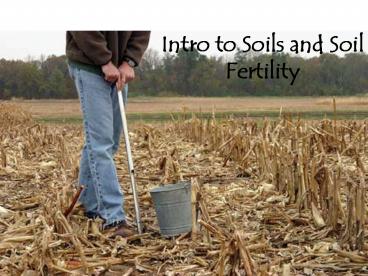
Intro to Soils and Soil Fertility
Description:
Intro to Soils and Soil Fertility – PowerPoint PPT presentation
Number of Views:108
Avg rating:3.0/5.0
Title: Intro to Soils and Soil Fertility
1
Intro to Soils and Soil Fertility
2
(No Transcript)
3
What is Soil?
- Provides air, water and nutrients to plants
- Soil provides mechanical support to plants
- Consists of weathered materials, decaying organic
matter, air and water
4
How is soil formed?
- Decomposing animals and plants
- Fungi and bacteria feed on the material to break
it down until it is released into the soil - Rocks and minerals break down through weathering
(freezing, thawing) and mechanical forces to
create soil texture.
5
(No Transcript)
6
Soil
- Average soil contains
- 45 Mineral
- 5 Organic Matter
- 25 Air
- 25 Water
7
(No Transcript)
8
Soil Texture
- Different sized mineral particles give soil its
texture - Sand
- Silt
- Clay
9
Soil Texture
- Sand is largest particle size, allowing for more
air and water to movement - Clay soils are heavy and hold a lot of water
- Loamy soils are intermediate between sand and
clay both water holding capacity and fertility
10
(No Transcript)
11
Growth FactorsWhat do plants need to grow?
- Light
- Water
- Nutrients
- Oxygen
- Carbon Dioxide
- Temperature
12
What is an Essential Plant Nutrient?
- All the nutrients needed to carry out growth and
reproductive success a full life cycle - Omission of the element will result in abnormal
growth - The element cannot be replaced or substituted
- The element must exert its effect directly on
growth - (Arnon and Stout, 1939)
13
Soil Fertility
- There are 17 known elements that are essential
for plant growth - Plants require nutrients that are not created
through photosynthesis - H, O, C Plants get from air and water
- Macronutrients
- N, P, K High
amounts - Ca, Mg, S Lesser
amounts - Micronutrients
- Fe, Mn, B, Mo, Cu, Zn, Cl Small amounts
14
Plant Nutrients
- Can be added to soil through commercial
fertilizer (i.e., 12-12-12), animal manure or
compost - To know the amounts to apply, you need a soil
test - Excesses and deficiencies can cause poor plant
growth or death
15
Nitrogen
- Most of soil nitrogen is in the form of organic
matter - Promotes growth and color
- Excess causes excessive growth, weak stems
16
Growth dwarfed and thin overall plant is light
green in color and turning yellow in the late
season
17
Phosphorus
- Primary source specific minerals and OM
- Promotes seed development, reproduction, cell
division - Enhances root development and water uptake by the
roots - Excess may lead to deficiencies in other nutrients
18
Phosphorus (P)
- The first symptoms are downward curling of the
leaf - The interveinal tissue becomes a paler green and
eventually dies - There may be a marginal scorch on the older
leaves.
19
Potassium
- Source in soil minerals
- Increases winter hardiness, reduces diseases,
important in ripening of fruits and vegetables
20
- Leaves are smaller, dark olive green and have a
dull appearance. - There is a tendency for the leaves to curl
downward and the leaf petioles to become darker
red. - Brown spots develop interveinally on the under
surface of the leaves.
Potassium (K)
21
Whats pH all about?
- pH is determined by soil type
- Can effect plant growth and nutrient availability
- Different plants have different soil pH
requirements - Can be adjusted through soil amendments
22
Soil pH Ranges
23
Applying Lime to raise soil pH
24
MANAGEMENTwhat are your soil uses?
- SOIL TEST -
- DONT GUESS!
- What are the needs of your plants?
- pH
- Fertility
- Compaction
- Soil Depth
- Slope
25
Horticulture/Gardening
26
Greenhouses, Homeowners
- Potting mixes have specific nutritional
requirements - Plants in pots are different than growing in the
ground - Water!
- Soil testing just as important for homeowner
will save money in the long run
27
What to do now?
- What are you going to grow?
- What are the specific fertility needs of that
crop? - Have soil tested
- Determine ph, soil texture and fertility needs
(deficiencies/excesses) based on results - Follow recommendations
- Have fun!
28
Guidelines for Soil Sampling
29
Overview
- Soil test values are no better than the soil
samples you collect. - Proper soil sampling procedures must be followed
to obtain meaningful test results for fertilizer
decisions.
30
Guidelines
- The best guideline for determining fertilizer
needs is a reliable analysis of a soil sample
that is representative of the field. - Proper procedures must be followed to collect
representative soil samples.
31
Why Soil Test?
- Determine the average nutrient status in a field
- Obtain a measurement of nutrient variability in
the field
32
Objectives of Soil Sampling
- Correct fertilizer nutrient use can result in
- increased yield
- reduced cost
- reduced potential water pollution.
33
Increased Crop Yield
34
Law of the Minimum - Liebig's Law
- Justus von Liebig, generally credited as the
"father of the fertilizer industry", formulated
the law of the minimum - If one crop nutrient is missing or deficient,
plant growth will be poor, even if the other
elements are abundant. Liebig likens the
potential of a crop to a barrel with staves of
unequal length. The capacity of this barrel is
limited by the length of the shortest stave (in
this case, nitrogen) and can only be increased by
lengthening that stave. When that stave is
lengthened, another one becomes the limiting
factor.
35
(No Transcript)
36
Reduced Production Cost
37
Reduce Potential Water Pollution
38
Define Management Units
- A management area is an area that can and will be
managed separately from any other. - If different field areas have different soil
types, past cropping histories, or different
production potentials, these areas should be
sampled separately.
39
Develop management units based on history,
topography and future crop production practices.
40
Sample the management unit
- Collect 15-20 cores in a clean plastic bucket.
- Take sample from throughout the entire area of
the unit - Avoid sampling areas such as windbreaks, old
fence lines, wet areas or areas near lime rock
roads etc.
41
General Guidelines Divide Fields
- Odd areas in the field (eroded spots, turn rows,
abandoned farmsteads, or feedlots) must be
avoided or sampled as separate areas. Soil
samples from these areas can change the test
results for the rest of the field
42
Sampling the management unitsProper Sampling
Depth
- Surface (tillage layer) samples are used for
determining soil pH, lime need, organic matter,
phosphorus, potassium, sulfur, and zinc. - Soil test correlations and calibrations for these
tests are based on surface samples. - Usually the tillage layer is considered to be the
0-6 inch or the 0-8 inch depth. It is best to use
the same sampling depth from year to year so soil
test values can be more accurately compared.
43
General Guidelines
- Proper random sampling can provide an accurate
picture of the average nutrient level in the
field. - Grid sampling can provide an opportunity to
obtain even more information. If individual
samples from a grid sampling pattern are analyzed
separately, they can be used to produce nutrient
level maps of the field.
44
General Guidelines, cont.
- Take Continuous Cores
- As soil cores are collected, the entire core for
the desired depth should be placed in a plastic
pail for mixing. Separate pails are needed for
surface cores and each subsurface depth sampled .
Soil cores in each pail are then thoroughly mixed
and a subsample placed in a separate bag or box
which has been labeled for the sample area in the
field, and for the depth of sample.
45
Thorough mixing is essential.
46
Dont forget to label worksheet and bag
47
- Ship no more than is required by the lab
- Usually one pint or less.
- Fill out all information sheets as completely and
accurately as possible
48
(No Transcript)
49
(No Transcript)
50
(No Transcript)
Recommended
CrystalGraphics Presentations


