
Corn Husk Doll Making - PowerPoint PPT Presentation
1 / 25
Title:
Corn Husk Doll Making
Description:
This forms the doll's hands. Separate the bundled corn husks and slip the ... piece of the same husk as shown, hiding your doll's face. ... for accessories! ... – PowerPoint PPT presentation
Number of Views:481
Avg rating:3.0/5.0
Title: Corn Husk Doll Making
1
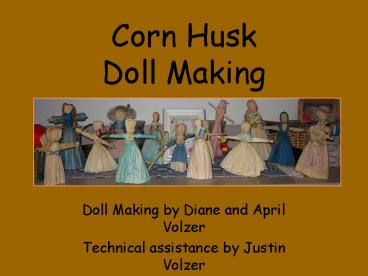
Corn HuskDoll Making
- Doll Making by Diane and April Volzer
- Technical assistance by Justin Volzer
- Calhoun, Georgia
2
Prepare Your Work Area
- Corn Husk Doll kit
- Scissors
- Pan of warm water
- Small towel
- Soak dried corn husks in warm water until soft
(about 30 minutes). Soak each color husk in a
separate pan. - Protect your work surface from water and dye. A
small towel works well.
More Than aTaste of Calhoun2009
3
Stack four soaked corn husks as shown.
4
Gather the un-dyed husks together about one or
two inches from the top and tie with twine.
5
Grasp the top of the bundled husks as shown.
6
Fold the Husks over, arranging two husks on
each side of your fist.
7
Gather the husks together
8
to form your dolls head! Tie with twine.
9
Trim the narrower end of a new corn husk to form
it into a near rectangular shape. Roll the husk
as shown to make the dolls arms.
10
Tie each end of the rolled husk as shown. This
forms the dolls hands.
11
Separate the bundled corn husks and slip the
rolled-up husk between them.
12
Gather the husks just below the arms to form the
dolls waist.
13
With twine, tie the waist. Your rustic corn
husk doll is finished! However, you may wish to
add some details
14
Adding An Apron Tear a one or two-inch
wide piece of corn husk lengthwise and set aside.
Place the larger piece of the same husk as shown,
hiding your dolls face.
15
With twine, tie the corn husk around the
dolls waist.
16
Gently fold the corn husk.
17
With the narrow piece of husk that you
tore previously, tie a sash over the top of the
apron.
18
Tie the sash in the back. Corn husks are
stronger than you might expect!
19
Trim the apron to the length desired. Trim long
pieces of twine. It is helpful to leave the
twine near the hands long for now you might use
them to attach a basket or other accessory.
20
Your doll is ready for accessories!
21
To place flowers in your dolls hands, pull
arms forward, tie, and insert silk flowers.
22
Trim twine as desired, and even add a hat! To
help your doll stand, trim the bottom of the
skirt as needed. It may need further trimming
after it dries.
By April, age 8
23
Gallery
With a touch of imagination, you can personalize
each doll!
By Diane
By April, age 8
24
Gallery
Above By Diane and April, age 8
By Diane My Anne of Green Gables
25
Enjoy!
By Diane
Recommended
CrystalGraphics Presentations


