
Using the Academic Computing Center - PowerPoint PPT Presentation
1 / 53
Title:
Using the Academic Computing Center
Description:
My Computer Locate application click on the application ... Show respect for students (Speak softly, turn cell phones off). Be careful with equipment ... – PowerPoint PPT presentation
Number of Views:46
Avg rating:3.0/5.0
Title: Using the Academic Computing Center
1
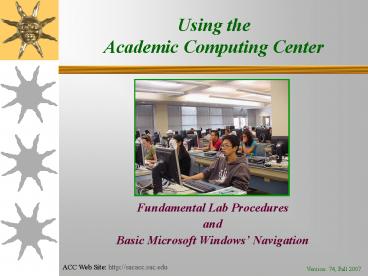
Using theAcademic Computing Center
- Fundamental Lab Procedures
- and
- Basic Microsoft Windows Navigation
Version 74, Fall 2007
2
Resource Information (1 of 3)
- Useful Web Sites Santa Ana College Information
3
Resource Information (2 of 3)
- Useful Web Sites Online Tutorials
4
Resource Information (3 of 3)
- Academic Computing Center
- Coordinator John Luxenberg
- Location
- Cesar Chavez Building, Room A-106 Click
to view location - Santa Ana College
- 1530 West 17th Street
- Santa Ana, California 92706
- Phone 714-564-6731
- Hours of Operation
5
Goals
- To give students a basic understanding of lab
procedures and computer operation so they can
work effectively in the Academic Computing
Center. - At the end of class students will know
- How to check into and out of the Academic
Computing - Center (ACC).
- How to use the ACC facility effectively.
- How to get started on a PC computer and
efficiently - Save work
- Print documents
- Burn CD-ROMs
- Unzip files
- Virus check their media
- Basic Windows XP navigation.
6
Suggestions for Students
- Bring either a diskette, zip disk, memory stick
or CD-R to the ACC. Two diskettes, zips, memory
sticks or CD-Rs are recommended.
- Have an E-mail account
- The ACC staff can show you how to obtain a free
E-mail account and how to save your work to the
account. - Make sure that your name, phone number and date
are on your media. - Make a paper copy of your work for backup (for
scanning as an additional backup).
7
Facilitating the Use of the ACC (1 of 2)
- Checking in and out of the Academic Computing
Center - You MUST be a current registered student at
Rancho Santiago Community College District. - Situation
- You have lost, misplaced or forgotten your
student ID. - Solutions
- Go to the printing station to the right of the
door where you - walked in and print a temporary ID. It
will be valid only on the day that it is printed. - OR
- For a replacement ID, go to the Cashiers Office
located in SAC S-104 to obtain a new student ID.
You may want to contact the Cashiers Office
first at 714-564-6965 or visit them by clicking
here. - Leaving possessions and/or ID in the lab
- Solution
- Always check to see that you have all your
possessions with you including diskettes, zip
disks, wallet, or purse. - Never leave your personal items unattended!
- Verify that the ID you receive back is your
student ID!
8
Facilitating the Use of the ACC (2 of 2)
- Finding a computer with the correct software
- Solution 1 Ask for the Program Location
Notebook at the front desk. Inside the
notebook go to the computer PC or Mac section.
You will find the row number and the computer
numbers that have the software you desire. - Solution 2 The screen (desktop) of each PC
computer is divided into columns for different
types of programs such as Graphics, Microsoft
Office and the Internet. - Look under the appropriate column for your
software. - For example, Microsoft Word will be found under
the column for Microsoft Office. - Note All computers have Microsoft Office,
Internet Explorer and Netscape installed on
them.
Click on the picture for location.
9
Getting Started Using the ACC PC Computers (1 of
4)
- Mouse use
- Selecting an item on your computer screen
- Click the left mouse button.
- Hint Once you have positioned your mouse over
the item you desire, keep your hand on the mouse.
- Opening (running) a program Double-click the
left mouse quickly. - Accessing additional properties - Click the right
mouse button (This function is disabled when
clicking on some areas such as the Windows
desktop in the Academic Computing Center).
10
Windows XP Fundamentals (1 of 9)
- Vocabulary
- Desktop
- Task Bar and system tray (See Learnthat.com
tutorial) - My Computer
- Start Button
- Shortcut
- The Recycle Bin
- Suggestion
- Take online tutorials on Windows by clicking
here. - Use this list of online dictionaries if you want
to find the meaning of other technology terms.
Click here to see the list.
11
Windows XP Fundamentals (2 of 9)
- Task bar
- By default, located on the bottom edge of the
desktop. - Taskbar can be dragged to other locations.
- An easy way to switch between active programs!
- The Start button, active program buttons, icons
for quick access to programs, and the current
time are located on the taskbar.
Click the picture for an expanded view.
12
Windows XP Fundamentals (3 of 9)
- Minimize, Restore and Close (X) buttons
- Close all programs that are open by clicking on
the button with a large X located in the upper
right corner. - Ways to Open an application or document
- From the desktop double (left) click on the
programs icon - Start button ? Programs ? click on application or
folder - My Computer ? Locate application ? click on the
application - Windows Explorer ? Locate application ? click on
the application - Note When clicking on an application it is best
to click on its icon - instead of its name.
13
Windows XP Fundamentals (4 of 9)
- Files, Directories and Folders
- Files have names such as project1a, document 1c,
my picture3. - Commands to modify files in application programs
like Word and PowerPoint are usually found under
the Edit or File menu. - Common commands are save, save as,
- copy, cut, paste and find.
Click the picture for an expanded view.
14
Windows XP Fundamentals (5 of 9)
- Files, Directories and Folders
- Directories An organizational unit, or
container, used to organize folders and files
into a hierarchical structure. - Folders have names such as Term Papers, Memos,
Art Work, Budget Items. - Windows Explorer and My Computer are often
used to view files and folders.
15
Windows XP Fundamentals (6 of 9)
- My Documents
16
Windows XP Fundamentals (7 of 9)
- Saving Your Work
- Label your media immediately. Include the
following - Your Name
- Your Phone number
- Todays date
- It is your responsibility to save your work
often. - Save your work using several names (project 1a,
project 1b, project 1c and so on). - All documents saved onto computer hard disk will
be lost when the computer is restarted. - We recommended saving your work onto a floppy
disk, zip disk or CD-R (Two media are better). - Never remove a disk (Floppy, flash, zip or CD)
while the computer is in the process of saving! - If you forgot to bring media (floppy, zip disk
etc.), you may want to send an E-mail to yourself
attaching your current document to it! - Note You may temporarily save to a hard disk on
an ACC computer, but your data will be lost when
the computer reboots.
17
Windows XP Fundamentals (8 of 9)
- How to Unzip / Extract a file
- Zip File definition A file that has been
compressed so that it takes up less space. - Open the folder where the zipped file is located
and right click the mouse on it. - Click on Extract All
- Use the Extraction Wizard and click Next.
- Click Browse and go to the location where you
would like to put your extracted files (such as
C\Temp). - Click Make a New Folder.
- Right click the mouse on the folder and choose
Rename. - Rename your new folder to a new name such as
Extracted Winamp 5.3 Files Click Ok. - Click Next.
- Click Finish.
18
Windows XP Fundamentals (9 of 9)
- Command short-cuts
19
Getting Started Using the ACC PC Computers (1 of
2)
- Using Audio (Sound)
- When you arrive at the computer, it should be
already be turned on. If it is not, ask an
assistant to help you. - Make sure that the black box (amplifier) next to
the computer is turned on if you want to hear
audio. - Also, be sure the volume is turned down so that
it is not too loud for you. - If you are going to listen to audio, plug your
stereo headphones into the phone jack on the
amplifier.
Click on the picture to see the location of
amplifier.
Click on the picture for information on trouble
shooting the amplifier.
20
Getting Started Using the ACC PC Computers (2 of
2)
- Printing
- Save your work under a unique name such as rain
forest uses, version 12(Do not use document
1). - Select the printer you wish to print to (Ex. HP
9000, Epson 1800). - Wait for a message notice that your print job has
been sent to the printer. - Go to the front desk and tell the assistant your
computer number and document name. - Printing limits
- Black on white 20 single sided, 40 double sided
- Color 5 (Must be for an assignment, and must
first print a black on white proof before
printing in color.) - For black white PC print outs, go to HP 9000
printer. For a color print out, go to the HP
4500 or ask the assistant to retrieve your print
from the Epson 1800.
Click here to see print message and the printers.
21
Creating (Burning) a CD-ROM In XP (1 of 3)
- Part 1
- Open the CD drive (the Burner), and put a blank
CD-R in the drive, with the optical (burn) side
facing down. - Close the CD drive.
- In the window that pops up, click Open writable
CD folder using Windows Explorer to highlight
it.
22
Creating (Burning) a CD-ROM In XP(2 of 3)
- Part 2
- Click the OK button at the bottom to open the
CD Writing Tasks window. - Resize this window to a smaller window on the
right of the screen. - Double click My Computer, and position the new
window next to the window created in step 5
above.
23
Creating (Burning) a CD-ROM In XP(3 of 3)
- Part 3
- In the My Computer window, locate the folder(s)
and/or file(s) you want to store onto the CD. - Drag and drop them into the white space in the
writable CD folder. - Once you have dragged all items, click Write
these files to CD in the CD Writing Tasks
window. - Type in the Name of the CD, and click the Next
button. - Wait until the system tells you the burning is
finished. - The CD drive will eject the CD when the burning
is finished. - You may now read files from this CD.
24
Good ACC Practices (1 of 2)
- Protect your work
- Save frequently preferably on two media
(diskettes and/or zips) - It is helpful to save under several names such
as - project 1a, project 1b, project 1c and so on
- Protect your personal items
- Protect your possessions at all times especially
diskettes and zip disks - Be sure to take your disk, ID card and all
personal items with you when you leave
25
Good ACC Practices (2 of 2)
- Use a headset when listening to audio
- You may listen to your own CD provided that you
are working on a college assignment. - Maintain a study environment that fosters
learning - Set up your desk area.
- Show respect for students (Speak softly, turn
cell phones off). - Be careful with equipment
26
Exercise 1 Recovering work after erasing the
contents of a file (1 of 2)
- Find Microsoft Word on the Desktop.
- Open Microsoft Word.
- Type This is test 1.
- Save your work in a file called project1a.
- Now, add this sentence It is always good to
save under a second file name.
27
Exercise 1 Recovering work after erasing the
contents of a file (2 of 2)
- Save your work in a file called project1b.
- Highlight all your work by dragging the mouse
over it. - Hint Second method Hold the Ctrl key
and tap the A key at the same time. - Press the Del (Delete) key.
- Save your work.
- Since you have just saved a blank page, how do
you recover at least some of your work? Click
here for answer.
28
Virus Checking (1 of 2)
- Part 1
- Definition Virus
- Benefits of Virus Checking
- Protects you from loosing work
- Protects the college computers from programs that
could damage software - Shows consideration towards others
- Starting Symantic AntiVirus
- On the desktop, double click on Symantic
AntiVirus. - Click Scan on the menu located on the top of
the screen. - Click Scan a Floppy Disk.
29
Virus Checking (2 of 2)
- Part 2
- A dialog box will appear
- Click Scan a Floppy Disk.
- Put two check marks in each box next to 3 ½
floppy A and/or Zip (D) - Note that the Removable Disk or Zip is usually
D or E although it can be any letter. - Click Scan at the bottom of the page
- The software will print a message, Completed at
the top of the page - If no viruses are found, click X to close this
dialog box and close Symatic AntiVirus. - If a virus is found, get an ACC assistant to help
you.
30
Additional Exercises
31
Exercise 2 Virus check your diskette or zip disk
- To get started
- See previous slides describing the necessary
steps. - Ask an assistant if you need additional help.
32
Exercise 3 Switching between open applications
- Open Microsoft Word and minimize it.
- Next, open Internet Explorer and minimize it.
- Open My Computer and minimize it.
- Using the task bar at the bottom of the screen,
switch between the open applications. - or
- Trick Hold the Alt key and gently tap the
Tab key to quickly switch between applications.
33
Exercise 4 Closing open applications quickly
- On the Task Bar right click your mouse on each
application (This function may be disabled on ACC
computers). - Click on Close.
- Repeat this for each open application.
34
Review
- Check for updates in the presentation online at
- http//sacacc.sacollege.org/presentations.htm
- Explore links that were not seen in class.
- Facilitating the Use of the ACC
- Checking into the ACC
- Finding software
- Mouse use
- Windows XP Fundamentals
- Desktop
- Task bar
- Minimize, Restore, Close
- Files, Directories and Folders
- Saving Your Work
- How to unzip a file
- Windows XP Fundamentals (Continued)
- How to unzip a file
- Command Short-cuts
- Using Audio
- Printing
- Creating (Burning a CD)
- Protecting your work
- Protecting personal items
- Virus checking
- Switching between open applications
- Click on different programs on the Task bar.
- Use Alt Tab.
35
Answers and Questions(Please determine the
Answers to the following Questions!)
- Example - Answer The Programs button found
under the start button. - A possible question could be What button do you
click on to find a list of installed programs and
shortcuts in Windows XP? - Question 1 ?
- Answer 1 Program Locator Folder / Notebook found
on the front desk. - Question 2 ?
- Answer 2 Hold theAlt key and tap theTab key.
- Question 3 ?
- Answer 3 Save your work under several file
names. - Question 4 ?
- Answer 4 Make sure the volume is turned down.
Click here to see the questions.
36
Academic Computing Center Credits
- ACC Coordinator
- John Luxenberg
- ACC Instructional Assistants
- Click here to view assistants
37
The Santa Ana CollegeAcademic Computing Center
The End. Contact the ACC at 714-564-6731 for
upcoming classes.
38
Academic Computing Center
Cesar Chavez Building (Building A)
Room A-106
Click here to return to slide show.
39
Better Safe Than Sorry!
Save on at least two media!
or
Click here to return to slide show.
40
The Program Location Folder / Notebook
2.
1.
3.
Check the computer row numbers by viewing these
columns.
Click here to return to slide show.
41
Exercise 2 Recovering work after erasing the
contents of a file (Answer)
- Method 1
- Click File ? Open.
- Select your floppy drive.
- Open project1a (or the last version you saved
before erasing your work). - Or,
- If you have recently saved project 1a,
- Click File.
- File project 1a will be listed at the bottom of
the File menu. - Click on project1a.
- Method 2 for Microsoft Word and many other
programs (To recover within a program, if you
have not exceeded your undo limit) - Click Edit.
- Click Undo (or use the CTRL key and Z
simultaneously). - Depending on the program, you may be able to use
the Undo several times to remove additional
problems. - Note Method 1 is very helpful if you have not
realized your mistake and want to recover at
least some of your work.
Click here to return to slide show.
42
Amplifier Location
Click here to return to slide show.
43
Amplifier Check
- Check the following items if the sound is not
working - Power is turned on.
- CD/Tape button is turned to
tuner. - Volume is turned
up slightly.
Click here to return to slide show.
44
Print Message and Printers
1. This is the Print Message that the student
receives.
2. The student picks up printout at HP 9000 high
speed laser printer or at
3. The HP 4500 color printer.
Click here to return to slide show.
45
List of Questions
- Question 1 Where can a student find the location
of the computer that has the installed program
they need? - Answer 1 Program Locator Folder / Notebook found
on the front desk - Question 2 How can you quickly switch between
programs without using the Task Bar? - Answer 2 Hold theAlt key and tap theTab key
- Question 3 Name a method of protecting your
files, other than saving on a second media, from
accidental deletion? - Answer 3Save your work under several file names
- Question 4 What should you do to the amplifier
before using a headset? - Answer 4 Make sure the volume is turned down
Click here to return to slide show.
46
Resource Information (1a of 2)
- Online Tutorials (After visiting a site, click
the browser Back button to return to this page.)
Click here to return to slide show.
47
Resource Information (1b of 2)
- Online Tutorials (After visiting a site, click
the browser Back button to return to this page.)
Click here to return to slide show.
48
Resource Information (1c of 2)
- Online Tutorials (After visiting a site, click
the browser Back button to return to this page.)
Click here to return to slide show.
49
Resource Information (2a of 2)
- Online Computer Dictionaries and Glossaries
Click here to return to slide show.
50
Resource Information (2b of 2)
- Online Computer Dictionaries and Glossaries
Click here to return to slide show.
51
Resource Information (2c of 2)
- Online Computer Dictionaries and Glossaries
Click here to return to slide show.
52
Task Bar, Left Side
Click here to return to slide show.
53
The Edit Menu
Detailed View
Edit Pull-down menu
Files, folders, networks and drives listed
Click here to return to slide show.
Recommended
CrystalGraphics Presentations


