
MICROSOFT ACCESS - PowerPoint PPT Presentation
Title:
MICROSOFT ACCESS
Description:
CHOOSE: Edit, Undo from menu to reverse the most recent changes. Previous. Topics ... Lookup Wizard. Primary Keys. CHOOSE: Edit, Primary Key or. CLICK: Primary ... – PowerPoint PPT presentation
Number of Views:419
Avg rating:3.0/5.0
Title: MICROSOFT ACCESS
1
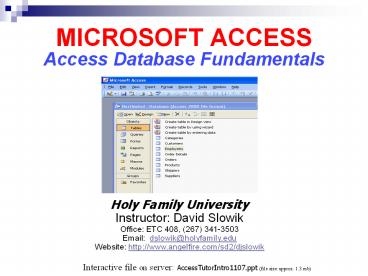
MICROSOFT ACCESS
Access Database Fundamentals
Holy Family University Instructor David
Slowik Office ETC 408, (267) 341-3503 Email
dslowik_at_holyfamily.edu Website
http//www.angelfire.com/sd2/djslowik
Interactive file on server AccessTutorIntro1107.p
pt (file sizeapprox. 1.3 mb)
2
(No Transcript)
3
Workshop Objective
- This workshop will help prepare you to work with
Microsoft Access in creating, and using existing
Microsoft databases. - The fundamental concepts, tools, and procedures
apply to multiple versions of Access including
new Access 2007. However, we will be using Access
2003 to demonstrate procedures in this workshop.
Previous
4
Topics (click on the hyperlinked topic to go to
that section)
Access (as part of Microsoft Office)
Starting Access
The Guided Tour
Getting Help
Working in Datasheet View
Retrieving Information (Tables, Filters, Queries)
Click here to check a detailed AccessTutorial (MS
Word document on HF network).
Previous
5
Introducing Microsoft Access as an integral
member of the MS Office Suite
Next
Previous
Topics
6
The Primary Microsoft Office Applications
Introducing Microsoft Access
- Word
- Excel
- Access
- PowerPoint
- Outlook
Next
Previous
Topics
7
What is the special, primary purpose for these
programs?
Introducing Microsoft Office
Use Microsoft Word to create, edit, format, and
print documents.
- Word
- Excel
- Access
- PowerPoint
- Outlook
.
.
Next
Previous
Topics
8
Introducing Microsoft Office
Use Microsoft Excel to analyze financial and
statistical data.
- Word
- Excel
- Access
- PowerPoint
- Outlook
Next
Previous
Topics
9
Introducing Microsoft Office
Use Microsoft Access to create, maintain, and
summarize an information database.
- Word
- Excel
- Access
- PowerPoint
- Outlook
Next
Previous
Topics
10
Introducing Microsoft Office
Use Microsoft PowerPoint to create on-screen
presentations, overhead transparencies, and 35mm
slides.
- Word
- Excel
- Access
- PowerPoint
- Outlook
Next
Previous
Topics
11
Introducing Microsoft Office
Use Microsoft Outlook to manage your inbox,
calendar, contacts, tasks, and notes.
- Word
- Excel
- Access
- PowerPoint
- Outlook
Next
Previous
Topics
12
Introducing Microsoft Office
Sharing data between applications is easy with
Office.
- Word
- Excel
- Access
- PowerPoint
- Outlook
Word Document
Excel Worksheet
Next
Previous
Topics
13
Introducing Microsoft Office
The Internet is easily accessible from Office
applications.
- Word
- Excel
- Access
- PowerPoint
- Outlook
Go to David Slowiks Web Site
Next
Previous
Topics
14
Working With Access
Next
Previous
Topics
15
What Is a Database?
Working With Microsoft Access
- Database a collection of information
- Table the primary element for collecting data,
organized into rows and columns - Record an individual entry in a table (row)
- Field a piece of data in a record (column)
Click here to check a detailed AccessTutorial (MS
Word document on HF network).
Next
Previous
Topics
16
A Database Example
Working With Microsoft Access
Field (column)
Table
Record(row)
Previous
Topics
17
Access Database Objects
Working With Microsoft Access
- Table Used to store and manipulate data.
- Query Used to retrieve information.
- Form Used to view one record of data.
- Report Used to present, calculate, summarize,
and print table data. - Macro/Module Used to automate frequently
performed procedures.
Next
Previous
Topics
18
Starting Access
Click here to check a detailed AccessTutorial (MS
Word document on HF network).
Next
Previous
Topics
19
Starting Access
Starting Access
- 1. CLICK on the taskbar
2. CHOOSE Microsoft Access from the Programs menu
Next
Previous
Topics
20
The Guided Tour
Next
Previous
Topics
21
The Guided Tour
The application window contains the Title bar,
Menu bar, toolbars, and Status bar.
Title bar
Menu bar
Control icon
Minimize, Restore, and Close icons
Database toolbar
Startup dialog box
Status bar
Next
Previous
Topics
22
The Guided Tour
The database window is the command center it
provides the means to create, view, and edit
database objects, such as tables, forms, and
reports.
Controlicon
Objecttabs
Processing orCommand Buttons
Next
Previous
Topics
23
The Guided Tour
Access commands are grouped together on the Menu
bar.
Menu commands in the learning guide are written
in the following form Edit, Copy where Edit is
the Menu bar option and Copy is the command to be
selected from the pull-down menu.
Next
Previous
Topics
24
The Guided Tour
Shortcut menus provide quick access to menu
commands. To display a shortcut menu, you
right-click with the mouse.
Right-click to display shortcut menus.
Next
Previous
Topics
25
The Guided Tour
The Database toolbar provides access to file
management and editing commands.
Using the mouse, point to any toolbar button
untila yellow ToolTip appears with the button
name.
Next
Previous
Topics
26
The Guided Tour
A dialog box is often used to collect
information before processing a command.
Example
Drop-downlist box
Option button
Spin box
Commandbutton
Check box
Text box
Previous
Topics
Next
27
Getting Help
Click here to check a detailed AccessTutorial (MS
Word document on HF network).
Next
Previous
Topics
28
Help Options
Getting Help
- Office Assistant
- Provides context-sensitive help
Displays a table of contents Provides searching
capabilities
Help Topics window
Office Assistant
Previous
Topics
29
Office Assistant at Work
Getting Help
Office Assistant
Previous
Topics
30
Working in Datasheet View
Previous
Topics
Next
31
Using Datasheet View
Working in Datasheet View
- Each row is an individual record
- Each column is a field of information
- The intersection of a row and column is called a
cell
Field (column)
Cell
Record (row)
Previous
Topics
32
Customizing Datasheet View
Working in Datasheet View
- You can minimize, maximize, and close a datasheet
window - You can customize its display font
- You can add special cell effects
- You can size, move, freeze, and hideits columns
Previous
Topics
33
Editing Table Data
Working in Datasheet View
- CLICK a cell using the mouse pointer
- Make changes to the cells information.
- SELECT another record to save changes
- CHOOSE Edit, Undo from menu to reverse the most
recent changes.
Previous
Topics
34
Adding and Deleting Records
Working in Datasheet View
- To add a recordCLICK New Record button
- To delete a recordSELECT the desired
recordCLICK Delete Record button
Previous
Topics
35
Section Review
Next
Previous
Topics
36
Section Review
- Microsoft Office includes five primary
applications Word, PowerPoint, Excel, Access,
and Outlook - A database management system enables you to store
and manipulate large amounts of data such as
customer lists. - A database consists of tables, records, and
fields. - In Access, you create a database application
using objects for tables, queries, forms,
reports, and macros/modules. - A table is comprised of rows (records) and
columns (fields). - The intersection of a row and column called a
cell. - (More)
Previous
Topics
37
Section Review
- You view table information in Datasheet view
mode. - You customize the datasheet view by manipulating
the window, by changing the display font and
applying cell effects, and by sizing and moving
columns in the datasheet. - You can manipulate table data, add records, and
delete records using the datasheet window. - The Office Assistant provides access to
context-sensitive help. - The Help Topics window provides a table of
contents listing and a searchable list of topics
Previous
Topics
38
Working with Tables
Click here to check a detailed AccessTutorial (MS
Word document on HF network).
39
Topics
Creating a Database
Creating a Table
Creating a Form
Customizing Datasheet View
Modifying the Table Structure
Printing a Datasheet
Section Review
Previous
40
Creating a Database
Next
Previous
Topics
41
Creating a Database
Designing a Database
- Determine your output requirements
- Design your database on paper first
- Divide information into separate fields
- Divide information into separate tables
- Identify each record with a unique code
- Place important fields at top of structure
- Test your database
Next
Previous
Topics
42
Creating a Database
Just a Reminder
A table is a single object within a database A
database can consists of tables, queries, forms,
reports, macros, and programming modules
Previous
Topics
43
Creating a Database
Getting Started
OPTION 1Create a blank database and then
populate it with the required objects OPTION
2Access a professionally designed database
template using the Access Database Wizard
Previous
Topics
44
Creating a Database
Database Design Templates
CHOOSE File, New Database orCLICK New Database
button
Design Templates
Previous
Topics
45
Creating a Database
Inventory Control Template
Previous
Topics
46
Creating a Table
47
Creating a Table
How Do I Create a Table?
Using the Table Wizard Using Datasheet View Using
Design View
Sample Table
Next
Previous
Topics
48
Creating a Table
Using the Table Wizard
Pick fields from existing business and personal
table structures
Previous
Topics
49
Creating a Table
Using Datasheet View
Create a table by typing information into a blank
datasheet When you save the table, Access creates
the table structure and assigns the proper data
types to each field
Previous
Topics
50
Creating a Table
Using Design View
Specify field names, data types, and indexes from
scratch
Define fieldsand data types
Define fieldproperties
Previous
Topics
51
Creating a Table
Field Data Types
Text Memo Number Date/Time Currency
Autonumber Yes/No OLE Object Hyperlink Lookup
Wizard
Previous
Topics
52
Creating a Table
Primary Keys
CHOOSE Edit, Primary Key orCLICK Primary Key
button Determines the order in which data is
displayed in the datasheet
Previous
Topics
53
Creating a Table
Indexes
Like Primary Key, determines the order in which
data is displayed CLICK Indexes button
PrimaryKey
IndexDefinition
Previous
Topics
54
Creating a Table
Moving Between Views
To switch to Datasheet viewCLICK Table View
button
To switch to Design viewCLICK Design View
button
To switch to Form viewCLICK Form View button
Previous
Topics
55
Creating a Form
Next
Previous
Topics
Click here to check a detailed AccessTutorial (MS
Word document on HF network).
56
Creating a Form
How Do I Create a Form?
Using the AutoForm Wizard Using Design View
A form created usingthe AutoForm Wizard
Form Navigation Controls
Next
Previous
Topics
57
Creating a Form
Using AutoForm Wizard
Creates and displays a form with all fields
included automatically CLICK New Object button
Previous
Topics
58
Customizing Datasheet View
Next
Previous
Topics
59
Customizing Datasheet View
Adjusting Column Widths
DRAG the column border between the field names
at the top of the window DOUBLE-CLICK the
column border to have Access calculate the
best-width
ColumnBorders
Previous
Topics
60
Customizing Datasheet View
Adjusting Row Heights
DRAG the border between rows to change all row
heights in the datasheet
RowBorders
Previous
Topics
61
Customizing Datasheet View
Reordering Fields
SELECT the entire field column DRAG field name
to move the column
To save the Datasheet viewCLICK Save button
Previous
Topics
62
Modifying the Table Structure
Next
Previous
Topics
63
Modifying the Table Structure
Inserting and Deleting Fields
Right-click a field todisplay this shortcutmenu
for modifyingtable structure
Previous
Topics
64
Modifying the Table Structure
Field Properties
Field Size Format Decimal Places Input
Mask Caption Default Value
Validation Rule Validation Text Required Allow
Zero Length Indexed
Previous
Topics
65
Printing a Datasheet
Click here to check a detailed AccessTutorial (MS
Word document on HF network).
Previous
Topics
Next
66
Printing a Datasheet
Printing a Datasheet
CHOOSE File, Print or CLICK Print button
Previous
Topics
67
Section Review
Section Review
Spend 90 of your time designing a database
properly in order to spend only 10 of your time
maintaining it. Use the Database wizard to create
a database application quickly using
professionally designed templates. Use the Table
wizard to create a table by picking and choosing
fields from existing personal and business table
structures. Use Datasheet view to create a table
by entering information as you would use a
spreadsheet. Use Design view to create a table
structure from scratch, defining field names and
data types.
(More)
Previous
Topics
68
Section Review
Specify a Primary Key field for uniquely
identifying records and displaying your table in
sorted order. Specify an index to display your
table in a sorted order other than that defined
in the Primary Key. Modify a Datasheet window by
sizing columns and rows and by reordering
fields. Modify a table structure using the table
Design view by inserting and deleting fields and
by setting field properties. Print a tables data
as it appears in the Datasheet window.
Previous
Topics
69
Section 3 Retrieving Information
70
Topics
Sorting a Table
Finding Information
Using Filters
Query Fundamentals
Query Design Window
Advanced Query Operations
Section Review
Previous
71
Sorting a Table
Next
Previous
Topics
72
Sorting a Table
Sorting Records
Allows you to better organize and present data
makes information out of raw data (alphabetical
phone listing) SELECT column or field to
sortCLICK Sort Ascending buttonCLICK Sort
Descending button
Next
Previous
Topics
73
Finding Information
Next
Previous
Topics
74
Finding Information
Find Command
Lets you search an entire table for the existence
of a few characters, words, or a phrase CLICK
Find button
Next
Previous
Topics
75
Using Filters
Next
Previous
Topics
Click here to check a detailed AccessTutorial (MS
Word document on HF network).
76
Using Filters
What Is a Filter?
Lets you limit the display of records in a table
using a simple matching criterion Methods for
filtering data? Filter For Input? Filter By
Selection? Filter Excluding Selection? Filter
By Form? Advanced Filter/Sort
Next
Previous
Topics
77
Using Filters
Filtering Fundamentals
You can apply more than one filter to a table You
can customize filters using wildcards, such as
the asterisk
Previous
Topics
78
Using Filters
Filter For Input
Lets you type a matching value or expression
directly into a text box that appears on a
shortcut menu
Enter item to match in this text box
Previous
Topics
79
Using Filters
Filter By Selection
SELECT all or Section of a field value CLICK
Filter By Selection button
Previous
Topics
80
Using Filters
Filter By Form
CLICK Filter By Form button CLICK Clear Grid
button Make selections from form. CLICK Apply
Filter button
Previous
Topics
81
Using Filters
Advanced Filter/Sort Operations
CHOOSE Records, Filter, Advanced Filter/Sort
Design grid for the Advanced Filter/Sort command
Previous
Topics
82
Query Reports Fundamentals
Next
Previous
Topics
83
Query Fundamentals
What Is a Query?
A query is a question you ask of your
database How many customers live in Chicago? What
is the average age of our employees? There are
two types of queries Select queries let you
retrieve information Action queries let you
modify information
Click here to check a detailed AccessTutorial (MS
Word document on HF network).
Previous
Topics
84
Query Fundamentals
Queries versus Filters
- Although similar to filters, queries provide
additional functionality. With a query, you can - display data from multiple tables
- control which fields display
- perform calculations on field values and
- while filters are temporary, queries are saved as
independent database objects.
Previous
Topics
85
Query Fundamentals
Creating a Query
CLICK Queries tab in the Database window CLICK
New command button
The New Query dialog box appears
Previous
Topics
86
Query Fundamentals
Simple Query Wizard
Use the Simple Query Wizard to build a new query
with the help of dialog boxes
Previous
Topics
87
Query Design Window
Next
Previous
Topics
88
Query Design Window
Query Design Window
A graphical query-by-example tool.
Displays tables on which youve chosen to
base your query
Displays the grid that you use to specify your
criteria and sorting options
Previous
Topics
89
Query Design Window
Query Grid Area
Field used to add a field to the grid Table
used to clarify the fields table Sort used to
sort the resulting table Show used to hide or
show the field Criteria used to set the query
criteria Or used to specify a second criterion
Previous
Topics
90
Query Design Window
Specifying a Search Criteria
Enter an example of value you are searching for
in the Criteria row Use the question mark (?)
wildcard to represent a single unknown
character Use the asterisk () wildcard to
represent more than one character Use operators
(lt, gt, ) to limit records between a range of
values or dates
Previous
Topics
91
Query Design Window
Examples of Search Criteria
Like Sm?threturns records with Smyth and
Smith Like Chngreturns records with Chang and
Chickering Between 21 And 65returns records with
values from 21 to 65 lt98000returns values of
less than or equal to 98000
Previous
Topics
92
Advanced Query Operations
Previous
Topics
Next
93
Advanced Query Operations
Conditional Search Criteria
A simple query extracts information based on a
single criterion or condition A complex query
involves more than on criterion and employs
conditional logic Conditional logic is the method
by which criteria statements are joined and
executed in a query statement
Previous
Topics
94
Advanced Query Operations
Performing Calculations
Besides searching a table, you can perform
calculations on textual and numeric data to
summarize records The built-in calculations
include sum, avg, min, max, count, stdev, var,
first, and last
Previous
Topics
95
Advanced Query Operations
Querying Multiple Tables
You can relate or join tables for the purpose of
sharing information and reducing data redundancy
Notice that there are two tables in this area
joined by a common field
Previous
Topics
96
Section Review
Section Review
You can sort a tables records in ascending or
descending order by selecting the desired column
and clicking a toolbar button. To search for a
value in a table, you use the Find command in
Datasheet view. You can use wildcards, such as
the question mark (?) and the asterisk (), to
represent unknown characters. A filter lets you
limit the display of records in a table using a
simple matching criterion. The available
filtering methods include Filter For Input,
Filter By Selection, Filter Excluding Selection,
Filter By Form, and Advanced Filter/Sort.
(More)
Previous
Topics
97
Section Review
You can create a query object using the Simple
Query Wizard or the Query Design Window. There
are two primary types of queries Select queries
for retrieving and displaying information and
Action queries for performing operations on table
data. The Query Design Window is a
query-by-example tool whereby you specify fields,
sort orders, and search criteria. Using the Query
Design Window, you can enter conditional search
criteria, perform calculations on table data, and
draw information from multiple table objects.
Previous
Topics
98
Presenting Your Data
Click here to check a detailed AccessTutorial (MS
Word document on HF network).
99
Topics
Creating a New Report
Creating Mailing Labels
Using Report Design View
Customizing a Report
Section Review
Previous
100
Creating a New Report
Next
Previous
Topics
101
Creating a New Report
What Is a Report?
An on-screen or printed display of organized data
from a table Examples include sales summaries,
invoices, mailing labels, personal address books,
and inventory listings
Report Title
Name
Address
Phone
Next
Previous
Topics
102
Creating a New Report
Creating a New Report
CLICK Reports tab CLICK New command button
The New Report dialog box appears
Previous
Topics
103
Creating a New Report
Options for Creating Reports
Design View Report Wizard AutoReport
Columns AutoReport Tabular Chart Wizard Label
Wizard
Previous
Topics
104
Creating a New Report
AutoReport Columnar
Created using the AutoReport Wizard.
FieldNames
TableData
Previous
Topics
105
Creating a New Report
AutoReport Tabular
Created using the AutoReport Wizard.
Field Names
Table Data
Previous
Topics
106
Creating a New Report
Previewing a Report
Report created using the Report Wizard.
Click these buttons tocustomizedisplay
Previous
Topics
107
Creating Mailing Labels
Next
Previous
Topics
108
Creating Mailing Labels
Mailing Label Report
CLICK Reports tab CLICK New command
button SELECT Label Wizard Choose a table and
then proceed through the wizard selecting fields.
Next
Previous
Topics
109
Creating Mailing Labels
Label Size and Format
Specify the label size and format, such as Avery
5160.
Previous
Topics
110
Creating Mailing Labels
Label Contents
Enter text and select fields for the label
prototype.
Previous
Topics
111
Creating Mailing Labels
Label Preview
The mailing label report, as designed using the
Label Wizard.
Previous
Topics
112
Using Report Design View
Next
Previous
Topics
113
Using Report Design View
Understanding Reports
Reports consists of different sections Sections
contain bound and unbound controls that determine
what displays A bound control is one whose source
of data is a field in a table or query An unbound
control does not have a source of data, such as a
title or image
Next
Previous
Topics
114
Using Report Design View
Sections of a Report
Report DesignWindow
ReportPreviewWindow
Report Header
Page Header
Detail (Body)
Page Footer
Report Footer
Previous
Topics
115
Customizing a Report
Next
Previous
Topics
116
Customizing a Report
Modifying a Report
Edit control text Resize controls Move
controls Format controls Add new controls
Previous
Topics
117
Customizing a Report
Formatting a Report
Apply formatting options to any control on a
report using the Formatting toolbar To copy
formatting optionsCLICK Format Painter
button To apply a professional style
templateCLICK AutoFormat button
Previous
Topics
118
Customizing a Report
Exporting a Report to HTML
You can export an Access report to HTML format
for publishing to the World Wide Web CHOOSE
File, Save As HTML
Previous
Topics
119
Section Review
Next
Previous
Topics
120
Section Review
Create a report in order to dress-up or
summarize your tables and query results for
presentation purposes. Each report may contain a
variety of design elements such as text,
graphics, lines, borders, fonts, styles, and
colors. Use the New Report dialog box to create a
new report. Methods for creating a new report
include using Report Design View, Report Wizard,
AutoReport Columnar Wizard, AutoReport Tabular
Wizard, Chart Wizard, and Label Wizard. Use the
Label Wizard to create professionally designed
and formatted mailing labels for most commercial
label sizes.
(More)
Previous
Topics
121
Section Review
A report consists of different sections or areas
on a page. Each section can contain either bound
or unbound controls. A bound control is linked to
a field in a table for displaying data. An
unbound control is not linked to table data. You
can format a report by editing control text,
sizing a control, moving a control, formatting a
control, or adding new controls such as graphic
images. You can export a report to HTML for
display in a web browser, such as Netscape
Navigator or Microsoft Internet Explorer.
Previous
Topics
122
Working with Forms
123
Topics
Creating a New Form
Creating a Multiple-Table Form
Using the Form Design View
Creating a Command Button
Managing Your Database
Section Review
Click here to check a detailed AccessTutorial (MS
Word document on HF network).
Previous
124
Creating a New Form
Next
Previous
Topics
125
Creating a New Form
What Is a Form?
A method for displaying one record at a time
(although you can display more than one record,
if desired) Examples include data entry forms,
switchboard forms that provide menus of choices,
and custom dialog boxes
Next
Previous
Topics
126
Creating a New Form
Creating a New Form
CLICK Forms tab CLICK New command button
The New Form dialog box appears
Previous
Topics
127
Creating a New Form
Options for Creating Forms
Design View Form Wizard AutoForm
Columnar AutoForm Tabular AutoForm
Datasheet Chart Wizard PivotTable Wizard
Previous
Topics
128
Creating a New Form
AutoForm Columnar
Created using the AutoReport Wizard.
New Form
NavigationControls
Previous
Topics
129
Creating a New Form
AutoForm Tabular
Created using the AutoReport Wizard.
FieldNames
TableData
Previous
Topics
130
Creating a New Form
Using Form Wizard
Lets you create a new form quickly Select fields
to display, choose a layout and style, and then
name the form
Previous
Topics
131
Creating a Multiple-Table Form
Next
Previous
Topics
132
Creating a Multiple-Table Form
What Is a Multiple-Table Form?
A method for displaying data from two or more
tables at the same time The primary or background
form is called the Main form The embedded form (a
form within a form) is called the subform
Next
Previous
Topics
133
Creating a Multiple-Table Form
Relating Tables
You establish a relationship between two or more
tables by identifying a common field in each table
Specifying the common field
Previous
Topics
134
Creating a Multiple-Table Form
A Multiple-Table Form
Main Form Shoe Models
SubformCustomers
Previous
Topics
135
Using the Form Design View
Next
Previous
Topics
136
Using the Form Design View
Understanding Forms
You create a form by placing controls onto a
background A bound control is one that relates to
data stored in an underlying table or query An
unbound control is one that does not have a data
source, such as a descriptive title or graphic
element
Next
Previous
Topics
137
Using the Form Design View
Sections of a Form
FormHeader
Detail(body)
Field Control(bound)
Label Control(unbound)
FormFooter
Previous
Topics
138
Using the Form Design View
Modifying a Form
Edit control text Resize controls Move
controls Format controls Add new controls
Previous
Topics
139
Using the Form Design View
Changing the Tab Order
Lets you tell Access where to move the cursor
when you press the TAB key in Form view
Previous
Topics
140
Creating a Command Button
Next
Previous
Topics
141
Creating a Command Button
Why Use a Button?
Lets your user perform an action or command by
clicking the button You commonly link a command
button to a macro sequence or module
Previous
Topics
142
Creating a Command Button
Command Button Wizard
CLICK Control Wizards tool CLICK Command Button
tool
Previous
Topics
143
Creating a Command Button
Command Button Example
Click the command button to preview a report.
CommandButton
Previous
Topics
144
Managing Your Database
Next
Previous
Topics
145
Managing Your Database
Managing Database Objects
RIGHT-CLICK an object to display a shortcut menu
of management commands
Shortcut Menu
Previous
Topics
146
Managing Your Database
Publishing to the Internet
Export tables, forms, and reports as HTML
documents for display on the Web
Microsoft Internet Explorer
An HTML document
Previous
Topics
147
Section Review
Section Review
- Create a form in order to display one record at a
time from a table or query. - Each form may contain a variety of design
elements such as text, graphics, lines, borders,
fonts, styles, and colors. - Use the New Form dialog box to create a new form.
- Methods for creating a new report include using
Form Design View, Form Wizard, AutoForm Columnar
Wizard, AutoForm Tabular Wizard, AutoForm
Datasheet Wizard, Chart Wizard, and PivotTable
Wizard. - To include data from more than one table on a
form, create a Primary or Main form and then
embed subforms.
(more on next slide)
Previous
Topics
148
Section Review
- A form consists of different sections or areas on
a page. - Each section can contain either bound or unbound
controls. - A bound control is linked to a field in a table
for displaying data. - An unbound control is not linked to table data.
- You can format a form by editing control text,
sizing a control, moving a control, formatting a
control, or adding new controls such as graphic
images. - You can place a command button on a form to
perform an action or command sequence. - You can publish tables, forms, and reports to
HTML documents for publishing to the Internet.
Click here to check a detailed AccessTutorial (MS
Word document on HF network).
Previous
Topics
Recommended
CrystalGraphics Presentations


