Engine Removal and Disassembly - PowerPoint PPT Presentation
1 / 16
Title:
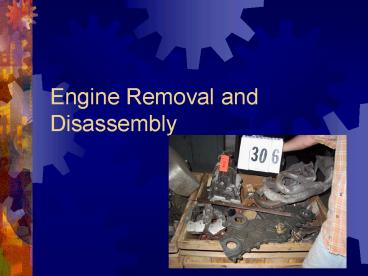
Engine Removal and Disassembly
Description:
... De-torque Engine Disassembly Be sure all fluids are drained Remove all motor mount brackets and accessories Remove exhaust manifold(s) Remove carburetor ... – PowerPoint PPT presentation
Number of Views:1576
Avg rating:3.0/5.0
Title: Engine Removal and Disassembly
1
Engine Removal and Disassembly
2
Engine Removal
- Refer to the proper service manual
- Disconnect all wires and hoses before attempting
to remove engine - If the transmission has an automatic transmission
the torque converter stays with the transmission - Be sure transmission is properly supported while
removing the engine
3
Engine Removal
- Drain all fluids (oil, coolant)
- Mark hinges - remove hood
- Take pictures of engine bay
- Disconnect battery - negative terminal first
- Remove topside components first
- Air Cleaner Assembly
- Fan and Fan shroud
- Radiator and radiator hoses
- Heater hoses
4
Topside Components Cont
- Throttle linkage
- Fuel lines after relieving fuel pressure
- Disconnect and mark vacuum and electrical
connectors - Air conditioning compressor
- Power steering pump
- Alternator
5
Bottom side components
- Exhaust components
- Splash pans and shrouds
- Starter motor
- Engine mounts
- All accessible wiring
- Half shafts or drive lines
- Automatic transmission cooler lines
6
Remember
- Protect paint and finish of the vehicle.
- Protect radiator and/or condenser.
- Support the transmission/transaxle.
- Remove engine from above if possible.
- Use factory lift points if possible.
7
Removing the engine
- Remove engine slowly - make sure you have undone
every thing - You will have to move the engine forward while
raising it on RWD cars - Use common sense and think about what you are
doing
8
Attaching Engine to Stand
- Use proper bolts
- Connect all four ears to the engine
- Have someone help you
9
Engine Disassembly Tips
- KEEP EVERYTHING ORGANIZED!!!
- Dont rush ahead work methodically
- Dont do anything I havent demonstrated
- If you arent absolutely sure of how to do
something ask - Use proper tools
- De-torque components properly
10
De-torque
- Components that have a bolt torquing sequence
must be properly de-torqued to avoid distorting
them - Intake manifold
- Exhaust manifold
- Cylinder heads
- Main and rod caps
11
De-torque
- If a de-torquing pattern is given, use it
- If a torquing pattern is given, reverse it for
de-torquing - If no pattern is given loosen from the ends in
- Break all bolts loose in the correct order first
then come back and finish loosening them in the
correct order
12
De-torque
Example sequence when no other sequence is given
1 5 9 7 3
2 6 10 8
4
13
Engine Disassembly
- Be sure all fluids are drained
- Remove all motor mount brackets and accessories
- Remove exhaust manifold(s)
- Remove carburetor/throttle body
- Remove intake manifold (de-torque)
- Remove valvetrain (keep in order)
14
Engine Disassembly
- Remove cylinder head(s) (de-torque)
- Remove cylinder ridge
- Remove oil pan
- Mark main and rod caps for direction and location
- Mark pistons for direction (if not already marked)
15
Engine Disassembly
- Remove oil pump
- Loosen all rod bolts
- Remove 1 rod cap (DO NOT get rough with them) ask
for assistance if necessary - Remove the rod/piston from the engine (use bolt
boots) - Replace cap and nuts on rod
- Repeat for each rod/piston assembly
16
Engine Disassembly
- Loosen main bolts (de-torque)
- Remove main caps again, dont get rough with
them - Lift crankshaft out crank should be stored
standing on end - Remove camshaft
- Remove cam bearings and frost plugs


