
Flip Cam Getting Started - PowerPoint PPT Presentation
1 / 35
Title:
Flip Cam Getting Started
Description:
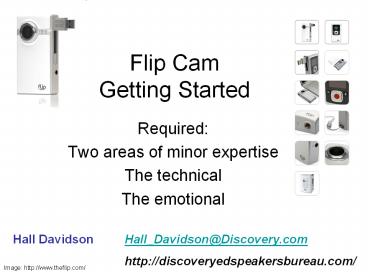
Flip Cam Getting Started Required: Two areas of minor expertise The technical The emotional Hall Davidson Hall_Davidson_at_Discovery.com http://discoveryedspeakersbureau ... – PowerPoint PPT presentation
Number of Views:81
Avg rating:3.0/5.0
Title: Flip Cam Getting Started
1
Flip CamGetting Started
- Required
- Two areas of minor expertise
- The technical
- The emotional
Hall Davidson Hall_Davidson_at_Discovery.com
http//discoveryedspeakersbureau.com/
Image http//www.theflip.com/
2
The Emotional How can you get people to feel
comfortable on camera?
- Practice
- Bio
- Favorite things
- Why I dont want to be taped
- Be personal
- Let folks take personal videos of home/family
- Play games
I never thought 150 would change my life. But
it did. classroom teacher, Los Angeles
3
-Shooting-Moving files to computer-Edit (to
enhance)
The Technical Side
Resource Links Great How To pdf! YouTube
Tutorial Prepare to fast forward How to
overview Link to Getting Started
4
1. Be careful of light in the background the
cameras eye is like the human iris2. Sound does
not zoom
Shooting Only two Tips
Resources Great How To pdf! YouTube Tutorial
Prepare to fast forward How to overview Link to
Getting Started
5
Avoid light in background -windows, lamps
Same camera, same time of dayonly difference
the background light level
Black garment bag hung over window - Light
gauzy curtains pulled
Photos hdavidson
6
Whatever is closest to the camera, you hear most
Voices or crunching paper noise closer to camera
will be heard. But dont sweat ambient noise too
much! Its part of the experience.
The voice you want
The sound you get
Image of paper http//classes.yale.edu/fractals/F
racAndDim/BoxDim/PowerLaw/CrumpledPaper.html
7
Insert to USB
Move video files to computer
Images http//www.kassblog.com/media/3/20080727-f
lip.jpg http//www.labnol.org/wp/images/2008/05/us
b-video-camera.jpg
8
USB menu Two Choices
A
B
PC example. Macs are different, but the same
principle holds.
9
USB menu Two Choices
A
B
B is the preferred method
10
A
The Flip Cam software Follow their menu. Beware
of crashes.
Image http//www.e3t.org/studentpage/studentpageh
old_assets/video20tutorial.pdf Go there for more
details
11
A
The Flip Cam software
Image http//www.e3t.org/studentpage/studentpageh
old_assets/video20tutorial.pdf
12
B
The open menu way More user control
Click Open folder to get FlipCam contents. Its
like a big USB drive.
13
B
The open menu way
Click DCIM to get the folder with the video files
14
B
The open menu way
Click 100Video folder inside DCIM
15
B
The open menu way
Drag the video file you want to your computer
These are all the video files on your FlipCam
16
See if the video file will open. If you get an
error message, there is an easy
A Necessary Troubleshoot
17
Click to open and view
File from Flipcam on Desktop
images hdavidson
18
If you get this message, you must change the
extension
File on Desktop
Note The video will play if you click yes. But
you wont be able to edit it in MovieMaker, Adobe
Premiere, etc.
19
Change the file extension to solve the problem
File on Desktop
20
Right click on fileRename extension from .wmv to
.avi
File on Desktop
Change the file extension on Macs, too, to use
in PowerPoint.
21
1. How to Mask FacesOpen MovieMaker(other
programs work and have more options but this one
is free)
Using editing with FlipCam videos
22
Inside MovieMaker, open the video file (Add to
Collection)You can also import directly from
camera Great How To pdf!
Open MovieMaker
23
Drag video clip to timeline.Youre ready to
edit!TutorialsK-12Atomic LearningVisual
literacy
Open MovieMaker
Image http//www.e3t.org/studentpage/studentpageh
old_assets/video20tutorial.pdf
24
FirstUse Split Clip control to isolate
segment you need to blurPut playhead at
beginning, then end, of segment to
isolate.Select Split (CtrlL)
MovieMaker
images hdavidson
25
Use Effects for witness protection effectto
mask student facesBlur (less dramatic)Watermark
(max mask)Note Deeper control in Pinnacle,
Adobe Premiere, iMovie plug-ins.
MovieMaker
26
Drag effect down to segment on timeline.Example
BlurNote Effect will blur every frame in
the segment you select. The video will still
move.
MovieMaker
27
Drag effect down to segment on timeline.Second
Example WatercolorNote Effect will
watercolor every frame in the segment you
select. The video will still move.
MovieMaker
images hdavidson
28
Original video image
MovieMaker
29
EffectBlur
MovieMaker
30
EffectWatercolor
MovieMaker
31
Add titles, credits, or introductions to
segments
Using editing with FlipCam videos
2. Add titles and 3. Add a narration
Images from MovieMaker help menu Titles
32
Using editing with FlipCam videos
2. Add titles
Under Tools,click Titles and CreditsChoose your
location, then add text
33
Using editing with FlipCam videos
3. Add a narration
Click on microphone, create at narration
Right click on the Flipcam clip audio line to
adjust clip volume
Your narration goes here
34
Right click on the Flipcam clip audio line to
adjust clip volume
Click on microphone, create at narration
35
Flip CamGetting Started
- Give it a try!
I never thought 150 would change my life. But
it did. classroom teacher, Los Angeles
Hall Davidson Hall_Davidson_at_Discovery.com
http//discoveryedspeakersbureau.com/
Image http//www.theflip.com/