
Lesson Title - PowerPoint PPT Presentation
1 / 57
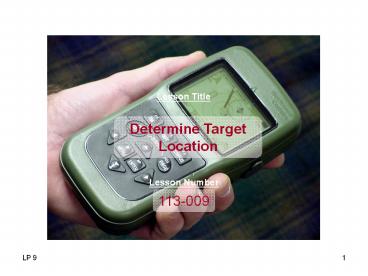
Title:
Lesson Title
Description:
... use the left and right cursor control keys to select the grid/coordinate system used by the inbound aircraft (part of the 1) Initial Point (IP ... Egress ... – PowerPoint PPT presentation
Number of Views:48
Avg rating:3.0/5.0
Title: Lesson Title
1
Lesson Title
Determine Target Location
Lesson Number
113-009
2
LESSON OBJECTIVES
- Determine target position using DAGR receiver
- Determine target location for artillery
- Determine target location for Close Air Support
using the CAS 9Line Brief Page
3
TOPIC OVERVIEW
- Introduction
- Fire Support Page
- Operations
- Determine Target Position
- How to Use Laser Range Finder
4
FIRE SUPPORT PAGE
- Fire Support Page
- WARNING
- Target lost if Power is Cycled
- Must Recalculate Target
- CAUTION
- Store Target as WP
- Verify Target Data
- Calculates Three Dimensional Position
- Can be stored as a Fire Support Waypoint
5
FIRE SUPPORT PAGE
- Fire Support Page
- WARNING
- Target lost if Power is Cycled
- Must Recalculate Target
- CAUTION
- Store Target as WP
- Verify Target Data
- Calculates Three Dimensional Position
- Can be stored as a Fire Support Waypoint
6
CHECK ON LEARNING
- How do you access the Fire Support page?
- From the Applications submenu using the advanced
function set. - What must entered before the DAGR can
automatically calculate the three dimensional
position of the target? - Source waypoint, slant range or horizontal range
to target, azimuth to target, and target
elevation or elevation angle.
7
FIRE SUPPORT PAGE
- Ref Para 14.2.3.1 b
- Calculate Target Position and Elevation
- From the Fire Support page, individually
highlight each field, then push the ENTER key to
edit field content described as follows - From WP field Select the source waypoint as
desired, or leave it set to present position
(000PRESPOS).
8
FIRE SUPPORT PAGE
- b. Azimuth field Input the azimuth (from the
source waypoint to the target position). - Note
- Point the DAGR at the target.
9
FIRE SUPPORT PAGE
- c. Range Type field and Elevation Type field
Determine, then input the range type and
elevation type into their corresponding fields.
This field corresponds with the Range/Slant Range
field and Target Elevation/Elevation Angle field.
10
FIRE SUPPORT PAGE
- d. Range or Slant Range field Input the
range or slant range field value (from the source
waypoint to the target position). This field is
dependent on the type of range set in the Range
Type field.
11
FIRE SUPPORT PAGE
- e. Target Elevation or Elevation Angle
fieldInput the target elevation or elevation
angle (from the source waypoint to the target
position) field value. This field is dependent on
the type of elevation set in the Elevation Type
field.
12
FIRE SUPPORT PAGE
- Calculated Target Position and Calculated Target
Elevation fields automatically display their
calculated values. - Warning
- Position Error
13
FIRE SUPPORT PAGE
- Store the calculation values as a waypoint.
- Highlight the Stored As WP field, then push the
MENU key. - Highlight Store As WP, then push the ENTER key.
- - Stored As WP Field
14
FIRE SUPPORT PAGE
- DAGR displays and highlights the first unused
waypoint. Highlight the desired waypoint, then
push the ENTER key. - DAGR briefly displays the waypoint stored
message, then returns to the Fire Support page
with the Stored As WP field displaying XXX-FSXXX,
where X represents the stored waypoint number.
15
FIRE SUPPORT PAGE
- Edit the Stored as WP field waypoint (name,
remark, or identity type) as desired using the
field menu selections.
16
LASER RANGE FINDER
- Ref Para 14.2.4
- How to Use a Laser Range Finder
- Warning
- - Position Error
- - Ensure Present Position
- - Check LRF Data
- Note
- - Close Range
- Attach the laser range finder interface cable
(supplied with the LRF) to the LRF and the RS-232
connector to the DAGR J2 connector. - Access the DAGR Communications submenu, COM Port
Setup page.
17
LASER RANGE FINDER
- Set the COM Port field to COM Port 1 (advanced
function set only). - Set the Configuration field to Standard (advanced
function set only). - Using LRF procedures (initiated from the LRF),
determine the range of the desired point in the
field of view, then transfer the data through the
interface cable to the DAGR. - The DAGR automatically collects the coordinate
information sent, displays LRF waypoint data, and
prompts the operator to confirm LRF waypoint
coordinates.
18
LASER RANGE FINDER
- The waypoint is stored and displayed as an
LRF-NNN waypoint. The LRF prefix denotes the
waypoint as a laser range finder waypoint, and N
represents the waypoint number. The azimuth and
range data to the LRF waypoint is also displayed.
Use the cursor control keys to scroll down and
view LRF waypoint position coordinates. - Push ENTER to acknowledge.
- Verify the LRF waypoint is stored using the
Waypoints page.
19
LASER RANGE FINDER
- Use the Waypoints page and Waypoint Editor page
to check laser range finder waypoint data (e.g.,
position, elevation, azimuth, slant range, EPE,
etc.). - Note
- - Sort LRF Waypoints
- - FS Prefix
20
CHECK ON LEARNING
- What field do you enter the targets elevation?
- Target Elevation Field
- What connector, on the DAGR, do you connect the
LRF cable to? - J2
21
PRACTICAL EXERCISE
- Determine Target Position
- How to Use a Laser Range Finder
22
TOPIC SUMMARY
- Introduction
- Fire Support Page
- Operations
- Determine Target Position
- How to Use Laser Range Finder
23
TOPIC OVERVIEW
- Introduction
- CAS 9-Line Brief Page
- Operations
- How to Use CAS 9-Line Brief Page
24
CAS 9-LINE BRIEF PAGE
- CAS 9-Line Brief Page
- WARNING
- Safety Check Fields
- Ensure Safety of Operator and other personnel
- CAUTION
- High Level Position Error
- Data used to Acquire Close Air Support
- Can use Fire Support and other Waypoints for
target data
25
CAS 9-LINE BRIEF PAGE
- CAS 9-Line Brief Page
- Provides Target and Initial Point position data
- Certain Pagefields number 1 - 9
- Two bottom views of page have Safety Check Fields
26
CHECK ON LEARNING
- What must be checked before calling in air
support? - CAS 9 Line brief safety check fields have been
checked.
27
CAS 9-LINE BRIEF PAGE
- Ref Para 14.3.3.1.a
- Set Up Units/References
- Note
- If other units or references are used, specify
these in the page Remarks field. - Prior to using display data, view the page to
determine if changes to units of measure or
references used in the display are required
(metric or decimal, mils or degrees, true or
magnetic, etc.).
28
CAS 9-LINE BRIEF PAGE
- When unit or reference changes are required,
highlight the field, then push the MENU key. - Highlight the desired type of units or reference
selection (e.g., Select Range Units), then push
the ENTER key. - Highlight the desired selection, then push the
ENTER key.
29
CAS 9-LINE BRIEF PAGE
- 5. The page displays all associated information
with the change made. - 6. If required, repeat the procedure for the
remaining selections.
30
CAS 9-LINE BRIEF PAGE
- Ref Para 14.3.3.1.b
- Entering and Using CAS 9Line Brief Data
- Note
- Clear all data for the CAS 9Line page
- From the CAS 9Line Brief
- page, push the MENU key.
31
CAS 9-LINE BRIEF PAGE
- Highlight Clear All, then push the ENTER key.
32
CAS 9-LINE BRIEF PAGE
- 3. Manually enter data as applicable for the
following fields - Coordinate Source field
- 5) Target Description field
- 7) Type of Mark field
- Code/Color
- 8) Location of Friendlies
- 9) Egress (Relative to Target)
- Remarks
- Time on Target (TOT)
- Time to Target (TTT) Standby
- Time to Target (TTT) Plus (Seconds)
33
CAS 9-LINE BRIEF PAGE
- 4. Scroll the page views and highlight the 1)
Initial Point (IP) field, then push the MENU key.
- 5. Highlight Use WP Position, then push the ENTER
key.
34
CAS 9-LINE BRIEF PAGE
- Highlight the waypoint desired for the initial
point (position used by inbound aircraft to
orient target acquisition), then push the ENTER
key. The display returns to the CAS 9Line Brief
page displaying the 1) Initial Point (IP) field
highlighted with the initial point waypoint
position data. - - Initial Point (IP) Field
- Note
- Waypoint datum
35
CAS 9-LINE BRIEF PAGE
- As required, use the left and right cursor
control keys to select the grid/coordinate system
used by the inbound aircraft (part of the 1)
Initial Point (IP) field). - Highlight the 6) Target Location field, then push
the MENU key.
36
CAS 9-LINE BRIEF PAGE
- Highlight Use WP Position, then push the ENTER
key. - Highlight Use WP Position, then push the ENTER
key.
37
CAS 9-LINE BRIEF PAGE
- The display returns to the CAS 9Line Brief page
displaying the 6) Target Location field
highlighted with target waypoint position data. - - Target Location Field
- Note
- Displays the waypoint datum
38
CAS 9-LINE BRIEF PAGE
- As required, use the left and right cursor
control keys to select the grid/coordinate system
used by the inbound aircraft (part of the 6)
Target Location field.
39
CAS 9-LINE BRIEF PAGE
- After the target location field is populated, the
DAGR automatically computes and displays data for
the following fields - 2) Heading (IP to Target) field. The word
(computed) is displayed following the data. - 3) Distance (IP to Target) field. The word
(computed) is displayed following the data. - 4)Target Elevation field
40
CAS 9-LINE BRIEF PAGE
- Heading (IP to Target) Field
- Distance (IP to Target) Field
- Target Elevation Field
41
CAS 9-LINE BRIEF PAGE
- Note
- Heading Field and Distance Field can be revised
Manually - Coordinate Source Field
- (none)
- Paper Map
- Electronic Map
- GPS
- Other
42
CAS 9-LINE BRIEF PAGE
- Target Description Field
- Target Location Field
43
CAS 9-LINE BRIEF PAGE
- Type of Mark Field
- Location of Friendlies Field
44
CAS 9-LINE BRIEF PAGE
- Egress (Relative to Target) Field
- Remarks Field
45
CAS 9-LINE BRIEF PAGE
- Time on Target (TOT) Field
- Time to Target (TTT0 Standby Field
- Time to Target (TTT) Plus (Seconds) Field
46
CAS 9-LINE BRIEF PAGE
- Scroll to the Safety Checks view of the CAS
9Line Brief page, and review all safety check
field information. - CAUTION
- Display Blinks
47
CAS 9-LINE BRIEF PAGE
- Current Time and Date (Time Hack) field Verify
accuracy of current time and date information. - Time Zone field Verify accuracy of current time
zone information.
48
CAS 9-LINE BRIEF PAGE
- c. Present Position to Target Range field
Verify a safe range between present position,
target position, and initial point position
49
CAS 9-LINE BRIEF PAGE
- d. IP to Target Azimuth field and Range field
Verify a safe range between present position,
target position, and initial point position.
Avoid having inbound aircraft overfly your
present position. When the IP to Target Azimuth
field and IP to Present Position Azimuth field
overfly bars are positioned in the same
direction, inbound aircraft could overfly your
present position.
50
CAS 9-LINE BRIEF PAGE
- e. IP to Present PositionAzimuth field and Range
fieldVerify a safe range between present
position, target position, and initial point
position. Avoid having inbound aircraft overfly
your present position. When the IP to Target
Azimuth field and IP to Present Position Azimuth
field overfly bars are positioned in the same
direction, inbound aircraft could overfly your
present position.
51
CAS 9-LINE BRIEF PAGE
- - Warning -
- Check fields prior to calling for close air
support - After verifying all safety check information
indicates it is safe to proceed, communicate data
as required for close air support.
52
CAS 9-LINE BRIEF PAGE
- Ref Para 14.3.3.1.c
- Revise Heading or Distance Field Information
- Note
- Revised manually, the DAGR does not automatically
compute or update these fields - From the CAS 9Line Brief page, highlight the 2)
Heading (IP To Target) field.
53
CAS 9-LINE BRIEF PAGE
- Push the MENU key.
- Highlight Compute Value, then push the ENTER key.
54
CAS 9-LINE BRIEF PAGE
- The DAGR performs computation according to the
data shown in the Initial Point and Target
Location fields. Display returns to the CAS
9Line Brief page with the field highlighted and
the word (computed) displayed following the data. - Repeat steps (1) through (4) of this procedure
for the 3) Distance (IP To Target) field.
55
CHECK ON LEARNING
- What does Initial Point field display?
- Position data for use by inbound aircraft to
orient target acquisition. - What does the IP to Target Azimuth Field display?
- Displays the azimuth from the IP to the target
position.
56
TOPIC SUMMARY
- Introduction
- CAS 9-Line Brief Page
- Operations
- How to Use CAS 9-Line Brief Page
57
PRACTICAL EXERCISE
- Determine Target Location using CAS 9-Line Brief
Page
58
LESSON SUMMARY
- Determine target position using DAGR receiver
- Determine target location for artillery using the
How To Use The Fire Support Page - Determine target location for Close Air Support
using the CAS 9Line Brief Page
Recommended
CrystalGraphics Presentations


