
P1253037276gZOpk - PowerPoint PPT Presentation
1 / 238
Title: P1253037276gZOpk
1
Payroll
General Ledger
ViewChoice Reports
ESS Timesheet
Employee Services
Security
Getting Started
Intro
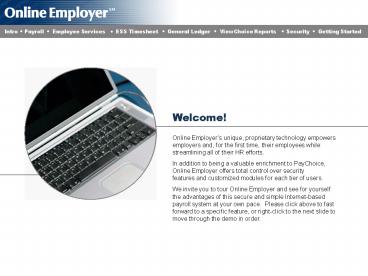
Welcome!
Online Employers unique, proprietary technology
empowers employers and, for the first time, their
employees while streamlining all of their HR
efforts. In addition to being a valuable
enrichment to PayChoice, Online Employer offers
total control over securityfeatures and
customized modules for each tier of users. We
invite you to tour Online Employer and see for
yourselfthe advantages of this secure and simple
Internet-based payroll system at your own pace.
Please click above to fast forward to a specific
feature, or right-click to the next slide to move
through the demo in order.
2
Introduction - Welcome Screen
When you visit onlineemployer.com,this screen
will greet you. Or, login from your payroll
processors web site to access Payroll,
Timesheet, Employee Services, General Ledger and
Report downloads. From here, you may use your
username and password to log onto the site.
(click Next to continue)
(Click screenshot to zoom in)
Back
Home
Next
3
Back
4
Introduction - Online Employer Home
Once you are logged in and haveclicked on the
Home tab, you willhave the opportunity to
choosewhich of the Online Employerservices you
would like to use. Click on the appropriate tab
to choose the service, then click on the company
whose payroll information you would like to edit.
(click Next to continue)
(Click screenshot to zoom in)
Back
Home
Next
5
Back
6
- Instant Processing
- Customizable Information
- No Duplication of Data
- No Tables Out-Of-Sync
- All the Benefits of PayChoice Online combined
with Online Employers Multi-Tiered Security
Click Here To Continue
7
Payroll - Main Screen
- Once you have clicked on the Payrolltab, another
window will pop up.This screen will greet you. - From here, you may view informationon the
current pay period and othertopics, or you may
use the menu onthe left side of the screen to
navigatethrough the module. - Payroll is the most comprehensive and popular
module used for Online Employer.
(click Next to continue)
(Click screenshot to zoom in)
Back
Home
Next
8
Back
9
Payroll - Employer - Switch My View
You may sort the way employee information is
viewed from this screen. Employee information
can be sorted by clock , last name, employee
or within division, department, group, hourly
rate, name, or pay frequency.
(click Next to continue)
(Click screenshot to zoom in)
Back
Home
Next
10
Back
11
Payroll - Employer - Employees
When you click on the Employees tab, a screen
with a list of employees for the company will
greet you. From here, you may view a list of
employees organized by division and select an
individual employee to edit their payroll.
(click Next to continue)
(Click screenshot to zoom in)
Home
Back
Next
12
Back
13
Payroll - Employer - Employees (Part 1)
New Employee Takes you through a Wizard that
allows you to add a new employee into the
system. Demographics Keep on top of an employees
information with a simple form. Use all of the
collected information to print a W-9 form
directly from this screen. Job Info Keep/change
information such as an employees job title,
clock number and labor allocations here.
(click Next to continue)
(Click screenshot to zoom in)
Back
Home
Next
14
Back
15
Back
16
Back
17
Payroll - Employer - Employees (Part 2)
Additional Info Custom HR fields allows you to
edit/change additional information such as static
personnel data, emergency contact, 401K, and more
with up to 124 customizable fields
available. Salary Keep track of an employees
salary, hourly rate, hours worked, pay rate
history and more. Deductions View an employees
deductions, see how much is being taken out of
each paycheck, add and/or schedule an employees
future deduction and more.
(Click screenshot to zoom in)
(click Next to continue)
Back
Home
Next
18
Back
19
Back
20
Back
21
Payroll - Employer - Employees (Part 3)
Taxes Determine which taxes are taken out of an
employees paycheck, as well as set up additional
taxes that need to be taken out. Direct
Deposit Establish an employees Checking/Savings
direct deposit and enter in their bank
information. Pay Template Set up a template for
any employee that keeps complex transaction
settings for every pay period.
(click Next to continue)
(Click screenshot to zoom in)
Back
Home
Next
22
Back
23
Back
24
Back
25
Payroll - Employer - Payroll
Once you have clicked on the Payrolltab, this
screen will greet you. From this tab, you can pay
employees and edit hours and dollars payroll
information. Clicking on the Payroll tab will
take you to the same screen as the Pay Grid.
(click Next to continue)
(Click screenshot to zoom in)
Back
Home
Next
26
Back
27
Payroll - Employer - Payroll (Part 1)
Import Pay Data Import data from Timeclock .txt
or .csv formats. Pay Grid View all
salaried/hourly employees hours and rates on one
simple screen, plus, see which employees have
been paid and which have pay details set up. Pay
Detail Handle more complex transactions and
second checks by setting up pay detail input for
any employee. Frequent overrides are easily
accommodated.
(click Next to continue)
(Click screenshot to zoom in)
Home
Back
Next
28
Back
29
Back
30
Back
31
Payroll - Employer - Payroll (Part 2)
Adjustments Write a Manual check separately from
the current pay cycle, void an already issued
check, or issue a pre-calculated
check Calculator Use a third party calculator to
calculate taxes on manual checks or double-check
your tax withholdings. Totals Enter control
totals and compare to computed totals to validate
pay grid entry of all employees by pay period.
(click Next to continue)
(Click screenshot to zoom in)
Back
Home
Next
32
Back
33
Back
34
Back
35
Payroll - Employer - Payroll (Part 3)
Dates View important dates such as the pay period
start/end, check dates. Also confirm month,
quarter year end and more. Deductions View a
list of active deductions scheduled this pay and
customize selection for every pay
cycle. Reports View a list of available reports
and modify the selection scheduled.
(click Next to continue)
(Click screenshot to zoom in)
Back
Home
Next
36
Back
37
Back
38
Back
39
Payroll - Employer - Submit Payroll
Once you have clicked on the Submit Payroll tab,
another window will pop up. This screen will
greet you. Our Payroll Submit Wizard will take
you through the complete payroll completion
process. It utilizes many of the same screens
you have entered payroll information into
previously so you can make final changes if
necessary.
(click Next to continue)
(Click screenshot to zoom in)
Back
Home
Next
40
Back
41
Payroll - Employer - Submit Payroll (Pay Wizard -
Part 1)
Completed Payroll Entry Indicates you have
finished entering your payroll information into
the database and you are ready to proceed through
the pay wizard. Review Pay/Dont Pay Shows a
complete list of paid/unpaid employees by
divisions and uses the Pay Grid to display
employee hourly, salary, and pay schedule
information. Review Totals Review control totals
and their variance. Click on the links to make
changes directly from the Pay Wizard.
(click Next to continue)
(Click screenshot to zoom in)
Back
Home
Next
42
Back
43
Back
44
Payroll - Employer - Submit Payroll (Pay Wizard -
Part 2)
Review Dates Review important payroll dates, stop
direct deposit and deduction checks, view the
company schedule and establish a check stub
message. Review Deductions Review checklist of
active deductions for the current pay period,
make deductions inactive, view their frequency
and note when certain deductions are taken
out. Review Reports Review a list of available
and permanent printable reports.
(click Next to continue)
(Click screenshot to zoom in)
Back
Home
Next
45
Back
46
Back
47
Back
48
Payroll - Employer - Submit Payroll (Pay Wizard -
Part 3)
Pre-Process Preview Submit your payroll to the
Pre-process calculations engine to review final
payroll calculations before Submit. Submit Email
to Processor Enter a message to the data center
for special instructions or final review by the
processing staff. Submit Payroll Finalize and
submit your payroll. Send specific instructions
to your service bureau from this screen if needed.
(click Next to continue)
(Click screenshot to zoom in)
Back
Home
Next
49
Back
50
Back
51
Payroll - Employer - Web Reports
This tab uses a viewer provided by Online
Employer to allow you to view payroll reports. A
list of viewable reports will drop down
underneath the tab. A custom report generator may
be available to create other reports for Excel
export. The first time you use Online Employer,
you will have to download the viewer to your PC.
(Click screenshot to zoom in)
Back
Home
Next
52
Back
53
Payroll - Employer - Web Reports (Part 1)
Employee List View a list of all employees
included on the current pay period. Pay Input
Transaction Gives a complete list of all the
payroll input transactions that have been made
for the pay period. Company Schedule View the
scheduled dates for check issues, start/end of
pay period, etc. for a specific company. Employee
Profile Gives you the profile of a specific
employee all on one page, including topics such
as deductions, salary schedule and pay rate
information.
(Click screenshot to zoom in)
(click Next to continue)
Back
Home
Next
54
Back
55
Back
56
Back
57
Back
58
Back
59
Payroll - Employer - Web Reports (Part 2)
Employee W2 and SSN Allows you to view employee
W2 and social security information for
verification. Change History (Was-Is) Lists all
of the payroll changes that have been made, by
employee, during the current pay period. Check
History View all of the checks issued during the
current pay period.
(click Next to continue)
(Click screenshot to zoom in)
Back
Home
Next
60
Back
61
Back
62
Back
63
Payroll - Employer - Company Setup
The Company Setup tab allows you to view/edit a
companys information. From here, you may view
informationon the current master file
configuration and other topics, or you may use
the menu on the left side of the screen to
navigate through the module Clicking on the
Company Setup tab will automatically forward you
to the Company Options page.
(click Next to continue)
(Click screenshot to zoom in)
Back
Home
Next
64
Back
65
Payroll - Employer - Company Setup (Part 1)
Company Options Edit main company information
from this screen. Set up company
options/defaults from this screen. Users Specify/r
estrict users ability to view information by
setting their access level here. Clicking on any
user name will give you the option to update
their information. Divisions View the options and
settings on company divisions. Departments Specify
the specific divisions and build new departments
here, as well as establish departments
descriptions.
(Click screenshot to zoom in)
(click Next to continue)
Back
Home
Next
66
Back
67
Back
68
Back
69
Back
70
Back
71
Payroll - Employer - Company Setup (Part 2)
Groups Set up company groups and add a
description to them. Locations Specify locations
within the company and their codes. Earn
Codes View only company earnings codes here and
view their corresponding taxation
codes Taxes View only company tax codes here and
view their corresponding tax table parameters
(click Next to continue)
(Click screenshot to zoom in)
Back
Home
Next
72
Back
73
Back
74
Back
75
Back
76
Payroll - Employer - Company Setup (Part 3)
Deductions View only company deduction codes here
and view their corresponding taxation
parameters. City Shortcuts Specify shortcuts for
city names. Workers Comp Set up codes for
workers compensation by state, class, and
description. Tax ID and Rates View company tax
ID numbers, rates and deposit frequencies. Edit
or Add local tax ID numbers for
Payroll. Banks Set up banks used by employees for
direct deposit.
(Click screenshot to zoom in)
(click Next to continue)
Back
Home
Next
77
Back
78
Back
79
Back
80
Back
81
Back
82
Payroll - Employer - Support Window
A customized support window pops up when the
Support tab is clicked. These settings can be
changed under the Company Setup tab. This window
is completely customizable by your data center -
graphics, text, and even format can be changed.
(click Next to continue)
(Click screenshot to zoom in)
Back
Home
Next
83
Back
84
- Save Time and Money
- Streamline HR and Payroll
- Employee Self-Service
- Check Pay Stubs, Vacation and Sick Time
- Less Questions, More Productivity
Click Here to Continue
85
Employee Services - Main Screen
When you enter Employee Services, this screen
will appear. From here, you can navigate through
this view-only program. This module represents
basic HR record keeping and works in conjunction
with PayChoice Online. It stores all information
in one place and is used as a database for
Payroll. The main screen also serves as a hub for
all employees to download forms, receive company
messages, and update information when screens are
activated by Administration.
(Click screenshot to zoom in)
(click Next to continue)
Back
Home
Next
86
Back
87
Back
88
Employee Services - Check View
When you click on Check View, this screen will
appear. A list of employees and relevant payroll
information is displayed. Click on the employee
in the Directory whose check information you want
to view.
(click Next to continue)
(Click screenshot to zoom in)
Back
Home
Next
89
Back
90
Employee Services - Check View (cont.)
Check Stub View selected check stub of any
employee. W2 View a copy of an employees
W2. Paycheck Calculator Gives the user the
opportunity to calculate different scenarios.
Your Paycheck A payroll document provided
directly by us to help you better understand the
payroll system.
(click Next to continue)
(Click screenshot to zoom in)
Back
Home
Next
91
Back
92
Back
93
Back
94
Back
95
Back
96
Employee Services - Employee
Upon clicking on the Employee tab and choosing an
option, you will be asked to select the employee
whose information you would like to bring onto
the screen. If you have already selected an
employee and are returning to this section, you
will go directly to the option you have selected.
(click Next to continue)
(Click screenshot to zoom in)
Back
Home
Next
97
Back
98
Employee Services - Employee (Part 1)
Demographics Keep all relevant demographical
information on an employee on one
screen. Employment View an employees status,
division/department, and other employment
information. EEO View an employees Equal
Opportunity statistics. W4 Look at an employees
Federal and State tax information.
(click Next to continue)
(Click screenshot to zoom in)
Back
Home
Next
99
Back
100
Back
101
Back
102
Back
103
Employee Services - Employee (Part 2)
Emergency View an employees emergency contact
information, as well as add new
contacts. Medical Keep track of an employees
medical information, including doctors contact
information, prescriptions, and
more. Dependent View list of dependents an
employee claims, plus add dependents when needed.
(click Next to continue)
(Click screenshot to zoom in)
Home
Back
Next
104
Back
105
Back
106
Back
107
Back
108
Back
109
Employee Services - Employee (Part 3)
Assets View list of company assets under an
individual employees name, plus assign assets to
individual employees. Employment History See a
list of places where an employee has previously
been employed. Also add previous employment to
an employees profile. Citizenship View
information on an employees citizenship and
verification.
(click Next to continue)
(Click screenshot to zoom in)
Back
Home
Next
110
Back
111
Back
112
Back
113
Back
114
Back
115
Employee Services - Skills Inventory
When you enter Skills Inventory, this screen will
appear. From here, you can view an individual
employees skills and attributes. The Skills
Inventory keeps track of skills based on
education, certifications, skills, and training
they have had.
(click Next to continue)
(Click screenshot to zoom in)
Back
Home
Next
116
Back
117
Employee Services - Skills Inventory
Education View list of college(s) an employee has
attended and their degree information, plus add
additional education here. Certification See a
list of an individual employees certifications
and their license number. Add more certifications
here as they are given. Skills View the
continuing education classes an employee has
taken and add to the list as needed. Training If
an employee has taken additional training classes
for the company, they can be kept in a list here
and added when taken.
(Click screenshot to zoom in)
(click Next to continue)
Home
Back
Next
118
Back
119
Back
120
Back
121
Back
122
Back
123
Back
124
Back
125
Back
126
Employee Services - Payroll
When you enter the Payroll section of Employee
Services, this screen will appear. All
relevant payroll information will be located
under this tab. Much of the data fields found
here are pulled directly from the Payroll module
of Online Employer.
(click Next to continue)
(Click screenshot to zoom in)
Back
Home
Next
127
Back
128
Employee Services - Payroll (Part 1)
Time Off View the amount of time off an employee
has taken by year. Compensation See the specific
types of compensation and the amounts paid by
employee. Salary History View an employees
history of raises and salary adjustments.
(click Next to continue)
(Click screenshot to zoom in)
Home
Back
Next
129
Back
130
Back
131
Back
132
Employee Services - Payroll (Part 2)
Deductions See which deductions are taken out of
an individuals paycheck. Direct Deposit Find out
which bank is set up for an employees direct
deposit. Additional Info View additional relevant
information, including the information customized
for your company.
(click Next to continue)
(Click screenshot to zoom in)
Home
Back
Next
133
Back
134
Back
135
Back
136
Employee Services - Timesheet
When you click on the Timesheet tab and select an
option, you will be asked to choose the employee
whose information you would like to bring on
screen. This tab is only visible if ESS
Timesheet is activated for your company.
(click Next to continue)
(Click screenshot to zoom in)
Back
Home
Next
137
Back
138
Employee Services - Reports
When you enter Reports, this listing will show.
It indicates which reports are available for the
selected employee. Make a customized printable
report from this screen if you do not see what
you want on the list.
(click Next to continue)
(Click screenshot to zoom in)
Home
Back
Next
139
Back
140
Employee Services - Reports - Creating Reports
(Preset)
Select Report Click on the report you want to
create based on pre-determined fields. A
description of what the report contains will
appear in the text box. Create List A list will
be created onscreen of the information youve
chosen to gather. Export to Excel Clicking onto
Export to Excel will export all the information
into an Excel spreadsheet for you to save.
(click Next to continue)
(Click screenshot to zoom in)
Back
Home
Next
141
Back
142
Back
143
Back
144
Employee Services - Reports - Creating Reports
(Custom)
Select/Order Fields Determine which information
you want to include and its order. Select/Order
Grouping Organize the grouping and display of
your desired report fields. Select Default Sort
Order Determine sort criteria for your
report. Select Filters Choose pre-defined filters
for your report. Save Report Definitions Create
your reports name/description. View List/Export
to Excel View your list and export to Excel from
the same page.
(Click screenshot to zoom in)
(click Next to continue)
Back
Home
Next
145
Back
146
Back
147
Back
148
Back
149
Back
150
Back
151
Employee Services - Directory
Clicking on the Directory tab will always bring
you back to the beginning screen. Go to this
screen when you want to change the employee whose
information you are viewing.
(click Next to continue)
(Click screenshot to zoom in)
Back
Home
Next
152
Back
153
Employee Services - Administration
The Administration tab leads you to the screen
where you can make changes to the look of
Employee Services. This tab will only be
available if you are an Administrator.
Supervisors and employees can only view
information through Employee Services.
(click Next to continue)
(Click screenshot to zoom in)
Back
Home
Next
154
Back
155
Employee Services - Administration (Part 1)
Company Hub Provides a place for employees to get
information supplied by the company whenever they
want. Creates company messages and bulletins
accessible to the entire staff. Skills Keeps a
comprehensive list of the skills acquired by all
employees in the company. PTO Admin Allows you
to adjust the codes established for persona time
off. Assets Shows a list of all the company
assets and which employee is assigned to them.
(Click screenshot to zoom in)
(click Next to continue)
Home
Back
Next
156
Back
157
Back
158
Back
159
Back
160
Employee Services - Administration (Part 2)
Training View a comprehensive list of the
training classes taken by all employees. Messages
Add messages viewable in the Company
Hub. Options Set up the different pages viewable
by level of access.
(click Next to continue)
(Click screenshot to zoom in)
Home
Back
Next
161
Back
162
Back
163
Back
164
- Track Hours for Remote Employees
- Post hours by Job Code or Department
- Maintain Hours in Multiple Pay Periods
Simultaneously
Click Here to Continue
165
Employee Services Timesheet - Main Screen
Timesheet is a module that requires a company to
first have access to PayChoice Online and
Employee Services. It allows employees to enter
hours into an electronic timesheet, making the
process of calculating totals seamless. Employees
can only enter hours into the timesheet,
Supervisors can approve or modify another
Employees hours, and Administrators can approve
or modify hours submitted by Employees and
Supervisors.
(click Next to continue)
(Click screenshot to zoom in)
Back
Home
Next
166
Back
167
Employee Services Timesheet - Enter Hours
Add Hours Use the specific fields to enter hours
into your timesheet under the appropriate earning
type. Add/Delete Row Customize your timesheet
by adding/deleting rows where needed. Add
Comments Type inside the box to add comments to
your timesheet. Save Changes Save hours entered
during your current visit to Timesheet. Submit
Timesheet If you are finished entering hours into
the timesheet for the current pay run, use this
button to submit it for payroll.
(Click screenshot to zoom in)
(click Next to continue)
Back
Home
Next
168
Back
169
Employee Services Timesheet - Approve
View All Employees Gives a list of all employees
set up to use the Timesheet program and a summary
of their hours classified by type. View
Individual View an individuals timesheet and
make edits to it simply by clicking on their
name. Email Reminders Send a message through
e-mail to supervisors for approval. Approve
All Once you are satisfied with all employees
timesheets, click to approve all and submit for
payroll.
(Click screenshot to zoom in)
(click Next to continue)
Back
Home
Next
170
Back
171
Employee Services Timesheet - Submit
View by Period Click on dates to view timesheets
by pay period. Click to Edit Once you are
viewing timesheets, click to make changes to
approved timesheets. Submit Scroll down to view
recently submitted pay periods, or click to
submit the current payroll. Confirmation Once
you have submitted a timesheet, you will receive
confirmation.
(Click screenshot to zoom in)
(click Next to continue)
Back
Home
Next
172
Back
173
Back
174
Employee Services Timesheet - Maintenance
Select/Order Hours/Pay Types Specify which hours
and pay types you would like to display and their
order on the timesheet. Select/Order Other Dollar
Types Specify other hours and pay types employees
can enter information into. Select/Order Hours
Column Select up to 5 manager-defined hours
columns for employees to enter their time under.
Enable Weekly/Bi-Weekly Timesheets Set up
timesheets by 7, 14, or 15-day pay entry screens.
(Click screenshot to zoom in)
(click Next to continue)
Back
Home
Next
175
Back
176
Back
177
Back
178
Back
179
- Automatic Creation of Files in Payroll
- Upload Payroll Summary and Nets to the Web
- Upload Previous Payroll Runs
- Five Different General Ledger Reports
- Post G/L Transactions to QuickBooks and
Generic Excel Formats
Click Here to Continue
180
General Ledger - Main Screen
When you enter General Ledger, this screen will
appear. From here, the client, service bureau or
an accountant can upload and maintain QuickBooks
accounts without the intervention of a third
party. General Ledger simplifies the maintenance
of multiple Chart of Accounts. With just a few
steps of setup, keeping track of your books has
never been easier.
(click Next to continue)
(Click screenshot to zoom in)
Back
Home
Next
181
Back
182
General Ledger - Main Menus
Post to GL Click on this if you have not posted a
pay run to General Ledger. Maintenance If you
have not already posted your pay run, click here
to make changes and/or updates to the
configuration. These are the same steps you take
to set up your company. Reports If you have
already posted your pay run and have made all
necessary edits, use this tab to process reports
from specific information.
(click Next to continue)
(Click screenshot to zoom in)
Back
Home
Next
183
Back
184
General Ledger - Post to GL
Open/Unposted Post a new pay run in General
Ledger, or view setup option screens.
History View history of past pay runs.
Delete/Recover From History tab, you can check
off boxes for the pay runs you wish to delete or
open again.
(click Next to continue)
(Click screenshot to zoom in)
Back
Home
Next
185
Back
186
Back
187
General Ledger - Posting a File
Upload Chart Of Accounts Upload General Ledger
files from your accounting system to enrollment,
or post a QuickBooks transaction to the Chart of
Accounts. Add to Chart Of Accounts Update an
existing COA from this screen. Edit Chart Of
Accounts Modify the display boxes to change your
Chart of Accounts lookup.
(click Next to continue)
(Click screenshot to zoom in)
Back
Home
Next
188
Back
189
Back
190
Back
191
General Ledger - Maintenance - Accounting
Information
Select Package Choose from the drop down menu
which accounting software you are using. Set
Options Establish the settings for date
transactions and default suspense accounts. Also
specify whether account numbers or class tracking
is used. Save Data Click to save your accounting
info.
(click Next to continue)
(Click screenshot to zoom in)
Back
Home
Next
192
Back
193
General Ledger - Maintenance - Bank Account
Information
Specify Posting Method Indicate how you post your
net pay checks. Map Default Bank
Account Specify the default account for your net
pay checks. Specify Other Records Map other bank
accounts by divisions.
(click Next to continue)
(Click screenshot to zoom in)
Back
Home
Next
194
Back
195
General Ledger - Maintenance - Allocation
Specify Tracking Allocate how QuickBooks tracks
your payroll expenses. Specify Allocation
Methods Map by company, div./dept. or labor code.
Further map your expenses by sub-account or
class tracking. Establish Labor
Information Specify the codes QuickBooks uses for
labor sub-accounts or class tracking.
(click Next to continue)
(Click screenshot to zoom in)
Back
Home
Next
196
Back
197
General Ledger - Maintenance - Master Mapping
Select Section Choose individual sections to edit
mapping of accounts to pay types. Specify
Accounts Once inside the section, specify which
General Ledger accounts are mapped to each pay
type. If allocation is used, first map at
company level, then for each cost center. Save
Settings After all sections are mapped, click on
Save to keep your settings for the General Ledger
configuration.
(click Next to continue)
(Click screenshot to zoom in)
Back
Home
Next
198
Back
199
Back
200
Back
201
General Ledger - Main Menu (w/mapped account)
View Payroll Totals Click on the pay run dates to
view payroll totals before posting. View
Summary Totals Click to view the totals that make
up your pay run. View Details Click on one of
the totals to see what makes up the
summary. Click/Save/Export Click to generate a
pay run Excel file. Select from the options as
to how you would like it organized, then save or
print your pay run. Once this is generated, your
file is moved into the History.
(Click screenshot to zoom in)
(click Next to continue)
Back
Home
Next
202
Back
203
General Ledger - Reports (Part 1)
Chart Of Accounts View the current chart of
accounts and view details such as account names,
numbers, types and more. Pre-Posting View
and/or print a report of the pay run(s) you are
about to post. Posting History View the mapped
old pay run totals previously posted to
QuickBooks. Check Detail View information on
previous checks issued.
(click Next to continue)
(Click screenshot to zoom in)
Back
Home
Next
204
Back
205
Back
206
Back
207
Back
208
General Ledger - Reports (Part 2)
Missing/Unmapped COA View a list of all missing
or unmapped Chart of Accounts posted to General
Ledger. Mapped COA View a list of all mapped
Chart of Accounts posted to General
Ledger. Export to IIF Select the pay run you wish
to export, then click View Report to create an
.IIF file for QuickBooks. General Ledger also
allows for the building of QuickBooks files for
older versions of the software.
(click Next to continue)
(Click screenshot to zoom in)
Back
Home
Next
209
Back
210
Back
211
Back
212
Back
213
- Convenient, Downloadable Payroll Report and
Check Images - Access Pay Stubs, Reports, Labor Distribution
and Payroll Registers. Quarter End Reports are
Also Available - Access W2s and 1099s
- Avoid E-mail Attachment and Security Problems
Click Here to Continue
214
ViewChoice Reports - Main Screen
When you enter ViewChoice Reports, this screen
will appear. From here, you can view, print or
delete stored reports and checks on the
web. ViewChoice is an archiving module that
collects a copy of every payroll report, check
stub, W-2, 1099, earning record and payroll tax
return processed for the period selected
monthly, quarterly, or annually.
(click Next to continue)
(Click screenshot to zoom in)
Back
Home
Next
215
Back
216
ViewChoice Reports - Software Setup
Download Software The first time you use
ViewChoice, you will have to download the
ViewChoice software from our support site.
Install from Local Desktop Once you have
installed the software from your local desktop,
you can view all reports set up in
ViewChoice. Open Files Click on Retrieve to
automatically open reports listed under certain
descriptions and dates.
(click Next to continue)
(Click screenshot to zoom in)
Back
Home
Next
217
Back
218
ViewChoice Reports - Main Window
ViewChoice contains all reports normally
available to you in the Payroll module. You can
download in PDF format, save, or print these
reports from ViewChoice. Payroll reports,
employee checks, and employee check stubs are
available via ViewChoice. Payroll reports,
employee checks, employee check stubs, quarterly
reports, W2s, 1099s, and check history are
available via ViewChoice CD.
(click Next to continue)
(Click screenshot to zoom in)
Back
Home
Next
219
Back
220
ViewChoice Reports - Payroll Reports
Click on the report screenshot you would like to
view. Check Register Check Reconciliation Direct
Deposit Report Department Summary Payroll
Department Analysis General Ledger Report Tax
Liability Workers Compensation Summary Deduction
Report Timesheet Controls Cash Analysis Delivery
Page
(click Next to continue)
(Click screenshot to zoom in)
Back
Home
Next
221
Back
222
Back
223
Back
224
Back
225
Back
226
Back
227
Back
228
Back
229
Back
230
Back
231
Back
232
Back
233
ViewChoice Reports - Employee Checks
View Check See a copy of any employees printed
check per period. Print Live Checks Live checks
are available for print one time only per
request. Easy Access Find an employees check
information without having to sort through mounds
of paperwork and files.
(click Next to continue)
(Click screenshot to zoom in)
Back
Home
Next
234
Back
235
ViewChoice Reports - Employee Check Stub
View Check Stub Scroll down to the employee whose
check stub you would like to view. Export to
Client or Accountant Export easily via e-mail
attachment or upload to a secure web site
available in Online Employer. Reprint Check
Stub Reprint an employees check stub directly
from ViewChoice, right in your office.
(click Next to continue)
(Click screenshot to zoom in)
Back
Home
Next
236
Back
237
Security
- Set Access by Company or User-By-User
- Revolutionary Multi-Tiered Security
- Administrator Controlled
- Protected User Information and Log-Ins
- Verisign Authentication
- SQL Server Protection
Click Here to Continue
238
Getting Started
Give us a call today to find out howyou can
profit by adding Online Employerto your service
offerings.
Recommended
CrystalGraphics Presentations


