
Rapid Prototyping RP - PowerPoint PPT Presentation
1 / 49
Title:
Rapid Prototyping RP
Description:
... powder is deposited via a roller mechanism on the top of ... The powder is applied from the feed cylinder by the levelling roller. 34. CAD / CAM / CAE / RP ... – PowerPoint PPT presentation
Number of Views:145
Avg rating:3.0/5.0
Title: Rapid Prototyping RP
1
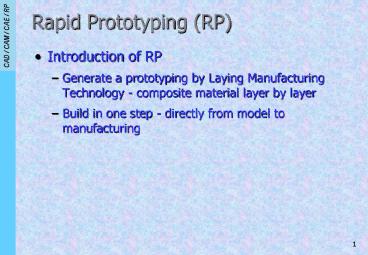
Rapid Prototyping (RP)
- Introduction of RP
- Generate a prototyping by Laying Manufacturing
Technology - composite material layer by layer - Build in one step - directly from model to
manufacturing
2
Rapid Prototyping (RP)
- Development of RP
- First Phase Manual (or Hard) Prototyping
- Age-old practice for many centuries
- Prototyping as a skilled craft is traditional and
manual and based on material of prototype - Natural prototyping technique
3
Rapid Prototyping (RP)
- Development of RP
- Second Phase Soft (or Virtual) Prototyping
- Mid 1970s
- Increasing complexity
- Can be stressed, simulated and tested with exact
mechanical and other properties
4
Rapid Prototyping (RP)
- Development of RP
- Third Phase Rapid Prototyping
- Mid 1980s
- Hard prototype made in a very short turnaround
time (relies on CAD modelling) - Prototype can be used for limited testing
- prototype can consist in the manufacturing of the
products - 3 times complex as soft prototyping
5
Rapid Prototyping (RP)
- Fundamentals of RP
- Building computer model
- Model is building by CAD/CAM system
- Model must be defined as enclosed volume or solid
- Converting model into STL file format
- STereoLithography (STL) file is a standard format
to describe CAD geometry used in RP system - STL file file approximates the surfaces of the
model by polygons
6
Rapid Prototyping (RP)
- Fundamentals of RP
- Fabricating the model
- Building model layer by layer
- Forming a 3D model by solidification of
liquid/powder
7
Rapid Prototyping (RP)
- Applications of RP
- For design evaluation
- Touch and holding a physical prototype
- For function verification
- e.g. assembly, kinematics performance, and
aerodynamic performance - Models for further manufacturing processes
- e.g. Vacuum casting, spray metal moulding,
investment casting, etc.
8
Rapid Prototyping (RP)
- Advantages and Disadvantages
- No planning of process sequences
- No specific equipment for handling materials
- No transportation between machining
- Features-based design and feature recognition are
unnecessary - Defining a blank geometry is unnecessary
- Defining different setups or complex sequences of
handling material is unnecessary
9
Rapid Prototyping (RP)
- Advantages and Disadvantages
- No need to consider jigs and fixtures
- Designing and manufacturing moulds and dies
- Specific materials are restricted
10
Rapid Prototyping (RP)
- Role of RP in Product Development Cycle
- Product design
- Increase part complexity and diversity with
little effect on lead time and cost - Minimise time-consuming discussion and
evaluations of manufacturing possibilities - Tool design and manufacturing
- Minimise design, manufacturing and verification
of tooling - Reduce parts count and eliminate tool wear
11
Rapid Prototyping (RP)
- Role of RP in Product Development Cycle
- Assembly and test
- Reduce labour content of manufacturing (e.g.
machining, casting, inspection and assembly,
etc.) - Reduce material costs (e.g. handling, waste,
transportation, spare and inventory, etc.) - Function testing
- Avoid design misinterpretations, i.e. what you
design is what get)
12
Rapid Prototyping (RP)
- Due to the newness of the technology, there are
already so many words for RP used today - RP( most commonly used) - Rapid Prototyping
- RPTM(inc. new development trends) - Rapid
Prototyping, Tooling and Manufacture - Direct CAD Manufacturing/Desktop
Manufacturing/Instant Manufacturing/CAD Oriented
Manufacturing RP
13
Rapid Prototyping (RP)
- Layer Manufacturing/Material Addition
Manufacturing/Material Deposit Manufacturing/
Material Increase Manufacturing/Solid Freedom
Manufacturing - Emphasis the unique
characteristic of RP
14
Rapid Prototyping (RP)
- Classification of RP Systems
- By the initial form of its material, RP systems
can be categorised into - Liquid-based
- Liquid-based material ? Curing Process ? Solid
- (e.g. SLA, SGC, SOUP, etc.)
15
Rapid Prototyping (RP)
- Classification of RP Systems
- Solid-based
- Encompass all forms of material in the solid
form, such as in the form of wire, a roll,
laminates and pellets. - (e.g. LOM and FDM, etc.)
- Powder-based
- Grain-like material ? Joining/Binding ? Solid
- (e.g. SLS and 3DP, etc.)
16
Rapid Prototyping (RP)
- Features of RP Systems
- The features of some commercially available RP
systems can be summarised into - Process type - Stereo lithography, Laminating,
Fused deposition modelling, Sintering of powder,
Solid ground curing, etc. - Work space(mm) - depends on the models
- Material - photopolymer resin, coated paper, ABS,
wax, metal alloy, etc.
17
Rapid Prototyping (RP)
- Features of RP Systems
- Layer thickness(mm) - 0.05 - 0.3(SLA) 0.1 -
1(LOM.) 0.05(FDM) 0.08(SLS) 0.01 - 0.15(SGC) - Accuracy(mm) - 0.01- 0.2(SLA) 0.1 - 0.2(LOM)
0.127 - 0.254(FDM) 0.03 - 0.38(SLS) 0.05 -
0.5(SGC) - Manufacturer - 3D System, Stratasys, Helisys,
DTM, EOS, etc.
18
Rapid Prototyping (RP)
- Pre-Processing Tasks
- Prepare geometric model in STL file format
- Solid or surface CAD model to be built is next
converted into format dubbed the .STL file format
because it is a standard input data to any RP
process. STL originates from 3D Systems, which
pioneers the Stereolithography system in 1987.
The format approximates the surfaces of the model
using tiny triangles. Since 1990, almost all
major CAD/CAM vendor supply the CAD-STL
interface.
19
Rapid Prototyping (RP)
- Pre-Processing Tasks
- Building up direction
- The direction affects many key aspects of RP
process, quality of the surface finish, build
time, amount of support structures needed, and
amount of trapped volume. For experience,
minimising the height of the geometry will reduce
the no. of layers required, thereby decreasing
build time, but also sacrifice part resolution or
accuracy.
20
Rapid Prototyping (RP)
- Pre-Processing Tasks
- Trapped volume
- It is the amount of liquid resin in the RP
process (e.g. SLA) that was entrapped by the
processed or solidified region. Thus trapped
volumes can exist in concave regions that as
containers. It may be eliminated by either
building a part with a drain hole and fill the
hole after solidification or modifying the
orientation of the part.
21
Rapid Prototyping (RP)
- Pre-Processing Tasks
- Part placement
- In RP, the time spent building a prototype does
not depend on the no. of parts but on the total
no. of slices required. By closely packing
multiple parts into feasible volume, several
parts can be built at the same time.
22
Rapid Prototyping (RP)
- Pre-Processing Tasks
- Support structure
- The support structure in RP process has the
following functions - ensure the recoater blade will not strike the
platform when the first layer is swept - improve uniformity of layer thickness
- provide a simple means of removing the part from
the platform upon its completion
23
Rapid Prototyping (RP)
- Pre-Processing Tasks
- Support structure
- However, overdesign of support structures
results in added design and manufacturing time,
as well as finishing operations
24
Rapid Prototyping (RP)
- Post-Processing Tasks
- Part removal and cleaning
- After a part is built, drain excess liquid resin
at the platform and the part back into the vat.
Next, the part and the platform are placed in a
cleaning apparatus with solvent (e.g. TPM). It
will produce little swelling distortion on a
part. Once the part has been thoroughly cleaned
of excess resin, both platform and part are
rinsed with water to remove TPM film. The last
step is to remove the part from the platform by
flat-bladed knife.
25
Rapid Prototyping (RP)
- Post-Processing Tasks
- Post curing
- During some RP processes, such as SLA, the laser
scans each layer along the boundary and hatching
lines only. This means that inside portions of
the layers may not be completely solidified. Thus
the part is post-cured to complete the
polymerisation process by exploring with UV
radiation in a specially designed apparatus.
26
Rapid Prototyping (RP)
- Post-Processing Tasks
- Part finishing
- This process is to remove the supports by using
a dull edged blade or putty knife. Care must be
taken to avoid damaging a part that contains
fragile sections. Once the supports have been
removed, minor sanding is applied to eliminate
residual traces of the supports.
27
Rapid Prototyping (RP)
- Principle of Stereolithography Apparatus (SLA)
- SLA was developed in 1986 by 3D Systems. The
process is based on the following principles - Parts are built from a photo-curable liquid resin
that solidifies when sufficiently exposed to a
laser beam which scans across the surface of the
resin - The building is done layer by layer, each layer
being scanned by the optical scanning system and
controlled by an elevation mechanism which lowers
at the completion of each layer
28
Rapid Prototyping (RP)
- Process of SLA
- Step 1 - A liquid state photosensitive polymer
that solidifies when exposed to a lighting
source - Step 2 - A platform that can be elevated is
located just one layer of thickness below the
surface - Step 3 - According to the cross section of the
part (starting with bottom layer). The laser
scans the polymer layer above the platform to
solidify the polymer
29
Rapid Prototyping (RP)
- Process of SLA
- Step 4 - The Platform is lowered into the
polymer bath to the layer thickness - Step 5 - Repeat 3 and 4 until the top layer of
the part is generated - Step 6 - Post-curing and part finishing will
then be performed
30
Rapid Prototyping (RP)
- Applications of SLA
- Models for conceptualisation,packaging and
presentation - Prototypes for design, analysis, verification and
functional testing - Masters for prototype tooling and low volume
production tooling - Patterns for investment casting, sand casting and
moulding - Tools for fixture and tooling design and
production tooling
31
Rapid Prototyping (RP)
- Principle of Selective Laser Sintering (SLS)
- SLS was developed by DTM Corporation in 1992.
The process is based on the following principles - Parts are built by sintering when a CO2 laser
beam hit a thin layer a powdered material. The
interaction of the laser beam with the powder
raises the temperature, resulting in particle
melting and bonding together
32
Rapid Prototyping (RP)
- Principle of Selective Laser Sintering (SLS)
- The building of the part is done layer by layer.
Each layer of the building process contains the
cross sections of one or many parts. The next
layer built directly on the top of the sintered
layer after an additional layer of powder is
deposited via a roller mechanism on the top of
the previously formed layer
33
Rapid Prototyping (RP)
- Process of SLS
- Step 1 - A part cylinder is located at the
height necessary for a layer of powdered
material to be deposited on the cylinder to
the desired thickness. The powder is applied
from the feed cylinder by the levelling roller
34
Rapid Prototyping (RP)
- Process of SLS
- Step 2 - The layer of powder is selectively
raster- scanned and heated with a laser,
causing particles to adhere to each other. The
laser scan forms the powder into the required
cross section shape. Again this step starts
with the bottom cross section - Step 3 - The part cylinder is lowered by the
layer thickness to permit a new layer of
powder to be deposited
35
Rapid Prototyping (RP)
- Process of SLS
- Step 4 - The new layer is scanned, conforming it
to the shape of the next upper cross-section
and adhering it to the previous layer - Step 5 - Repeat 3 and 4 until the top layer of
the part is generated - Step 6 - Post-curing may be required for some
material
36
Rapid Prototyping (RP)
- Applications of SLS
- Concept models
- Functional models and working prototypes
- Wax casting pattern
- Polycarbonate patterns. These build faster than
wax patterns and are ideally suited for design
with thin walls and fine features. These pattern
are also durable and heat resistant - Metal Tools. Direct rapid prototype of tools of
moulds for small or short production runs.
37
Rapid Prototyping (RP)
- Process of FDM
- The process of FDM is relatively simple and fast
but its use is limited to thermoplastic materials - Step 1 - The thermoplastic material in the form
of filament is heated to just above its
solidification temperature - Step 2 - The extrusion head is heated and moves
according to the pattern of the cross section
of each layer of the part
38
Rapid Prototyping (RP)
- Process of FDM
- Step 3 - The material is extruded on the
foundation or previously built layer. As it is
extruded, it is cooled and thus solidifies to
form the required pattern of part - Step 4 - Repeat 2 and 3 until the top layer of
the part is generated - Step 5 - Part finishing may be required
39
Rapid Prototyping (RP)
- Applications of FDM
- Models for conceptualisation and presentation
- Prototypes for design, analysis and functional
testing - Patterns and masters for tooling. Models can be
used as patterns for investment casting, sand
casting and moulding
40
Rapid Prototyping (RP)
- Principle of Laminated Object Manufacturing (LOM)
- LOM was developed by Helisys Inc. in 1991. The
process is based on the following principles - Parts are built, layer by layer, by laminating
and laser-trimming materials that are delivered
in sheet form. The sheets are laminated into
block by a thermal adhesive coating
41
Rapid Prototyping (RP)
- Process of LOM
- The accuracy of the process of LOM is high. The
most popular laminated material is paper sheet. - Step 1 - Sheet material is supplied from a
continuous roll form. Each sheet attached to
the block, using heat and pressure to form a
new layer - Step 2 - The platform is lowered by the
thickness of the sheet whenever a sheet is
attached to the stack
42
Rapid Prototyping (RP)
- Process of LOM
- Step 3 - After a layer is deposited, a CO2 laser
is traced on the layer along the contours
corresponding to the current cross section - Step 4 - Areas of the layer outside the contours
are cross-hatched by the laser (i.e. cut into
small pieces for removal afterwards)
43
Rapid Prototyping (RP)
- Process of LOM
- Step 5 - After the part is built, the result is
imbedded within a block of supporting material.
This material is then broken into chunks along
the cross-hatching lines - Step 6 - The resulting part may then be coated
with a sealant to keep out moisture
44
Rapid Prototyping (RP)
- Applications of LOM
- Applicable for a wide range of product, equipment
for aerospace or automotive, consumer products,
and medical devices - Prototypes for design, analysis and functional
testing - Tools for production
- Small volume of finished goods
45
Rapid Prototyping (RP)
- Principle of 3D Printing (3DP)
- 3DP was invented by MIT in 1994
- Parts are created by a layered printing process
and adhesive bonding, based on sliced cross
section data. A layer is created by adding
another layer of powder. The powder layer is
selectively joined, where the part is to be form,
by ink-jet printing of a blinder material
46
Rapid Prototyping (RP)
- Process of 3DP
- The process of 3DP is more efficient and
relatively cheaper than sintering types. - Step 1 - Platform is located at the height
necessary for a layer of ceramic powder to be
deposited - Step 2 - The layer of ceramic powder is
selectively raster-scanned with a print head
that delivers a liquid binder, causing
particles to adhere to each other
47
Rapid Prototyping (RP)
- Process of 3DP
- Step 3 - The platform is lowered by the
layer thickness to permit a new layer of
powder to be deposited - Step 4 - The new layer is scanned, conforming it
to the shape of the next upper cross section
and adhering it to the previous layer
48
Rapid Prototyping (RP)
- Process of 3DP
- Step 5 - Repeat 3 and 4 until the top layer of
the part is generated - Step 6 - A post-process heat treatment is
applied to solidify the part
49
Rapid Prototyping (RP)
- Applications of 3DP
- CAD-Casting metal parts. A ceramic shell with
integral cores can be fabricated directly from
the CAD model - Direct metal parts. It is adaptable to a variety
of material systems, allowing the production of
metallic/ceramic parts with novel composition - Prototypes with colours and elastic feature
Recommended
CrystalGraphics Presentations


