
Electronic Merit Marks - PowerPoint PPT Presentation
1 / 39
Title: Electronic Merit Marks
1
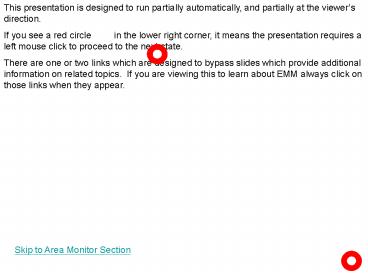
This presentation is designed to run partially
automatically, and partially at the viewers
direction. If you see a red circle in the
lower right corner, it means the presentation
requires a left mouse click to proceed to the
next state. There are one or two links which are
designed to bypass slides which provide
additional information on related topics. If you
are viewing this to learn about EMM always click
on those links when they appear.
Skip to Area Monitor Section
2
As this presentation was going to press, a new
feature was being added to the EMM system. When
the original submitter receives the email from
EMM describing the results of the Area Monitors
review, it will in future include a text file
attachment. Using DB2000, you will be able to
import that text file and automatically post the
results of the review into the merit mark grid
changing the submission status from Submit to
Accepted and/or Rejected as appropriate.
3
Those familiar with DB2000 will recognize the
main splash screen with its menus and buttons.
To work on merit marks Click on the MM button
4
Doing so will display the Merit Mark
Recommendation window. This is the dialog one
uses to enter merit mark recommendations.
Notice that the Change S O or Change Submitting
Organization only appears when using a D/60
roster to do national committee recommendations.
When you have finished all of your merit mark
entries and are ready to print or send merit
marks, click on the Review button.
Click on this link to Skip Details on How to Do
Merit Marks
5
Doing Merit Marks From Scratch (Terms)
An Original submission can only be made once a
year. If you forget to include someone in the
original submission, they must be sent in on a
Supplemental submission If a recommendation is
rejected by the area monitor and you want to
elaborate on why you feel they really deserve a
merit mark, you must send in a Re-Submission. If
someone was omitted from a previous years
submission, the submitting officer from that year
must send in a Retroactive submission.
6
Doing Merit Marks From Scratch
When You click on the MM button for the first
time, the system will present an empty MM Grid.
7
The first thing we need to do is to add all of
our candidates to the grid.
The easiest way to do this is to click on the
Add All button.
Notice that the grid is initially empty.
8
If, after this, you discover that someone, other
than the submitting officer, is missing from the
grid, you can click on the Main button to return
to the DB2000 splash screen.
That will add every member of your organization
to the grid.
9
Then click on the Roster button
10
Then click on the Add Members button
11
Click on the New button
12
And then click on the Roster button to return to
the Roster screen
Choose an affiliation of either New Member or
Associate Member as appropriate.
And fill in the other top 5 fields making
absolutely certain that you have the correct
Certificate Number. Triple check it! Its very
important that you enter the correct number.
When you are finished, click on the OK button
13
When you have returned to the Roster screen,
click on the Main button to return to the Splash
screen
14
And then click on the MM button to return to the
Merit Mark grid.
15
At that point you should be able to add the new
member to the grid.
Notice that the cell background turns pink when
the cell is open for data entry. The control
values can be changed with the mouse or with the
up and down arrows. Press Enter to store the
value.Press Escape to cancel entry.
The cells in the rows for course name, or course
sessions taught or proctored have controls
associated with them which can be used to enter
data in the selected cell.
Text is entered in the selected Valuable Service
Performed cell by double-clicking or pressing
Enter to open, and pressing Enter to save the
text. Press Escape to discard changes.
Notice that the submission status for each member
is No Data.
After we add data to a members entry, his
submission status will change to No
Recommendation.
Adding data to a members entry is a simple
matter of selecting the correct cell and then
double-clicking on it to open it.
16
And select Remove All No Data
When you are finished entering all of your
recommendations you will want to delete all rows
which have no data, that is those that are not
being recommended for a Merit Mark.
The easiest way to do this is to click on the
Change Status menu
17
Notice that the Submission Status for the
remaining rows is No Recommendation.
The Submission Status of a row determines whether
or not it will be included in the submission.
And select Mark All No Recommendation for
Submittal
That will reduce the grid to only those rows
which have had data entered.
We need to change the submission status from No
Recommendation to Submit. The easiest way to do
that is to click on the Change Status menu
18
When you have completed all of your
recommendations, and are ready to print or send
them, click on the Review button.
Notice that all of the Submission Status cells
will change to Submit.
For the most part you can ignore these controls
which have to do with tagging or untagging
records for one purpose or another.
19
Which will bring you to this page.
Notice that we have added two additional buttons.
If you click Send Draft To it will open your
browser and send some information to a web
program.
20
Also change the contents of this box so that it
contains the email address of the person to whom
the PDF file should be sent.
That web program will respond with this page,
which is designed to upload the merit mark
submission and determine to whom the PDF should
be emailed.
That will fill in this box automatically.
Notice that the page knows the name of the
submission file. You should use the Browse
button to navigate to the specified file and
select it.
When both fields have been properly filled in,
click on the Submit Request button
21
In a few seconds the system will respond with a
response similar to this. Remember to close your
browser after this response has been received.
22
If you click Submit via Web, it will open your
browser and send some information to a web
program.
Closing your browser will again reveal this page.
23
Its up to the submitter to fill in the file name
either by keying, by cutting and pasting, or by
using the browse button to locate and select the
file. Security features prevent the software
from doing it automatically.
That web program will respond with this page,
which is designed to upload the merit mark
submission.
Notice that the web program knows the name of the
file it wants!
24
If you choose to browse
Use the Look in box to navigate to the proper
folder.
Then select the proper file by double-clicking on
its name
25
The result of the previous action will be to put
the desired files name in this box.
Then all you have to do is click on the Submit
MM button to send the merit marks to the merit
mark processing system.
26
When you do, you will receive a screen similar to
this confirming the receipt of your submission.
27
In addition, the submitter will also receive an
email similar to this, confirming the receipt of
his submission.
28
Furthermore, the appropriate area monitor will
also receive an email, similar to this, advising
that he has a submission to review.
He can just click on the imbedded link to
automatically be taken to his queue of pending
submissions.
29
Or, he can manually logon at some other time.
30
These column headings are click sensitive and if
clicked will sort the list into ascending
sequence based on the data in that column.
Depending on how frequently the area monitor
works on his queue, there may be many entries on
this page, or none.
There is also a button which allows area monitors
to research submissions they have previously
processed and which have been archived. This
does away with the need for printing.
The area monitor need only click on the
associated link to review the complete submission
31
x
This work does not qualify for a merit mark.
Provide more detail.
If you want to print a copy of the submission,
click on this button to create a print friendly
view of the page. Remember, that you will be
printing the entry as it is on the queue, NOT as
modified in your browser.
If an area monitor wants to reject a
recommendation, all he does is check the
corresponding check box.
If you or a subsequent reviewer clear a check
box, the associated reject reason field is
cleared and again disabled.
When a box is checked, the associated reason
field is enabled and the reviewer MUST enter a
reason for the rejection.
If you want to print it WITH the changes you have
made, click on this button, retrieve the
submission from the queue again, and then print
it.
The submission review page looks like this
32
This is what the Print Friendly Page looks like
33
If for some reason you want to completely discard
a submission, enter a reason in this box, and
click on the indicated button.
When you are completely finished with your
review, click on this button to place the
submission on the queue for the next level of
review. Emails will be sent to all pertinent
parties.
If you are working on a large submission and want
to save it, and come back to it later, click on
this button.
The reason will be included in the status email
sent to the original submitter.
34
If instead of reviewing an entry on the queue,
the area monitor chooses to view previously
archived entries he clicks on the button below.
35
Again, the column headings can be used to sort
the listing into a desired order.
That will open a list of all archived submissions
ever reviewed by him electronically.
And an archived entry is opened by simply
clicking on the appropriate link in the first
column.
This button is used to leave the archive review
and return to the current queue of submissions.
36
- Notice when viewing an archived submission
- The heading changes,
- The input fields disappear, and
- The button returns to the list of available
archives.
37
If the reviewer is concerned about tying up his
phone line while reviewing a large submission,
all he needs to do is to click on the Browsers
File menu
The browser will break the connection and the
phone will be available for other calls.
When he is finished and wants to click on any of
the buttons below
All he needs to do is click on the file menu
again and this time select Work Online
And select Work Offline
The browser will re-establish the connection and
proceed as if it had never been disconnected.
38
- The original submitter is notified by email of
the status of the submission at every step in the
process, i.e. submission, Area Monitor, Chief, HQ
- Each reviewer receives an email notifying him of
the arrival of a submission on his queue.
- Each reviewer receives a confirming email when he
acts on a submission.
- Submissions queued for the C/C remain on his
queue for 14 days and if not reviewed in that
time are then automatically requeued for HQ.
- Submissions queued for HQ are removed daily and
added to an archive. The certificate number,
merit mark year, and submitter certificate number
are extracted and added to another file which is
FTPd to HQ for use in posting to the HQ records.
39
- Area Monitors can research previous work directly
from the archives eliminating the need to print
hardcopy of everything they do.
- HQ saves time and money as all manual posting is
eliminated and done automatically by computer.
- Submitters save on postage and printing by now
needing only one copy for their records vs 4
previously required.
- The computer controls the entire process
eliminating dropped balls and lost paperwork.