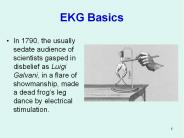
The Basics - PowerPoint PPT Presentation

1 / 18
Title:
The Basics
Description:
Click & type the ' title' (the main idea of that ) Click below to add text ... Switch to 'Slide Show', and click through your program ... – PowerPoint PPT presentation
Number of Views:15
Avg rating:3.0/5.0
Title: The Basics
1
PowerPoint
- The Basics
2
Where is it?
- Hard Drive / Microsoft Office / PowerPoint
3
Create a New Presentation
- Select Presentation Design
- Select a Design, Click OK
4
New Slide
- Title Slide
- many formats
- Use the pre-selected one, Click OK
- Save to Your Disk
- (Summary Information OK)
- Add Title, subtitle
5
Toolbars
- Notice names and explanations (at the bottom)
6
The Next Slide
- Click on New Slide from the floating menu.
- Use the pre-selected one. Click OK.
- Click type the slide title (the main idea of
that slide) - Click below to add text
- Press Return to go to the next line
7
Bullets
- Add text without bullets, or......
- Add text with bullets
- Click on the arrows to promote or demote the
text. - (or option / shift / arrow)
- Bullets help organize your information.
8
The Next Slide the next, the next....
- Click on New Slide again
- Follow the same steps for all of your slides
- Save frequently
9
Slide View vs. Outline View
- View Toolbar at bottom of page
- Select Outline View
- Same commands work
- You can complete your whole presentation in
Outline View.
10
Slide Sorter View
- Shows Thumbnails of all slides
- Wrong order? To change the order of your slides
- In Slide Sorter View or Outline View, drag
the slide to the desired position. - You can select and go directly to any slide
- So, click on the first slide, and ........
11
See How It Looks!
- Select Slide Show View (bottom of page)
- Click the mouse to change slides
- Ready for some special effects?.........
12
Transitions
- Add a fancy transition between slides
- In Slide Sorter View, select all (Edit menu)
- Select a Transition directly from the toolbar
above - Try the Slide Show again to see the difference
13
Build
- Adds your points one by one- not all at the same
time - Again, select Slide Sorter View, and Select
All (Edit menu) - Use the Build menu on the toolbar to choose an
effect
14
Check Out the Difference
- Select Slide Sorter, and click on slide 1.
- Switch to Slide Show, and click through your
program - To change the Build or Transition style
- Return to Slide Sorter View and Select All.
Then try a different style.
15
To Add a Picture
- New Slide Layout
- Select a layout with a picture and text, or
- Select the layout with title only, or blank
- Select Picture... (Insert menu)
- Find the picture you would like, and click on
Insert - Resize / reposition the picture
16
Notes Pages View
- Gives 1 slide per page
- Also provides space to write extra notes about
that slide - Can be printed (one page for each slide)
- Alternative
- Save a copy (Save As....)
- Add your extra notes to the outline, and print it.
17
Printing
- Possible to print
- slides
- notes pages
- handout of slides (2, 3, or 6 per page)
- outline notes
- Check the box Pure Black White
18
What Else? Lots!
- Other basics spelling, cut/paste....
- Change colors Format menu
- Slide Background and Slide Color Scheme
- Text color button and text styles/size
- Drawing / graphics
- Insert graphs / tables
Recommended
CrystalGraphics Presentations