
How to Sand Your Floors by Yourself | From Start to End - PowerPoint PPT Presentation
Title:
How to Sand Your Floors by Yourself | From Start to End
Description:
Floor sanding is more recommendable if you are planning to do it by yourself as the process is less complicated than floor polishing. But even if you would want to invest in a healthy and guaranteed option then contact the best experts of floor sanding in North Sydney anytime. – PowerPoint PPT presentation
Number of Views:22
Title: How to Sand Your Floors by Yourself | From Start to End
1
How to Sand Your Floors by Yourself From Start
to End As far as installing quality flooring is
concerned, it is also extremely significant to
implement the right steps to make them look
new-like forever, agree? In this context, we
would like to acknowledge you with the thing that
floor sanding and polishing are the two
affordable and most effective processes to do
so. On a serious note, floor sanding is more
recommendable if you are planning to do it by
yourself as the process is less complicated than
floor polishing. But even if you would want to
invest in a healthy and guaranteed option then
contact the best experts of floor sanding in
North Sydney anytime. Visit the website to learn
more about them.
2
- Benefits of Floor Sanding
- Helps in pest control
- Diminish the possibility of sprinters
- Elevate the sturdiness of the floors
- Better for allergy sufferers
- Cost-effective option
- Tools you may require
- Essential tools Drum Sander Small disk sander
also known as edging sander - Other Less essential tools Different grits of
sandpaper, Vacuum cleaner, hammer, Nail punch - Safety gears Dust mask, Rubber or protective
gloves and shoes, Ear muffs or plugs - And obviously a Trash bin.
3
Steps of Floor Sanding Step 1 Clean up The
experts of floor polishing in North Sydney
recommend, whether you are preparing for an
at-home floor sanding or floor polishing, it is
extremely significant to first clean up the
floors before starting ahead. Cleaning mostly
removes all the lurking dust and dirt off the
floors and helps simplify further processes. It
also helps the eyes channelize which places would
require more sanding and vise versa. Step 2
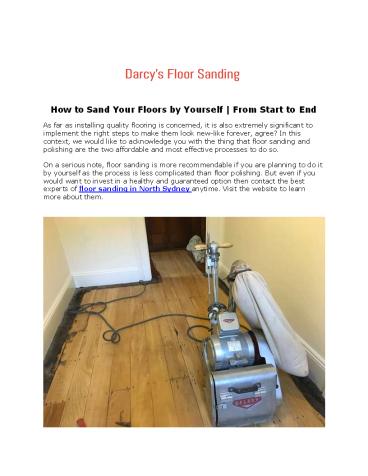
Start with Sanding (Using Drum Sander) Start
with sanding using the drum sander (which is
particularly for sanding the rooms space
excluding the corners) and then proceed by
sanding the edges using a small disk
sander. While working with a drum sander you
need to be cautious as no extra pressure is
required simply move the equipment to and from,
diagonally, horizontally, and vertically around
the floors until perfectly sanded. Bonus Tip
On average, a room of 140sq. Ft. takes around 4-5
hours
4
Step 3 Start with Sanding (Using Disk or Edging
Sander) Once you are done with the drum sanding,
now lets move on to the edges. For sanding the
edges, you may require using an edging or small
disk sander. Use sander pads to stick the disk
sander or the sandpaper, to avoid any injuries to
the hand. Also, make sure to wear protective
gloves during the entire sanding process. Move
the sandpaper to and from in a somewhat
aggressive manner but, remember to not go too
harsh on the surface or it may hamper the
appearance of your floors. Bonus Tip Only use
sandpaper with the grains of the wood/coarse
sandpaper in the start and then conclude with
less coarse sandpaper
So, these were the steps of sanding your floors
the right way. If you found the blog post
beneficial and plan to try it sooner then, feel
free to share your experience by writing us in
the comment section below.
5
For more tips and updates on Flooring, visit
Darcys Floor Sanding, a professional company
catering to the needs of flooring installation,
refurbishment, repair, and much more for over 15
years at the best possible price.
Recommended
CrystalGraphics Presentations


