
Rear view mirror camera
Title: Rear view mirror camera
1
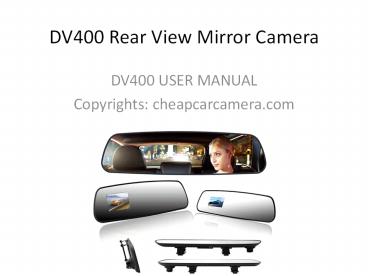
DV400 Rear View Mirror Camera
- DV400 USER MANUAL
- Copyrights cheapcarcamera.com
2
Product picture 1
3
Product picture 2
4
Product page
- More details on
- http//www.cheapcarcamera.com/dv400-car-camera-car
-rear-view-mirror-p-169.html - Rear view mirror car camera
5
instruction
6
Technical parameter
- 1. screen TFT
- 2. lens 5 million pixels, 140 degrees of ultra
wide Angle lens - 3. Video WVGA, 720P, 1080P
- 4. Video mode Cycle video/move detection
- 5. Video format AVI
- 6. Storage card TF card (maximum support 32 G)
- 7. recording The recording can be
- 8. Gravity induction Three axis stereo collision
acceleration sensor - 9. Video signal PAL/NTSC
- 10. Current frequency 50HZ/60HZ
- 11. Power interface 5V
- 12. Battery Built-in battery polymer lithium
battery
7
Operation
- 1. Installation
- This DV is very simple to install Use clamp
covered in the mirror. Connect the cigarette
lighter, hidden line - 2.Power supply
- A. Use external power supply charging
- Charging ways Connect USB car charger.
- B. Connect the power AV line
- When the car starts, the DVR will automatically
start recording. - Power-off after 15 seconds, the DVR will
automatically shut down - and automatically save the file previously
recorded. - Note Only use the output of the vehicle power
supply voltage of 5V - and use the car charger power supply or power
failure to turn off the DVR.
8
Operation 2
- 4.Recording function
- Recording is the default open if you want to shut
down long press 2 seconds?. - 5.Playback function
- In the video after the stop according to ? into
the playback mode, press ? or ? choice in front
or behind photographed by video, play according
to OK. - 6.Protection function
- Protection function is to be able to put a video
or all video protection lock, in circulation
video will not be covered. - 7.A key lock
- In the video according to "O.R lock, video taken
in circulation video can not be overridden,
release according to 0 back to cycle video mode. - 8.Browse and deleting files
- Open DVR and press video key stop video, key?in
playback mode. According to the turnover on key?
choose recording file and press play key OK play
preview. If you want to delete the file, stop
playing the menu button M to delete mode. Press
turn ?and choose delete or format. To continue to
do menu button exit operation.
9
Operation 3
- Open DVR and stop video, press menu button M
,enter setup menu interface. Press the turn key ?
choose specific parameters, finally according to
confirm key OK confirmed operation. When all the
setting is completed, continue to according to
the menu button M exit setup interface.
10
System menu description
- 1. Standby state press the menu button M into the
system Settings - 2. Resolution Optional (WVGA, 720P, 1084P)
- 3. Exposure compensation Optional -2.0, -5/3,
-4/3, -1.0, -2/3, -1/3, 0.0, 1/3, 2/3, 1.0,
4/3, 5/3, 2.0 - 4. Cycle video
- Optional 1 minute, 2 minutes, 3 minutes, 5
minutes, 10 minutes, 15 minutes - 5. Motion detection Optional on/off Motion
detection is to detect moving. - 6. Recording Optional open and close
- 7. Date label Optional open and close
- 8. Gsensor Gravity induction setting Optional
high, medium and low and close. - 9. Date/time
11
System menu description 2
- 10. Automatic shutdown Optional shut, 2 minutes,
5 minutes,10 minutes, Automatic shutdown is
refers to the standby case no operation more than
a certain time off. - 11. Key Voice Optional open and close
- 12. Language setting Optional 12 languages
Simplified Chinese character, traditional Chinese
character, English, Russian, Japanese, French,
Spanish, Italian, Portuguese, Turkish, Greek,
German. - 13. Volume adjustment Shut, 1, 2, 3, 4, 5, 6, 7,
8 - 14. Light source frequency band 50Hz, 60 Hz
- 15. TV Mode NTSC, PAL
- 16. Default Settings Restore default Settings
Confirm/cancel - 17. Formatting Formatted memory, will erase all
data Confirm/cancel
12
System menu description 3
- 18. Screen saver 1 minute, 3 minutes, 5 minutes,
shut - 19. Boot video On/off
- 20. Fill light setting On/off
- 21. Image rotation On/off
- 22. AV On/off
- 23. Version Display system
13
Download files
- Use USB cable to connect the DVR and computer,
the screen will show two options connection
computer, press 0 K confirmation options please
first insert memory card. - Note
- 1.Please insert the TF card in the video before
the first. - 2. This DVR video mode can choose cycle
recording. When the memory card is full already,
DVR will remove the front video clips, save the
latest video clips. - 3.Please use the included USB car charger for
DVR-powered car charger containing 12V/24V switch
to 5V adapter. If the output voltage is greater
than 5V, the DVR will be burned.
14
Accessories
- Rear view mirror camera, car charger and, power
AV output one line (optional). - Its very easy to install and use.