
Assembly of the ATSFYV Interlocking tower at Merced, CA - PowerPoint PPT Presentation
1 / 15
Title: Assembly of the ATSFYV Interlocking tower at Merced, CA
1
Assembly of the ATSF/YVInterlocking tower at
Merced, CA
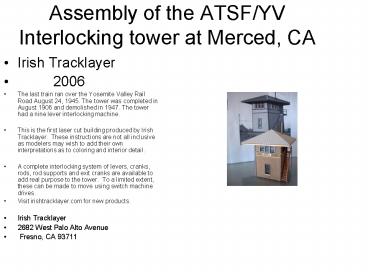
- Irish Tracklayer
- 2006
- The last train ran over the Yosemite Valley Rail
Road August 24, 1945. The tower was completed in
August 1906 and demolished in 1947. The tower had
a nine lever interlocking machine. - This is the first laser cut building produced by
Irish Tracklayer. These instructions are not all
inclusive as modelers may wish to add their own
interpretations as to coloring and interior
detail. - A complete interlocking system of levers, cranks,
rods, rod supports and exit cranks are available
to add real purpose to the tower. To a limited
extent, these can be made to move using switch
machine drives. - Visit irishtracklayer.com for new products.
- Irish Tracklayer
- 2682 West Palo Alto Avenue
- Fresno, CA 93711
2
Wall construction
- Paint all parts at this time. The first coats of
paint should be added before removing the parts
from the sprue. - Suggested colors are Floquil depot buff for the
sides and roof brown for the trim. The window
frames are white. The roof is red. Add any
weathering, especially if your technique requires
a rubbing pressure. Add the glazing after the
paint has dried. - Add glazing at this time.
3
Window assembly
- The small window goes on top of the large window.
This is the upper sash. The other parts on the
sheet of windows are trim boards for the exterior
walls. - The South and North sides are the 15 foot sides,
the East and West sides are the 14 foot sides.
4
Window assemblyPage 2
- View of upper window being attached to window
frame. - Adding window to wall. This can be done before
assembly of the walls or later.
5
Adding the floors
- After two walls are attached to each other, add
the bottom floor. It might help to draw a line
where the second floor attaches to the two walls
as an aid to keeping everything square. - If you are going to add some interior detail,
this might be the time to do it as the building
is quite open. The kit includes a lobby gate,
desk and railing. Since I do not have access to
any interior shots of either floor, use your
imagination. My recollection of the Fresno tower
was a wall with a 2 x 10 to act as a counter top
to set a lantern on. - After your have completed the interior and added
any lighting effects desired, glue the remaining
two walls, being careful to match the 14 foot
side with its mate. Then the 15 foot side should
be in the proper place. - If you want to add the interlocking levers and
make them move, holes should be cut in the floor
before assembly to accept the rod and crank
movement.
6
Adding the floorsPage 2
- The doors probably should be added after the
closest wall is in place to avoid clearance
problems.
7
Adding the ceiling
- The ceiling is made of two parts which allow it
to fit tightly on the building. The roof is
square but the building is 14 x 15 feet. Glue
the simulated tongue and grove centered on the
roof base. Center the assembly on the roof,
measuring carefully in all four directions.
8
Fitting the roof
- After gluing the ceiling to the roof base, test
it for a tight fit on the completed four wall
structure.
9
Adding the ceilingPage 2
- Center the roof/ceiling assembly as shown in the
photographs. Measure each side and glue in place - The roof joists and trim board can be added at
this time. 2x6 material has been provided for
this purpose.
10
Roof construction
11
Roof construction continued
12
Shingle the roof
- The shingle should be painted before attaching to
the roof. The wood roof should be painted the
same color as the shingles. Lap the shingles as
would be done in common construction practice.
If you do not like these asphalt shingles,
simulated wood shingles can be made scissors and
a strip of paper. With this method you can create
irregular width shingles for a more common roof
appearance. - Trim each side as you complete it. The hole for
the chimney will be made last after you decide
what side of the roof looks best.
13
Shingle the roofPage 2
- The completed roof is shown in the bottom
picture. A Grandt Line chimney has been provided
but you must make the square box that is shown in
the photo on the first page.
14
Completing the model
- The stairs steps are made of 2x10 boards. You
must cut them to match the width of the landing
provided. - Trim boards will be added at this time if not
already installed. - The sign Merced Tower No.2 can be made by
copying the drawings included with the model,
using the copy machine to increase or decrease
the size as needed. Glue the resulting copy to
the tower boards included or make different sized
ones for other names. - The Merced tower sign on the preproduction model
was made taking an alphabet that seemed right,
using a drawing program to stretch it to the
proper size and printing it. You could even make
your own decals from such a drawing.
15
Window screens
- The pictures show a typical window screen. Note
that the screen is flush with the window trim.
The half round wood molding holds the screen in
place. It is one-half inch in diameter. - The bottom frame is thicker than the other three
sides. - The hook that holds the frame to the structure is
too thin to photo etch, but could be simulated
with thin styrene. The attachment in the photo
is a modern style device. - Screens were made of woven wire. Reguardless of
original color, the would be come blacked with
soot from the passing stream locomotives.
Recommended
CrystalGraphics Presentations


