
PowerPoint: Preparing a Basic Student Presentation - PowerPoint PPT Presentation
1 / 12
Title:
PowerPoint: Preparing a Basic Student Presentation
Description:
Word art, unnecessary animation (movement) and busy backgrounds distract audience ... Free-mail accounts (i.e. Hotmail) limit size of e-mail attachments. ... – PowerPoint PPT presentation
Number of Views:74
Avg rating:3.0/5.0
Title: PowerPoint: Preparing a Basic Student Presentation
1
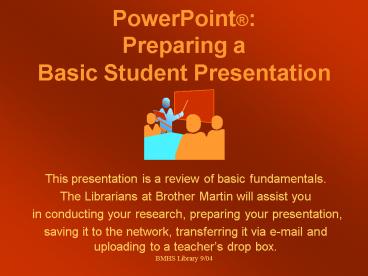
PowerPoint Preparing a Basic Student
Presentation
- This presentation is a review of basic
fundamentals. - The Librarians at Brother Martin will assist you
- in conducting your research, preparing your
presentation, - saving it to the network, transferring it via
e-mail and uploading to a teachers drop box.
2
Please Note
- The following is intended to provide general
information to Brother Martin students preparing
presentations for class use. For any assignment,
your teacher and the Librarians will give you
specific guidelines to follow.
3
Why use PowerPoint?
- Visual demonstration to illustrate a lesson
- Use photos, charts, maps, graphics
- Dont read to audience presentation should
offer key terms and graphics to support your
lecture - Dark background, light text projects best
- Word art, unnecessary animation (movement) and
busy backgrounds distract audience - Possible to imbed (link) web sites, import sound
4
Creating a PowerPoint Presentation
- Locate and save some images
- From the Internet, right click on a picture
- Then Save As
- on school computers, save to your T\ drive
- at home save to your hard drive or a disk to
later e-mail to school - name the graphic
- .jpeg or .gif files work best
- You may also right click on an image, left click
on copy, open the PowerPoint slide and right
click and paste the image in location. - We can also scan images save to your T space on
the network. - NO disks are allowed at school.
5
Open PowerPoint
- Blank presentation
- Select new slide
- Create title slide
- Click on each section, type words
- Use standard word processing tools bold,
italics, font, size, justification, etc. - Go to Format, select slide color scheme or
background, apply to all
6
Create Graphics Slide
- Insert new slide
- Choose slide layout with picture or a blank slide
- Insert picture-from file-look in your T\ spaced
for previously saved graphics - click on image
name insert - To crop View-Toolbars- Picture- Click on image,
click on crop (hatch marks) - To outline Picture toolbar click on 3 parallel
lines- Select line width or select more lines-
line color style - OK
7
Key Icons to Know
- Lower left corner of screen
- Normal view - shows text and slide side by side
- Outline view - text only
- Slide view - largest editing view of a single
slide - Slide sorter view
- rearrange slides by clicking and dragging
- icons show if slide is animated, has transitions
or is timed - Slide show presentation as audience will view
it
8
Slide Movement can be used for emphasis
- Transitions Slide show - Slide Transitions -
pull down menu - choose one - apply to all - Animations Slide show - Custom animations
Timing Effects OK - Note that random transitions and animations can
detract from your presentation. Audience looks
for special effects and attention to content is
lost. - If e-mailing a presentation, avoid animation and
transitions as both require large amounts of
space. - Free-mail accounts (i.e. Hotmail) limit size of
e-mail attachments. Wait until your final
presentation is saved to your T space before
animating or installing transitions.
9
Print recommendations to students
- File, print
- print range all
- print what handouts
- slides per page three (allows space opposite
each slide for notes) or six per page - select grayscale
- select frame slides
- copies number of copies 2 (1 student, 1
teacher)
10
Saving your presentation
- Entire presentation may be saved to the students
personal T space. The tutorial posted on the web
site, Saving a Document to Your Personal Network
Folder, provides additional information. - Name presentation with your last name,
distinctive title - Ex. Baker Roman Legionnaires
- If you work on your presentation at home and want
to continue working on it at school, you must
send it to school as attachment to an e-mail - open your e-mail account at school
- download the attachment
- save to your server space
- For additional detail, refer to Transferring Your
Work - E-mail from School to Home, posted on the Web
Site.
11
Saving to a TEACHERS Drop Box
- Student assignments must be saved to the
teachers online drop box by the deadline the
teacher establishes. - Teacher drop boxes are locked once the deadline
passes so late work is not accepted. - Once dropped, the student cannot access or edit
the project. A later version may be uploaded to
supercede previously submitted work so long as
the box is still open. - Detailed instructions entitled Uploading Your
Work To A Teachers Drop Box are posted on the
web site.
12
Presentation Date
- The teacher will log on to the Brother Martin
network on a school laptop and open the teacher
drop box. You will locate your presentation from
this folder. - Be sure to reserve equipment in advance through
the Library. - We do not recommend bringing any computer or
peripheral from home for school assignments.
Recommended
CrystalGraphics Presentations


