
Improper lube. Failure to feed. M249 Automatic Rifle - PowerPoint PPT Presentation
1 / 89
Title:
Improper lube. Failure to feed. M249 Automatic Rifle
Description:
Improper lube. Failure to feed. M249 Automatic Rifle. Stoppages ... Clean gas port and operating rod tube. Lubricate as required. Replace operating rod spring. ... – PowerPoint PPT presentation
Number of Views:2071
Avg rating:3.0/5.0
Title: Improper lube. Failure to feed. M249 Automatic Rifle
1
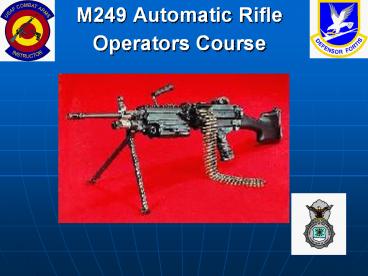
M249 Automatic RifleOperators Course
2
M249 Automatic RifleOperators Course
- OVERVIEW
- I
- Orientation and Mechanical Training
- II
- Techniques of Fire and Employment
- III
- Preparatory Marksmanship Training
3
M249 Automatic RifleOperators Course
- OVERVIEW CONTINUED
- IV
- Performance Evaluation
- VI
- LIVE FIRE (Practice Evaluation)
4
M249 Automatic RifleOperators Course
- OPRENTATION AND MECHANICAL TRAINING
- Basic Weapons Safety Rules
- 1. Treat every Weapons as if it were Loaded!
- 2. Never point a weapon at anything you dont
intend to shoot.
5
M249 Automatic RifleOperators Course
- 3. Keep your finger off the trigger until your
weapon is pointed down range and your sight are
on target. - 4. Dont shoot anything you cant positively
identify know what is behind it.
6
M249 Automatic RifleOperators Course
- 5. Always carry your weapons so that you can
control the direction of the muzzle, even if you
stumble.
7
M249 Automatic RifleOperators Course
- CLASSROOM SAFETY RULES
- AND PROCEDURES
- 1. Do not intentionally point the weapon at
yourself or others during weapon handling
exercises - (some pointing during training is unavoidable as
weapons are cleared and made safe).
8
M249 Automatic RifleOperators Course
- 2. Handle the weapon only when told to do so.
- 3. No horseplay of any kind allowed.
- 4. Do not get ahead of the instructor or
anticipate instructions. - 5. Dont let the bolt slam forward on an empty
chamber
9
M249 Automatic RifleOperators Course
- 6. During disassembly, ensure the bolt is forward
before removing operating rod assembly. - 7. If at any time, you dont understand the
instruction or have difficulty or have difficulty
understanding an operation or a procedure, ask
questions.
10
M249 Automatic RifleOperators Course
- M249 Automatic Rifle Characteristics
- Description
- 1. Air cooled
- 2. Disintegrating metallic split link belt fed or
magazine fed (Emergency situations only) - 3. Gas operated
- 4. Fixed headspace.
- Allows for quick barrel changes for cooling and
Maintenance
11
M249 Automatic RifleOperators Course
- 5. Fires from the open bolt position.
- 6. 5.56mm NATO
- 7. Weight 16.5 lb.
12
M249 Automatic RifleOperators Course
- Performance
- Range
- Maximum 3,600 meters
- Maximum effective range
- 1. Point target 600 meters
- 2. Area target 800 meters
- 3. Suppression 1,000 meters
- 4. Maximum extent of grazing fire- 600 meters
- 5. Tracer burnout 900 meters
- 6. Basic load 800 rds
13
M249 Automatic RifleOperators Course
- Rates of Fire
- Sustained 50 RPM (3-5 rd. burst with4-5 sec.
between bursts). Barrel change every 200 rds. - Rapid 100 RPM (8-10 rd. burst with 2-3 seconds
between bursts). Barrel change every 200 rds. - Cyclic 800 RPM.
14
M249 Automatic RifleOperators Course
- AMMUNITION TYPES, CARE HANDLING
15
M249 Automatic RifleOperators Course
- AMMUNITION TYPES, CARE HANDLING
Storage. Ammunition is stored under cover. If
ammunition is in the open, it must be kept at
least 6 inches above the ground and covered with
a double thickness of tarpaulin. The cover must
be placed so that it protects the ammunition yet
allows ventilation. Trenches are dug to divert
water from flowing under the ammunition. Care,
Handling, and Preservation. Ammunition should not
be removed from the airtight containers until
ready for use. Ammunition removed from the
airtight containers, particularly in damp
climates, may corrode.
16
M249 Automatic RifleOperators Course
- AMMUNITION TYPES, CARE HANDLING
Packaging The ammunition case contains 1600
rounds. Inside the case is two metal cans
containing 800 rounds ( 4 assault packs with
200round each.
17
M249 Automatic RifleOperators Course
- NOMENCLATURE
- Eight Major Groups
- 1. Operating Rod Group
- 2. Barrel Group
- 3. Hand guard Group
- 4. Buttstock and Buffer Assembly Group
- 5. Trigger Mechansm Group
- 6. Gas Cylinder Group
- 7. Bipod Assembly Group
- 8. Receiver Group
18
M249 Automatic RifleOperators Course
Nomenclature
19
M249 Automatic RifleOperators Course External
Nomenclature
- 1. Barrel Assembly
- 2. Heat Shield
- 3. Rear Sight Assy.
- 4. Cover Assembly
- 5. Feed Tray
- 6. Cocking Handle Assy.
- 7. Buttstock Assy.
- 8. Bolt Assembly
- 9. Slide Assembly
- 10.Return Rod /Transfer Mechanism Assy.
- 11. Reciever Assy.
- 12. Trigger Assembly
- 13. Handguard
- Sling
- Bipod Assembly
- Gas Cylinder Assy.
- Gas Cylinder Piston
- Return Rod Spring
20
M249 Automatic RifleOperators Course Clearing
Procedures
- 1. Pull cocking handle to the rear and lock bolt
into rear position, return cocking handle to the
forward position - 2. Place safety to safe
21
M249 Automatic RifleOperators Course Clearing
Procedures cont.
- 3. Raise the cover and inspect the Five Safety
Points - 1) Feed Pawl Assembly under cover
- 2) Feed Tray Assembly
- 3) Lift feed tray assembly and check chamber
- 4) Check the space between the bolt assembly
and chamber - 5) Check the magazine well
- 4. Close the cover ,place to fire, pull the
cocking handle to the rear and ride the bolt
forward while pressing the trigger to the rear
22
M249 Automatic RifleOperators Course LOADING
- Full-Load
- Lock bolt to rear and return cocking handle
forward - Safety to Safe.
- Raise Cover clear Chamber
- Place link belt in feed tray with first round
against cartridge stop - Close cover, make sure it locks shut.
- NOTE DO NOT PLACE WEAPON TO FIRE UNTIL YOU
ARE READY TO USE IT
23
M249 Automatic RifleField Strip (Disassembly)
- Clear Weapon
- 1. Pull upper retaining pin to the left, butt
stock will pivot downward - 2. Push in and up on the back of transfer
mechanism (TM) - 3. Remove TM , spring, and return rod. Separate
spring from the rod. - 4. Pull cocking handle to the rear removing the
operating group - 5. Rotate the bolt and pull it out of slide
assembly. - 6. Separate slide assembly from piston by
depressing retaining pin to the left
24
M249 Automatic Rifle Field Strip (Disassembly)
- 7. Remove the barrel group.
- 8. Remove gas regulator and collar
25
M249 Automatic Rifle Field Strip (Disassembly)
9. Remove the handguard assembly 10. Remove butt
stock
26
M249 Automatic Rifle Field Strip (Disassembly)
- 11. Remove the gas cylinder and bipod group
27
M249 Automatic Rifle Assembly
- In Reverse Order
28
M249 Automatic Rifle Function Check
- Pull the cocking handle to the rear, locking the
bolt to the rear of the receiver. - While keeping positive control of the cocking
handle place to safe and squeeze trigger( should
not fire) - Place to fire, squeeze trigger and ride the bolt
forward
29
M249 Automatic Rifle Malfunctions, Stoppages,
Misfiresand Immediate actions
- Definitions
- Malfunction A malfunction occurs when a
mechanical failure causes the weapon to fire
improperly. - Stoppage Any interruption in the cycle of
operation of the gun. - Immediate Action Prompt actions taken to
overcome the stoppage.
30
M249 Automatic Rifle Malfunctions, Stoppages,
Misfiresand Immediate actions
- Definitions
- Remedial Action Action taken to identify
stoppage, in immediate action fails. - Cook-off Ignition of a chambered round of
ammunition due to the heat of the weapon. - Hot or Cold gun (Peacetime classification only
in the interest of safety) - Hot gun- more than 200 rounds fired within a 2
minute period
31
M249 Automatic Rifle Malfunctions, Stoppages,
Misfiresand Immediate actions
- Warning
- If nothing is ejected and you have a hot gun (200
rounds within a 2 minute period). Do not open the
cover. Place safety to safe, keep machine gun
pointed down range, and remain away from the
weapon for 15 minutes. After 15 minutes clear the
machine gun. The climate conditions can also
affect how fast the weapons becomes hot
32
M249 Automatic Rifle Malfunctions
- Uncontrolled Fire (Runaway Gun)
- Uncontrolled fire (the weapon continues to fire
after the trigger is released). This is usually
caused by, the gunner not pulling and holding the
trigger all the way to the rear. The following
are immediate actions for uncontrolled fire - (1) The gunner holds the weapon on target and
fires the remaining ammunition. - (2) The gunner stops the weapon from firing by
breaking the belt of ammunition. - (3) The gunner as a last resort pulls the
cocking handle to the rear thus, locking the bolt
to the rear of the receiver.
33
M249 Automatic Rifle Malfunctions
- Sluggish Operation
- Sluggish operation is due to excessive
friction caused by carbon build-up, improper
lubrication, or burred parts. Corrective action
includes cleaning, lubricating inspecting, and
replacing worn parts.
34
M249 Automatic Rifle Stoppages
- STOPPAGE PROBABLE CAUSE CORRECTIVE
ACTION
35
M249 Automatic Rifle Stoppages
- STOPPAGE PROBABLE CAUSE
CORRECTIVE ACTION
36
M249 Automatic Rifle Stoppages
- STOPPAGE PROBABLE CAUSE
CORRECTIVE ACTION
37
M249 Automatic Rifle Stoppages
- STOPPAGE PROBABLE CAUSE
CORRECTIVE ACTION
38
M249 Automatic Rifle Immediate Action
- Immediate action is action taken to reduce a
stoppage without looking for the cause. Immediate
action should be taken in the event of either a
misfire or a cook off. A misfire is the failure
of a chambered round to fire. Such failure can be
due to an ammunition defect or faulty firing
mechanism.
39
M249 Automatic Rifle Immediate Action
- A cook off is the firing of a round by the
heat of a hot barrel and not by the firing
mechanism. Cookoffs can be avoided by applying
immediate action within 10 seconds after a
failure to fire. If the M249 stops firing, the
gunner performs the following immediate actions
are taken. (An effective memory aid is POPP,
which stands for pull, observe, push, and press.)
40
M249 Automatic Rifle Immediate Action
- a. Pulls and locks the cocking handle to the rear
while observing the ejection port to see if a
cartridge case, belt link, or round is ejected.
Ensures that the bolt remains to the rear to
prevent double feeding if a round or cartridge
case is not ejected. - b. If a cartridge case, belt link, or a round is
ejected, returns cocking handle to forward
position, aim on the target, and presses the
trigger. If the weapon still does not fire, takes
remedial action. If a cartridge case, belt link,
or round is not ejected, takes remedial action.
41
M249 Automatic Rifle Remedial Action
- Cold Weapon Procedures
- When a stoppage occurs with a cold weapon and
immediate action has failed, the gunner uses the
following procedures. - (1) Pulls the cocking handle to the rear,
locking the bolt. Returns the cocking handle and
places the safety to SAFE. - (2) Places the weapon on the ground or away
from his face and opens the cover, performs the
five-point safety check. Reloads and continues to
fire. - (3) If the weapon does not fire, clears the
weapon and inspects it and the ammunition.
42
M249 Automatic Rifle Remedial Action
- Hot Weapon Procedures
- If the stoppage occurs with a hot weapon (200
rounds or more in 2 minutes or as noted above for
training), the gunner moves the safety to SAFE,
waits 5 seconds (during training, lets the weapon
cool for 15 minutes), uses the same procedures as
outlined for cold weapon procedures.
43
M249 Automatic Rifle Remedial Action
- Jammed Cocking Handle
- If a stoppage occurs and the cocking handle
cannot be pulled to the rear by hand (the bolt
may be fully forward and locked or only partially
forward), the gunner takes the following steps. - (1) Tries once again to pull the cocking handle
by hand. - WARNING
- Do not try to force the cocking handle to the
rear with your foot or a heavy object. This could
damage the weapon.
44
M249 Automatic Rifle Remedial Action
- (2) If the weapon is hot enough to cause a cook
off, moves all personnel a safe distance from the
weapon and keeps them away for 15 minutes. - (3) After the gun has cooled, the gunner will
pull the cocking handle to the rear. Ensures
rearward pressure is kept on the cocking handle
until the TM is removed. Opens the cover and
disassembles the gun.
45
M249 Automatic Rifle Remedial Action
- (4) Removes the round or fired cartridge. Uses
cleaning rod or ruptured cartridge extractor if
necessary. - (a) In a training situation, after completing
the remedial action procedures, the gun should
not be fired until an inspection by an CA
intructor has been made. - (b) In a combat situation, after the stoppage
has been corrected, the gunner changes the barrel
and tries to fire. If the weapon fails to
function properly, the gunner sends it to Combat
Arms personnel.
46
M249 Automatic Rifle Cleaning and Lubrication
- Warning
- Be sure weapons is cleared before disassembly,
cleaning, inspecting, transporting and storing. - Using gasoline, kerosene, hydraulic oil, benzene,
bensol, high-pressure water, steam, or air for
cleaning is PROHIBITED
47
M249 Automatic Rifle Cleaning and Lubrication
- Caution
- Do not use abrasives to clean the bore, piston,
gas cylinder, or gas regulator plug. - Do not submerge buffer in any liquid. Wipe clean
with wiping rag only. - Do not apply lubricants to composite/rubber
components.
48
M249 Automatic Rifle Cleaning and Lubrication
The M249 machine gun should be cleaned
immediately after firing. At a minimum, the M249
should be cleaned after firing a basic load of
900 to 1,200 rounds. The gunner disassembles the
M249 into its major groups for cleaning. All
metal components and surfaces that have been
exposed to powder fouling should be cleaned using
CLP on a bore-cleaning patch. CLP is used on the
bristles of the receiver brush to clean the
receiver. After the M249 is cleaned and wiped
dry, a thin coat of CLP is rubbed on using a
cloth. This lubricates and preserves the exposed
metal parts during all normal temperature ranges.
49
M249 Automatic Rifle Cleaning and Lubrication
- CAUTION
- When using CLP, do not use other cleaners.
Never mix CLP with RBC or LSA. When cleaning the
barrel, avoid getting CLP or RBC in the gas
regulator. Damage could occur to the weapon.
50
M249 Automatic Rifle Cleaning and Lubrication
- (1) Clean the bore using CLP or RBC and a bore
brush with a cleaning rod. Do not reverse
direction of the bore brush while it is in the
bore. - (a) Run the brush through the bore several
times until most of the powder fouling and other
foreign matter has been removed. - (b) Swab out the bore several times using a
cleaning rod and a swab wet with CLP. - (c) Swab out the bore several times using a
cleaning rod and a dry swab.
51
M249 Automatic Rifle Cleaning and Lubrication
- (2) Clean the chamber using CLP and a chamber
brush attached to a cleaning rod. - (a) Run the brush through the chamber several
times until most of the powder fouling and other
foreign matter has been removed. - (b) Swab out the chamber several times using a
cleaning rod and a swab wet with CLP. - (c) Swab out the chamber several times using a
cleaning rod and a dry swab.
52
M249 Automatic Rifle Cleaning and Lubrication
- (3) Clean the receiver using a receiver brush
and CLP. - (a) Brush the receiver until most of the powder
fouling and other foreign matter is removed. - (b) Swab out the receiver several times using a
cleaning rod section and a swab wet with CLP.
(c) Swab out the receiver several times using
a cleaning rod section and a dry swab.
53
M249 Automatic Rifle Cleaning and Lubrication
- (4) Clean the gas regulator plug with special
tools (scraper tool). Remove all carbon dust. Do
not use CLP on the collar, gas piston, or body. - (a) Clean The gas inlet hole of the gas
regulator plug. - (b) Clean the central hole of the gas plug by
inserting the scraper tool down to the bottom of
the hole and twisting firmly. - (c) Clean the two grooves by inserting the
scraper tool into the grooves and applying
pressure as firmly as possible.
54
M249 Automatic Rifle Cleaning and Lubrication
- (5) Clean the gas cylinder and piston with the
scraper tool. Do not use CLP on the cylinder or
piston - (a) Clean the front interior of the gas
cylinder by inserting and turning the flat side
of the scraper in a 360-degree circular motion. - (b) Clean the internal grooves of the front
side of the gas cylinder the same as the
interior, except insert the scraper farther into
the gas cylinder. - (c) Clean the three groves of the piston using a
360-degree circular motion. Remove all carbon
dust from the inside and outside of the piston. - (d) Clean the hole in front of the piston by
using the flat side of the scraper in a circular
motion.
55
M249 Automatic Rifle Preventive
MaintenanceInspection
- Inspection begins with the weapon disassembled
into its eight major assemblies. Note that a
shiny surface on a part does not mean the parts
are unserviceable. The gunner inspects each area
of the weapon and related equipment for the
conditions indicated. Any broken or missing parts
should be repaired or replaced. - The gunner should perform PMCS every 90 days. If
the weapon has not been used in 90 days, the PMCS
in the operator's manual should be performed
regardless. If you see rust on a weapon, the PMCS
should be done immediately. Inspect all of the
components for broken or missing parts. Inspect
parts for cracks, dents, burrs excessive wear,
rust, or corrosion. Inspect external surfaces for
adequate finish.
56
M249 Automatic Rifle Preventive
MaintenanceInspection
- Barrel Assembly
- Check barrel for bulges, bends, burrs,
obstructions and obstructions or pits in the
chamber or bore. Disassemble, inspect, and clean
the gas collar and plug. Ensure the flash
suppressor is fastened securely. Inspect the
front sight for damage or looseness. Inspect
carrying handle assembly for bent, broken, or
missing parts. Assure the heat shield is present,
on the barrel assembly, and is not bent or
broken, and does not have any missing parts.
57
M249 Automatic Rifle Preventive
MaintenanceInspection
- Buttstock and Buffer Assembly.
- Check for burrs and rough edges on mating
grooves and flanges. Check to be sure the back
plate latch locks the buffer assembly securely to
the receiver assembly when installed. Make sure
the buffer plug sticks out through the back plate
and is flush or higher than the protrusion below
it. Make sure there is no rattling sound when the
buffer is shaken and that the plug cannot rotated
by finger pressure. Inspect the butt stock for
cracks. Check to make sure the back plate locks
the butt stock securely to the receiver assembly
when installed.
58
M249 Automatic Rifle Preventive
MaintenanceInspection
Bolt And Operating Rod Assembly. Inspect entire
area of the bolt and operating rod assembly for
missing parts, broken or cracked areas, burrs,
bends, or pits on the surface. Looking at the
bolt, you can see if the firing pin is broken.
The extractor should not move. The operating rod
piston should have a slight movement from left to
right (about 1/8-inch turn). When the bolt and
operating rod are pulled to the rear, the piston
should move freely without binding
59
M249 Automatic Rifle Preventive
MaintenanceInspection
- Trigger Mechanism/Housing Assembly. Inspect
the tripping lever and sear for burrs on edges.
Push the tripping lever back to raise the sear,
put the safety on "S," and pull the trigger. The
sear should not drop down far enough to lock in
the downward position. Place the safety on "F,"
and pull the trigger. The sear should drop down
and lock in the downward position. Check the sear
spring, ensuring the leg of the spring is behind
the trigger pin and not between the trigger and
the pin. Check grip assembly for loose or missing
grip screws. Check trigger guard for bends or
cracks. Check trigger spring pin for bends, and
or broken or missing spring.
60
M249 Automatic Rifle Preventive
MaintenanceInspection
- Cover Assembly. Pivot the feed lever back and
forth to ensure it operates smoothly without
binding. Push in on the cover latches to make
sure the retaining clip is not weak or missing
and that they do not bind in the housing. Push
down on the cartridge guides and feed pawls to
make sure the springs are not weak or missing.
Inspect accessory mounting rail for nicks or
burrs.
Feed Tray. Check for cracks, deformation,
broken welds, or loose rivets. Handguard. Check
handguard for cracks, broken or missing parts.
61
M249 Automatic Rifle Preventive
MaintenanceInspection
- Receiver Assembly.
- Check that the rear sight assembly is
securely mounted to the receiver and operates
properly. Check that the cocking handle operates
the slide properly. Pull the cocking handle to
the rear and allow it to slowly return forward,
making sure that the slide does not bind in the
receiver. Check for damaged or missing ejection
port cover, spring, and pin. Lower and raise the
bipod legs, ensuring they move freely without
binding. Check bipod legs for cracks, or twisted
or incomplete assembly. Check the exterior
surface of the M249 for the exterior protective
finish.
62
M249 Automatic Rifle Preventive
MaintenanceInspection
- Machine Gun.
- Assemble the weapon. Be sure parts are
installed correctly and are in good working
condition. When installing the barrel, move the
barrel release slowly to the right and count the
number of clicks. Fewer than two and more than
seven clicks indicate defective parts. Check both
barrels. Check weapon functioning with belted
dummy ammunition by performing a function check.
If weapon does not function properly and the
cause cannot be determined using troubling
shooting procedures, notify direct-support
maintenance.
63
M249 Automatic Rifle TE Nomenclature
M122A1 Tripod
64
M249 Automatic Rifle TE Nomenclature
M249 Automatic rifle Mounted on Tripod and TE
1. Front receiver bushing 2. Pintle Assembly 3.
Quick release pin 4. T E Mechanism 5. T E
Fork Assembly 6. Spring Pin
65
M249 Automatic Rifle Operators Course
- Zero the T E Mechanism
- Installation of Equipment (Tripod, Pintle(s), T
E
66
M249 Automatic Rifle Operator Course
- Blank Fire Attachment
67
M249 Automatic Rifle Operator Course
- Attach the BFA. Unscrew the shaft until it
slides all the way to the rear. Install the
chamber device over the flash suppressor. Slide
the shaft into the throat of the flash
suppressor. Engage the threads on shaft into the
body of the chamber device turn clockwise until
it is hand tight.
68
M249 Automatic Rifle Operator Course
- DESTRUCTION
Destruction of any military weapon is only
authorized as a last resort to prevent enemy
capture or use. This paragraph discusses the
field-expedient means of this destruction it
does not replace published policies. In combat
situations, the commander has the authority to
destroy weapons, but he must report this
destruction through channels.
69
M249 Automatic Rifle Operator CourseDESTRUCTION
- a. Disassemble the weapon as completely as time
permits. Use the barrel or tripod mount to
destroy the bolt and operating rod assembly,
barrels, rear and front sights, and mounts. - b. Bury the disassembled weapon or dump the
parts into a stream, a sump, or a latrine. - c. Burn the weapon by placing an incendiary
grenade on the receiver group over the bolt (with
the cover resting on the grenade) and detonating
the grenade. - d. Smash the traversing and elevating mechanism
and pintle assembly. Bend the tripod legs.
70
M249 Automatic Rifle Operator Course
- MOUNTING THE NIGHT SIGHT
VEHICULAR MOUNTS
71
M249 Automatic Rifle Operator Course
- TECHNIQUES OF FIRE AND EMPLOYMENT
- Roles of the Machine gun
- 1. Supports rifleman in offensive and defensive
mode - 2. Provides heavy volume of close and continuous
fire. - 3. Can engage target beyond the capability of
rifleman. - 4. Marking or locating target.
- 5. Aerial defense when necessary.
72
M249 Automatic Rifle Operator Course
CHARACTERISTICS OF FIRE Trajectory and maximum
ordinate. Trajectory- path of projectile. Almost
flat at 300 meters or less, beyond 300 meters
trajectory is curved and becomes greater as range
increases. Maximum ordinate- Highest point
trajectory reaches from muzzle to target. Occurs
at 2/3 of distance between gun and target.
73
M249 Automatic Rifle Operator Course
74
M249 Automatic Rifle Operator Course
- CONE OF FIRE AND BEATEN ZONE
- Cone of Fire- Patter formed by several rounds in
a burst, each round taking a slightly different
trajectory. - Primary cause vibration of gun
- Other causes Variations in ammunition, and
atmospheric conditions.
75
M249 Automatic Rifle Operator Course
- BEATEN ZONE- Area where cone of fire strikes the
ground. - Will change when range to target changes.
- On uniformly sloping or level terrain, the beaten
zone is long and narrow. - As range increases beaten zone becomes shorter
and wider. - With terrain sloping down and away from the gun,
the beaten zone becomes longer. - With terrain rising, the beaten zone becomes
shorter - Terrain has no great effect on the width of the
beaten zone.
76
M249 Automatic Rifle Operator Course
77
M249 Automatic Rifle Operator Course
- Danger Space Space between gun and target
where trajectory does not rise above 1.8 meters. - Fired over level or uniformly sloping terrain
- Over 700 meters trajectory will rise over 1.8
meters. - Some areas between gun and target may not have
danger space. - Dead Space- area that cant be seen or covered by
gun position. Caused by depression, rises,
obstructions, etc.
78
M249 Automatic Rifle Operator CourseCLASSES OF
FIRE
- Respect to ground
- 1. Grazing- Center of cone of fire does not rise
above 1 meter above the ground. - Maximum extent of fire over level of
uniformly sloping terrain is 600 meters - 2. Plunging- Danger space is practically confined
to beaten zone - Obtaining Plunging Fire-
- Target range greater than 600 meters.
- Fire from high to low ground.
- Fire into abruptly rising ground.
79
M249 Automatic Rifle Operator CourseCLASSES OF
FIRE
80
M249 Automatic Rifle Operator Course CLASSES OF
FIRE
- Respect to Target
- 1. Frontal- firing directly into front of target,
long axis of the beaten is at right angle to
front of target. - 2. Flanking- firing directly against flank (right
angle) of target. - 3. Oblique- firing at an angle other a right
angle to target. - 4. Enfilade- long axis of beaten zone may or may
not coincide with long axis of target.
81
M249 Automatic Rifle Operator Course CLASSES OF
FIRE
- Respect to gun
- 1. Fixed- firing at a stationary target which the
beaten zone covers target. - 2. Traversing- firing distributed in width by
successive changes in direction. - 3. Searching- firing distributed in depth by
successive changes in elevation. - 4. Traversing and searching- amount of adjustment
is determined by slope of terrain and angle of
target. - 5. Free gun- fire delivered against massive
targets.
82
M249 Automatic Rifle Operator CourseRange
Determination and Lateral Distance Measurement
- Uses.
- 1. Accurate determination affects gunners
marksmanship abilities. - 2. Is required in reporting of information and
the adjustment of artillery and mortar fire - Methods.
- 1. 100 meter unit-of-measure
- 2. Pacing- 115 paces approx. 100 meters
- 3. Appearance of objects- Most common method
used. - 4. T E method.
83
M249 Automatic Rifle Operator Course
- Principles of Fire
- Types of targets
- 1. Point targets- require single aiming points.
- 2. Area targets- having considerable width and
depth. - Rates of fire
- Sustained- 100 rpm, barrel change (10 Min.)
- Rapid- 200 rpm, barrel change (2 Min.)
- Cyclic- 550 rpm, barrel change every minute
84
M249 Automatic Rifle Operator Course
- Engagement of visible targets
- Engagement of targets during limited visibility
- Predetermined fires
- Range Cards
- Night vision sight
- Zeroing PVS-4 night vision sight
- Estimating range sighting and aiming
85
M249 Automatic Rifle Operator Course
- PREPARATORY MARKSMANSHIP TRAINING
- 1. Firing positions- gunner gets into prone
position behind gun right shoulder and right hip
pocket should be directly behind gun. Spread legs
with heels down. - 2. Grip- Bipod
- Right hand on grip and index finger on
trigger. - Left palm down on cover.
- Both hands firmly pressed down and rearward.
- 3. Tripod - Right hand on grip and index finger
on trigger. - Left hand on T E
86
M249 Automatic Rifle Operator Course
- Aiming
- Sight Alignment
- Sight Picture
- Trigger Manipulation
- Pull do not squeeze trigger
- Sight Adjustment
- Windage knob- one click equals 1 mil
- Push forward strike moves right
- Pull back- strike moves left
87
M249 Automatic Rifle Operator Course
- Sight Adjustment continued
- Elevation knob- four clicks equals 1 mil
- Turn left- strike moves up
- Turn right- strike moves down
- Adjusted Aiming Point
- Rapid/accurate adjustment without adjusting
sights
88
M249 Automatic Rifle Operator Course
- Target Analysis
- Chemical Warfare Defense Ensemble (CWDE)
- Firing from Vehicles
89
M249 Automatic Rifle Operator Course
- PERFORMANCE EVALUATION
- GO/NO GO CHECKLISTS
- LIVE FIRE
- PRACTICE PHASE/EVALUATION
Recommended
CrystalGraphics Presentations


