
Fundamentals of Fingerprinting - PowerPoint PPT Presentation
1 / 31
Title:
Fundamentals of Fingerprinting
Description:
The printing surface of the platen should be from 39 to 42 inches from the floor. ... Place the Right Thumb on the Platen (DEMO) Recording the Slaps ... – PowerPoint PPT presentation
Number of Views:186
Avg rating:3.0/5.0
Title: Fundamentals of Fingerprinting
1
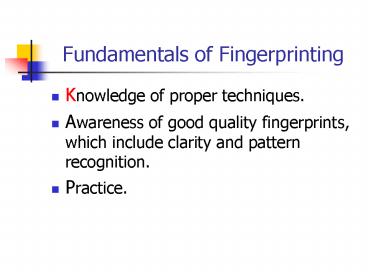
Fundamentals of Fingerprinting
- Knowledge of proper techniques.
- Awareness of good quality fingerprints, which
include clarity and pattern recognition. - Practice.
2
Preparation
- Prior to recording an individuals fingerprints
on a LiveScan Unit , the operator should take a
couple of minutes and perform a few pre-printing
operations.
3
Preparation
- The individual being fingerprinted should stand
directly in front of the LiveScan unit,
approximately a forearms length away. - The printing surface of the platen should be from
39 to 42 inches from the floor. - In most cases the individual should stand to
the right of the operator. This will
enable the operator to control the individuals
movement. (DEMO)
4
Preparation
- The operator should not allow the person to
help while taking the fingerprints. - The persons fingers should be held with both
hands. One hand should hold the tip of their
finger, while the other hand holds the middle
joint of their finger. ( DEMO)
5
Preparation
- If the image appears to be too dark, check for
perspiration or try using less pressure. - If the image appears to be too light, increase
the pressure slightly, or try using the
Optimize/Contrast tab. - If the image is still too light, use a PreScan
block. (DEMO)
6
Recording the Images
- The operator will record the fingerprints in the
following manner - Slaps or Plain impressions
- Right Thumb
- Right Four fingers
- Left Thumb
- Left Four Fingers
7
Recording the Slaps
- Place the Right Thumb on the Platen (DEMO)
8
Recording the Slaps
- The slaps or plain impressions should be taken as
straight up and down as possible. (DEMO)
9
Recording the Slaps
- When recording the slaps, the operator should
avoid cutting off the tops of the fingers. - Ideally, you should see the impressions and the
first crease. (DEMO)
10
Recording the Slaps
- The impressions SHOULD NOT look like
this (DEMO)
11
Recording the Slaps
- If the individual has large hands it may be
necessary to angle the fingers SLIGHTLY to fit
them in the box - The angle SHOULD NOT be more than 30 degrees.
- If the angle is too severe, this may cause false
sequencing errors.
12
Recording the Slaps
- Avoid severe angles (DEMO)
13
T.I.F.O.
- Remember the acronym T.I.F.O.
- Thumbs In
- Fingers Out
14
Fingerprinting Techniques
- The Thumbs of the person being fingerprinted
should be rolled In towards their body - The Fingers should be rolled Out or away from
their body. - This movement allows the fingers to be rolled
from an awkward position to a comfortable
position.
15
Recording Rolled ImpressionsPosition Finger on
Cross Hair
16
Recording the Rolled Impressions
- After centering, rock the finger backward either
right or left until the outer edge of the finger
is visible. - (DEMO)
17
Recording Rolled ImpressionsRock Back on Finger
18
Recording the Rolled Impressions
- Step on the foot pedal, when you hear the beep,
begin to roll the finger on the platen. - Continue rolling until you reach the opposite
side of the finger.
19
Recording the Rolled Impressions
- When the roll is completed, roll the finger
backwards slightly. This will stop the camera. - This is the Rock and Roll method.
- Roll the remaining fingers in this manner.
20
Recording the Rolled Impressions
- When rolling the fingers, the finger should be
rolled completely from one side to the other. - This technique is called Nail to Nail.
- Another acronym to remember is N2N
21
Recording the Rolled Impressions
- Another acronym to remember is N2N Nail to Nail.
- When rolling the fingers, the finger should be
rolled completely from one side to the other.
22
Fundamentals of Fingerprinting
- Knowledge of proper techniques.
- Awareness of good quality fingerprints, which
include clarity and pattern recognition. - Practice.
23
Recording Rolled Impressions
- After the finger has been rolled, the operator
should be able to recognize the fingerprint
pattern.
24
LAW Loops Arches Whorls
25
Awareness Square Edges
- Rock And Roll, T.I.F.O., N2N
26
Awareness Finger Placement
- Rock Roll, T.I.F.O., N2N
27
Awareness Niblet
- Rock Roll, T.I.F.O., N2N
28
Awareness Slippage
- Rock Roll, T.I.F.O., N2N
29
Awareness Dalmation Effect
- Rock Roll, T.I.F.O., N2N
30
Fundamentals of Fingerprinting
- Knowledge of proper techniques.
- Awareness of good quality fingerprints, which
include clarity and pattern recognition. - Practice.
31
Thank You!
Recommended
CrystalGraphics Presentations


