
Using the Audio Visual Aids in Room SM 0'32 - PowerPoint PPT Presentation
1 / 1
Title:
Using the Audio Visual Aids in Room SM 0'32
Description:
... located behind the two small cupboard doors beneath the lectern as shown below. ... the option is chosen at the lectern. At the lectern press and all of the ... – PowerPoint PPT presentation
Number of Views:143
Avg rating:3.0/5.0
Title: Using the Audio Visual Aids in Room SM 0'32
1
Using the Audio Visual Aids in Room SM
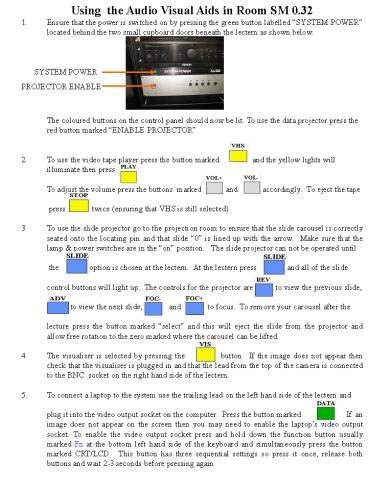
0.32 1. Ensure that the power is switched on by
pressing the green button labelled SYSTEM POWER
located behind the two small cupboard doors
beneath the lectern as shown below. The
coloured buttons on the control panel should now
be lit. To use the data projector press the red
button marked ENABLE PROJECTOR 2. To use the
video tape player press the button marked
and the yellow lights will illuminate then
press . To adjust the volume
press the buttons marked and
accordingly. To eject the tape press
twice (ensuring that VHS is still
selected). 3 To use the slide projector go to
the projection room to ensure that the slide
carousel is correctly seated onto the locating
pin and that slide 0 is lined up with the
arrow. Make sure that the lamp power switches
are in the on position. The slide projector
can not be operated until the
option is chosen at the lectern. At the lectern
press and all of the slide
control buttons will light up. The controls
for the projector are to view the
previous slide, to view the next
slide, and to focus. To
remove your carousel after the lecture press
the button marked select and this will eject
the slide from the projector and allow free
rotation to the zero marked where the carousel
can be lifted. 4. The visualiser is selected by
pressing the button. If the image
does not appear then check that the visualiser is
plugged in and that the lead from the top of the
camera is connected to the BNC socket on the
right hand side of the lectern. 5. To connect a
laptop to the system use the trailing lead on the
left hand side of the lectern and plug it into
the video output socket on the computer. Press
the button marked . If an image does
not appear on the screen then you may need to
enable the laptops video output socket. To
enable the video output socket press and hold
down the function button usually marked Fn at the
bottom left hand side of the keyboard and
simultaneously press the button marked CRT/LCD.
This button has three sequential settings so
press it once, release both buttons and wait 2-3
seconds before pressing again.
SYSTEM POWER
PROJECTOR ENABLE